Author: oi_admin

How Often Should You Clean Bedroom & Bathroom Items?

Ever since it was reported that Oprah has clean sheets on her bed every day – the rest of us wonder if that’s the standard we should be striving to achieve.  If we had a staff like Oprah, we could have our sheets, towels and even our shower curtains changed daily. Sheets and towels absorb sweat, dead skin cells, body oils, drool and other body fluids. If they aren’t washed frequently, sheets and towels become a breeding ground for dust mites, mold and mildew. So, let’s balance our dreams of having the ultimately clean bathroom with practicality and see if we can determine how often we should be cleaning things in our bathroom and bedroom.

Towels – Hand towels in a bathroom should be changed out daily as they get used a lot.  Towels used after a shower should be washed every other day. In between uses, the towels should be hung so that they can dry out completely throughout the day. Mold and mildew can start forming a few hours after using the towel.

Washcloths – Washcloths can be on the same cleaning schedule as your bath towels. Washcloths collect dead skin cells with each use so more than two uses are not recommended.  They can be washed with the bath towels using hot water to help disinfect them.

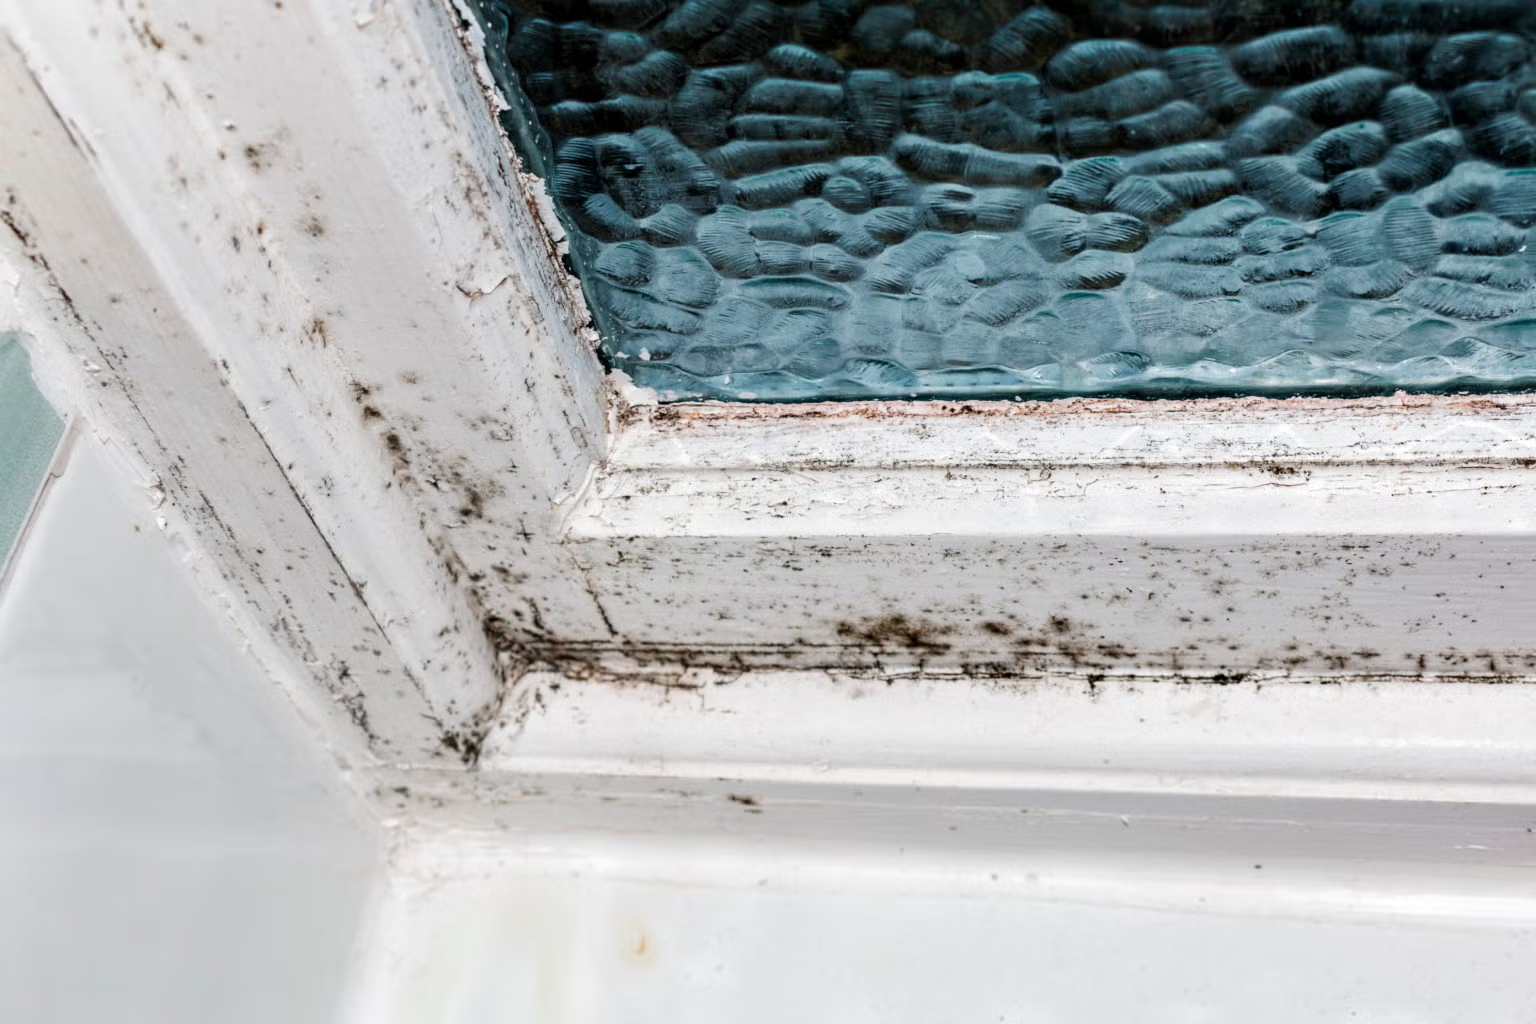
Bath mats – Bath mats should be washed once a week. They accumulate dust, fibers, and hair as well as dirt from the floor. Washing once a week keeps them clean and fresh. It also helps to battle any mold or mildew that could be forming inside the mat fibers.

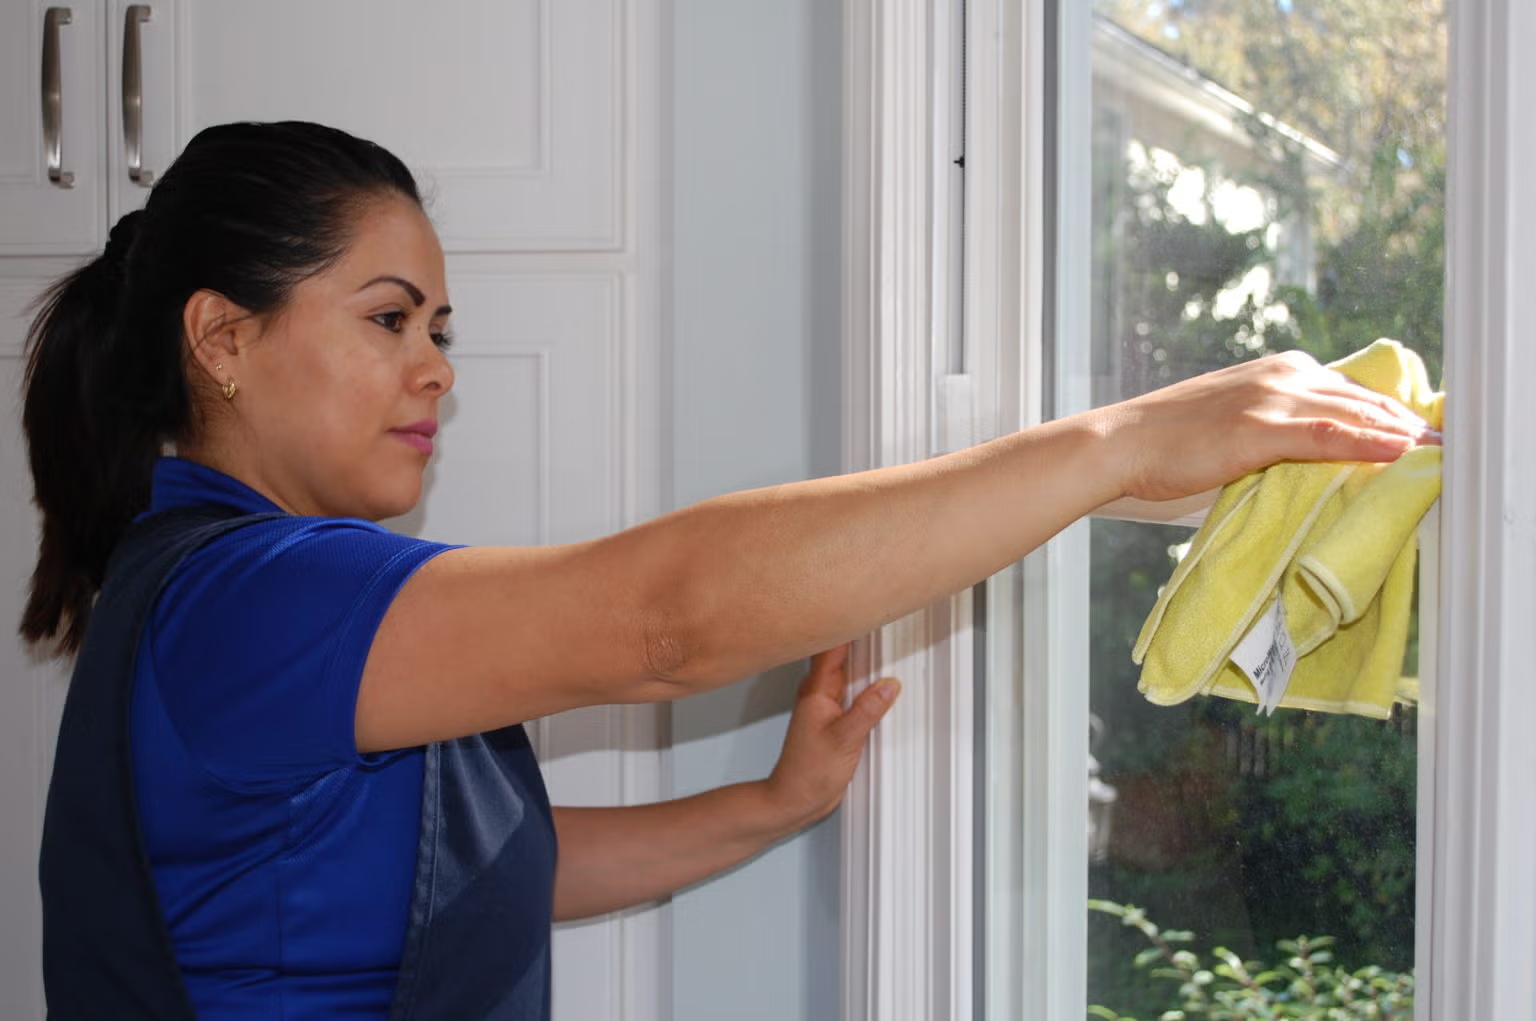
Plastic shower curtains – Plastic shower curtains should be cleaned once a month. Soap scum and mildew build up on the inside of the plastic. You can place a shower curtain in the washing machine and it will come out looking brand new.  Just put the shower curtain in the wash using hot water and two bath towels. Add a touch of laundry detergent to the washer as well.  Wash and rinse the shower curtain on a regular cycle. Hang the plastic shower curtain back up as normal to allow it to air dry.

Use your dishwasher --A quick tip for cleaning things on your vanity is to enlist your dishwasher. Your toothbrush holder, towel caddies, toothpaste holders and even brushes and combs can be popped into the top drawer of the dishwasher. Use the regular dishwashing detergent and a regular washing cycle.  The items will come out clean and disinfected.

Sheets – Most experts agree that sheets should be washed at least once every other week. If you have night sweats or tend to sweat more than the average person, you should wash your sheets once a week. Make sure to wash your sheets in a gentle soap versus a detergent. Detergents can cause skin irritations. They don’t rinse totally out of your sheets. Soaps, on the other handwash completely out of the fabric.

remove-bed-bugs

Blankets – Blankets need to be washed frequently, but not as often as sheets. Blankets can become infested with dust mites. Most experts recommend washing blankets monthly in extremely hot water and drying them on a hot setting in the dryer. The high heat will kill the dust mites.  If you deal with a dust mite allergy, you may need to wash the blankets more often.

Comforters – Down comforters can be cleaned on the same schedule as blankets. Down comforters are very difficult to wash and dry so if you want to remove the dust and allergens quickly, you can pop the comforter directly into the dryer and set it to the hottest setting. The dryer will remove the dust and the hot air will kill the dust mites.

Pillows – Pillows are not usually on our list of things to wash. But they can become extremely infested with dust mites as well as body oils and fluids.  To prevent the pillow from absorbing fluids and oils, you can use a pillow encasement that will keep the pillows clean and keep dust mites away from the pillow filling. The encasement is much easier to wash than an entire pillow.

Quilts – Hand made quilts need special attention. They needed to be washed with care. You can place the quilt in the dryer on a hot setting for a few minutes to kill dust mites and remove the dust. You can also use a clothesline and hang it outside in the bright sunlight to help keep the dust mites at bay.


For more information from DIY green cleaning expert Leslie Reichert, visit https://www.facebook.com/GreenCleaningCoach/

Treating Common Springtime Stains

Battling stains can be very expensive if you don’t take the proper steps to remove them. It’s not the stain removal that’s expensive, but the damage done to the clothing if it’s not done properly. Using the wrong product to remove a stain can do damage to the fabric and also set the stain. Here are a few things to do when trying to remove a stain.

Try to remember what the stain might be. Knowing the source of the stain makes removing it much easier.  Try to figure out if it’s an oil-based stain, a milk-based stain or possibly a blood stain.  One stain remover does NOT work for all stains.

Have the right things on hand to battle the stain.  There are five things that are the basics for stain removal: corn starch, rubbing alcohol, club soda, an enzyme-based stain remover, and hydrogen peroxide. Make sure you have these items in quantity so you are ready for any stain.

Corn starch is used to absorb much of the liquid or oil that is left on the fabric. It works extremely well on oily stains. Just sprinkle some corn starch on the area, rub it in completely, let it sit for a while and then brush it off with a stiff toothbrush. The corn starch will absorb whatever is in the fabric and carry it away when it’s brushed off.

Club soda is great for pre-soaking stains. No matter what you’ve spilled, you can just dab some club soda on the area and it will work to lift the stain. You can put a small spray bottle in your purse or glove compartment and be ready to battle a spill. There is no proven chemical reason why club soda works so well since it’s just water infused with carbon dioxide and a small amount of salt, but for some reason it really does work.

Enzyme-based stain removers are perfect for stains from grass, blood or chocolate. Enzymes are proteins or bacteria that actually break down stains by digesting them. They work as long as the stain is moist and then become dormant when the fabric dries.

Hydrogen peroxide is a diluted acid that works great on red stains such as red wine or blood.  Nurses have known this for years.  After a day at work, all they do is spray their uniforms with hydrogen peroxide and the blood stains totally disappear.

A few other things to remember about stain removal.

  • Never try to remove a stain by spraying it with a stain remover and then throwing it into a washing machine. It is much better to pretreat the stain before washing, rinse it with cool water and let it air dry. The heat of the hot water in the washing machine may actually set the stain before it can be removed.
  • Never put your clothing in the dryer until you are completely sure the stain has been removed. Placing the item in a hot dryer can set the stain.
  • Continue to treat, rinse and air dry the piece of clothing until the stain is removed. It takes patience but almost any stain can be removed if you keep repeating the treatment.

For more information from DIY green cleaning expert Leslie Reichert, visit https://www.facebook.com/GreenCleaningCoach/

Kitchen Cleaning Hacks - Cleaning Your Stovetop

The stove has been called the “heart of the kitchen”, mainly because it’s where most of the family meals are prepared. Keeping your stove’s cooktop clean should be a priority.  Built-up grease and food debris can cause smoke which can damage the surrounding walls or even worse, start a fire. Let’s look at a few tips that will keep you keep the top of your stove clean and safe.

Never clean your stovetop while it’s still hot. It doesn’t matter whether you have a gas or an electric cooktop, never clean it while it’s hot. The heat will turn your cleaning product into a vapor which is dangerous if you breathe it in. Instead, wait until the stove has completely cooled before cleaning.

Remove any movable parts from the stove before cleaning. This includes grates, spill trays, and knobs. Move these pieces out of the way so you will be able to clean every nook on your stovetop. It will also let you concentrate on cleaning those pieces separately – away from the stove.

Soak the items you’ve removed in warm soapy water. Let them soak for a few minutes to loosen the grease and the oils. Wipe them with a large looped microfiber cloth. If the buildup doesn’t come right off, spray them with rubbing alcohol and let them sit for a few minutes on a paper towel. The alcohol will work to break down the grease so you won’t have to scrub too hard to remove it.

If you have a gas stove do NOT spray any cleaner directly onto the cooktop. Instead, spray the cleaner on a microfiber cloth and wipe the stovetop with the cloth. Without knowing the ingredients in your cleaner, it is not safe to spray anything around an open flame.  Remember a gas stovetop has a pilot light underneath that could be exposed to the ingredients in the cleaner.  Another item to avoid around a gas stove is alcohol.  Alcohol is a great product to use to break down grease and oil but do not use anywhere near a gas flame.

Glass stovetops have a lovely look but can be extremely difficult to clean.  The glass needs to be cleaned thoroughly after each use or the residue will become burnt on. There are a lot of specialized creams that you can use to clean the glass. The trick is to use a damp sponge with the cream and apply it in a circular motion. If you have spots that just won’t come clean, you can use a straight edge razor tipped at a 45-degree angle to scrape off the spots. Don’t be afraid of scratching the glass. Just use a new razor blade each time you clean and the residue will slide right off. Finish with a damp microfiber cloth.

Stainless steel stovetops also need to be cleaned after every use.  The stainless in between the burners will oxidize and look very spotty. Wipe the cooktop down with a degreasing cleaner, Then, use a powdered cleanser like Shadazzle to remove the oxidation and leave the stainless steel looking perfect. Wipe off the cleanser, then finish with a light coat of baby oil.  The baby oil will seal the stainless steel, prevent further oxidation and keep it looking streak free.

A hack for cleaning drip pans is to boil some hot water in a large pot big enough to submerge the drip pans. Add a cup of dishwashing detergent and stir until it’s dissolved. Place the drip pans in the boiling water, turn off the heat and cover. Let them sit in this mixture overnight. In the morning just give them a quick rinse and most of the crud should come right off.

Brown burn marks on your stovetop can gently be removed with baking soda and a soft sponge. Just sprinkle the spot with the baking soda and use the damp sponge to gently scrub the spot away. Be very careful not to be too aggressive or you could scratch the surface.

Make a DIY grease cutter to remove grease and oil from your stovetop. Just add some pure lemon juice to a bowl of baking soda until it becomes a thick paste. Then apply this mixture to your stovetop or hood. Let the paste sit for a minute or two then spray the area with HOT distilled white vinegar.  The hot vinegar will activate the baking soda to lift and remove the oils from the surface while the acid in the lemon juice will work to cut through the greasy buildup so it’s easier to remove.  Just give the stovetop a quick wipe and it will be sparkling.

For more information from DIY green cleaning expert Leslie Reichert, visit https://www.facebook.com/GreenCleaningCoach/

Why is Consistent House Cleaning Good for Your Health?

Let’s face it, constantly cleaning, organizing and putting stuff away is not anyone’s idea of a good time.  But keeping your home clean on a consistent basis is important for a number of reasons. You might not realize that cleaning can give you a sense of satisfaction which releases endorphins and makes you feel better. Even if the reasons below don’t spark motivation for you to keep your house clean, maybe remembering that feeling good when you are done can keep you focused.

Removing allergens – Keeping your home dust free will remove allergens from your home. Dust contains dust mite excrement, which is the true cause of dust allergies. Dusting your home on a weekly basis keeps the allergens at a safe and manageable level. You can also use a HEPA air filter to help remove dust from the air, which keeps the dust from settling on the furniture, meaning you can dust less often.

Lowers stress – A clean and organized house can lower stress levels for you and your family. Marie Kondo’s “KonMari Method” of tiding up recommends getting rid of anything that doesn’t give you joy. Things that don’t give you joy are probably adding stress to your life and should be removed. Once removed, you will feel better and will have a little less stress in your life.

Home safety – For the safety of your family and pets, you want to remove the dirt and clutter from your home. Frequent cleaning removes germs. Not to mention too much clutter can cause trips, falls and accidents.  Items stacked too high can fall down and be dangerous. Items left in the middle of the floor can cause a fall which can lead to a debilitating injury.

Germ-free – Cleaning and disinfecting should be a priority for your cleaning regimen. Some people do not realize that you cannot disinfect a surface that has not been cleaned first. Using disinfecting wipes on a dirty surface does not kill germs. Areas must be cleaned first with soap and warm water, rinsed completely, and then disinfected. The disinfectant needs to sit on the surface for 10 minutes or more to kill the germs.

Pest removal – Dirty homes are a haven for nasty pests such as ants, spiders, mice, and even flour moths. Leftover food attracts ants which are very difficult to remove from your home.  They are attracted to spills and drips on floors and cabinets.  By keeping your kitchen spotless you are working to keep ants and rodents away. Cobwebs are really just spider webs with dust on them. You’ll want to dust and vacuum walls and ceilings to get rid of the spiders that are making the webs.  Keep your food products in airtight containers which will keep the flour moths from infiltrating your pantry. Keep your shelves spotless so there is nothing in the pantry to attract them.

Naturally Remove Mold from Window Sills

CleaningWindowSill

Sometimes, windows don’t get the attention they need, especially in the winter. Windows can “sweat’ in the wintertime and the combination of condensation and warm temperatures in a room are the perfect conditions for growing mold and mildew.  Let’s look at some techniques you can use to clean your windows, sills and remove mold and mildew.

Control the humidity in your house   Start by purchasing a hygrometer so you can measure exactly what the humidity levels are in your home. The optimum humidity level in a home should be between 40% and 50%.  In the winter months, you want to keep the levels closer to 40% to prevent condensation on the windows.

Purchase a dehumidifier with an automatic pump   Spend a few extra dollars and buy a dehumidifier with a water pump. These dehumidifiers work day and night, extracting moisture from the air. You can put the drain tube for the dehumidifier into your washing machines drain hose so you never have to worry about emptying the container. These humidifiers come with a hygrometer built in so you can set the levels of humidity for your home and it will work to keep the humidity levels exactly where you want them.

Wipe away condensation   If you find that your windows still have condensation, lower the humidity level of your dehumidifier then wipe the windows with a dry microfiber cloth. Make sure to wipe off the moisture on the glass as well as the window frames and sills.

how-to-clean-and-control-mold

Make your own all-natural mold remover   You can make your own all-natural mold remover by using a spray bottle filled with rubbing alcohol and 10-15 drops of Tea Tree oil. The alcohol will be the carrier and will carry the Tea Tree oil onto the moldy area. The alcohol will then evaporate quickly to prevent more moisture in the area.  The Tea Tree oil will work to kill the mold and mold spores so that the area will be free of mold.  Once the area is treated and left to dry for a day, wipe with a damp microfiber cloth and then spray again with the Tea Tree mixture. This will prevent mold and mildew from growing in the area.

Keep the window sills clean   Cleaning and maintaining window sills on a biweekly schedule will help you be aware if mold or mildew is accumulating on the sills. Just treat with your all-natural mold spray to keep mold and mildew away.

For more information from DIY green cleaning expert Leslie Reichert, visit greencleaningcoach.com

Tips for Cleaning Your Dining Room Table

Have you heard of the flat surface rule? It says that a flat surface like a floor, a table or countertop should always be cleared of anything that is not a permanent fixture. This sounds like a great rule but my dining room table constantly challenges that flat surface rule. My table attracts mail, paperwork, bills and even clothing. I’ve put a new rule in place that says that the dining room table must be cleared of all clutter by dinner time. Much more doable! If there are items left on the table, they are placed in a laundry basket and given 24 hours to be dealt with. After 24 hours they will be discarded. This new rule seems to be working and has left my table top free from clutter. I’ve found that my next challenge is keeping the tabletop clean and dust free. Here are a few tips I’ve learned:

Cleaning

Start by washing the table with warm water and a touch of dish detergent.  Whether you have a wood, glass or plastic dining room table, they can all be cleaned with a damp cloth and a touch of dish detergent. Start with a bucket of warm water and a drop or two of a gentle dish soap. Use a large looped microfiber cloth wrung out until it’s slightly damp. Go over the entire table including the legs and chairs. Rinse the table with warm water and then use a fine woven microfiber cloth to dry it completely.

Conditioning

Once the furniture is completely clean and dry, apply liquid beeswax to seal in the moisture and condition the wood. A favorite product of mine is Howard’s Feed-N-Wax, which is a polisher and conditioner. This product combines beeswax, carnauba wax and orange oil to enhance the natural beauty of the grain in both finished and unfinished wood. It also seals the wood and prevents it from drying out. This product is something you’ll want to use on your dining room table once a month.

Dusting

You’ll want to dust your dining room table to keep it clean on a weekly basis. I suggest using a dry large-looped microfiber cloth to remove dust easily and gently. The microscopic fingers in the microfiber pick up the dust and hold onto it until you place the cloth in the laundry. This makes dusting extremely easy. Because microfiber is so efficient you don’t have to use a dusting polish which cuts your cleaning time in half.

Environmental Conditions

Wood furniture reacts to the environment so you’ll want to keep the temperature and the humidity at constant levels. The room temperature should be between 60 and 80 degrees all year long. The humidity should be in the 35 to 45 percent range to keep the wood from becoming too dry. You’ll also want to keep your furniture out of direct sunlight. The sun can bleach the wood and can damage the piece. Avoid storing wood furniture in attics and basements as they are not stable environments for wood furniture.

Maintenance

You want to pay close attention to your wood furniture. Cleaning, dusting, and conditioning will keep it from deteriorating. Some people think that it doesn’t matter how often you dust a wood piece of furniture. But dust can build up and combine with moisture in the air which will permanently damage the finish. Maintaining a schedule of cleaning, dusting and conditioning your wood dining room table will keep it looking its best for generations. It will be something special to hand down to your children or even your children’s children.  Remember a dining room table is where family memories are made.

For more information on how you can clean and protect your home safely & efficiently, visit Leslie's website!

Cleaning your house after the Holiday Season

What’s your official day to do your holiday cleanup? I’m sure your answer really depends on when you put your decorations up.  A good rule of thumb is January 6, which is known as “little Christmas.” Personally, I’m feeling pretty good if I get my decorations down by Valentine’s Day! It really doesn’t matter what day you choose as long as you take them down and put them away so they are organized for next year. Once the decorations are down and stored, we can then focus on the cleaning.

Organizing your Christmas decorations

  • You can choose to put your decorations away by room or by item. I like to store all my window and outside lights together as they are the first I’ll want to get out next year. Store all the decorations for each tree together so that you know which decorations go with which tree. Use clear storage tubs so you can see what’s inside.
  • Labeling is very important. Make sure you list everything inside each storage tub so you don’t have to dig through everything again the following year.
  • Make a fun date with yourself (and your family) to take down the decorations. Set aside a specific block of time so you keep focused. Trying to take down decorations in between cooking dinner and folding laundry probably won’t work - you’ll end up frustrated next Christmas when you realize nothing was put away correctly.

Stains and cleanup problems

Christmas has its own set of cleaning problems. Below are some tricks on how to deal with them.

Pine pitch - If you had a real Christmas tree you may have some sticky pine pitch on your carpeting or hardwood floors. Once evergreen trees come inside a home and warm up, the sap inside the tree branches drips out of the trimmed limbs. This is called pine pitch and it can be very hard to remove. To remove it, you’ll want to start by rubbing the area with an ice cube to freeze the sap. Scrape as much of the sap off of the flooring as you can, then use a clean cloth dampened with rubbing alcohol to dab the area until the pitch is removed from the floor.

Water stains - You may have some water stains from the tree stand overflowing. This stain can be removed by using vinegar. Pour vinegar into a spray bottle and liberally spray the entire area. Let it sit without scrubbing. After 30 minutes dab the area with a paper towel and repeat the process until the stain disappears.

Table Linen stains - Don’t put your table linens away until you know they are completely clean and stain free. You can use rubbing alcohol on greasy stains and oxygen bleach for food spots. Once the linens are clean and dry, press them and then wrap them in tissue paper and store them in an airtight container.

Window sill spots – If you have discovered the trick of using white athletic tape to hold your Christmas window lights in place you also are dealing with the adhesive residue left when you remove it. An easy remedy is to scrape off as much of the adhesive as you can with a putty knife. Dampen the area with rubbing alcohol, which works to break down the adhesive. Place a drop of dish detergent over the area and work it into the residue. Wipe the window sill with warm water and a microfiber cloth.

Floors – Your floors will have taken a beating over the holidays between decorations, guests and all the cooking and baking. Plan to give each hard floor a good scrubbing on your hands and knees if you can. Start by moving all your furniture away from the walls and vacuuming the floor and the wood trim around the room. Use a bucket of hot water with a drop of dish soap and use a microfiber cloth to clean your way around the room. Once the outside of the room is dry, move your furniture from the middle of the room to the edges and wash the middle area. Once the floor is completely dry, you can replace area rugs and reset the furniture.

Guest room sheets – Strip all the beds and wash them in hot water. Add a touch of oxygen bleach to clean and disinfect them. Dry them on high heat to kill dust mites and other allergens. While the sheets are in the dryer, use an upholstery tool to vacuum the mattress and the sides of the box springs.  Wipe down the bed frame and remake the bed as soon as the sheets are dry. A simple trick to remove wrinkles in the sheets is to spray them with witch hazel after they are on the bed. You can add a few drops of an essential oil to create a fragrant linen spray.

How to Take Care of Hardwood Floors

Taking care of your hardwood floors can be difficult, especially if you are using the wrong cleaning products, mop or vacuum.  Foggy, smeary floors look old and abused, but with a few simple tips and tricks we can have your floors looking shiny and new!

Vacuum often with a canister vacuum - Sand and dust can damage the shine on your hardwood floors. You’ll want to vacuum them as often as you can.  Use a soft, horsehair brush attachment made specifically for hardwood floors.  The gentle brush picks up the dirt without scratching the floor.

Use the correct vacuum - Don’t use an upright vacuum that has a beater bar, as it will scratch the wood. It’s fine to use an upright vacuum if it has a switch that will turn off the beater brush, but the best vacuum to use on a hardwood floor is a canister vacuum. The hardwood floor attachment gently glides of the hardwood floor.

Dry mop the floor - Use a microfiber mop to dry dust your floors in between vacuuming. Dry dusting is a quick way to pick up dust and hair when you don’t have time to vacuum. Use a microfiber mop head that will pick up and hold the dirt.

Washing your hardwood floors - You can use a microfiber mop to wash your hardwood floors. Try my bucket-less mopping technique to have them looking perfect. Bucket-less mopping is a system that uses a microfiber mop and a spray bottle of diluted cleaner. You simply spray the cleaner onto the hardwood floor and wipe it away with the microfiber mop.

Winter time tip - During the winter you’ll want to wipe off any salt that gets onto your hardwood floors immediately, as salt can damage the finish on your hardwood.  Make sure you have plenty of area rugs near the doorways. Should someone come in with salt on their shoes, use a wet towel on the area and wipe off all the salt.

Shoes must come off - Ask your family and guests to remove their shoes when they come into your home. This habit will prevent dirt and dust from scratching the floor.

Use area rugs at entrances to catch dirt before it gets to the hardwood floor. Area rugs will capture dust and dirt at the doorway. There are some great brands of area rugs that are designed to really grab the dirt from the bottoms of shoes as you walk over them. These will remove the maximum amount of grime before walking into the house.

Don’t use straight vinegar to clean your hardwood floor - The acid in the vinegar will damage the finish on your floors. You can use a tablespoon or two of vinegar in a 16-ounce spray bottle but don’t use too much or the acid will work against the finish of the floor.

Consider bringing in an expert if the floor has lost its’ luster. A professional can apply a new coat of finish and recommend other products that will keep it looking its best. He may also recommend having the floor refinished if it’s very damaged.

Protect your floor from sunlight - UV rays can change the color of the wood which may not be obvious until it’s too late.  If you have an area rug, you’ll find that when you remove the rug the wood underneath will be much darker. You can protect the wood with UV filtering blinds or curtains.

Black scuff marks? You can remove black scuff marks with a tennis ball. Just rub the ball over the scuff and it will disappear.

Keep pets nails trimmed at all times - Their claws can really damage hardwood floors.

Try to keep your humidity between 35 and 50% to avoid too much moisture which can warp and damage the wood. You’ll see the wood cup if there’s too much moisture in your home. If the room under the hardwood is damp, make sure you run a dehumidifier to keep the moisture from damaging the floor from underneath.

Storing Summer Clothes for Next Season

The autumn chill is in the air! The cooler temperatures have started to motivate everyone young and old to start changing out their summer shorts for winter sweaters. But what exactly is the best way to store your summer wardrobe? Let’s look at a few tips that will keep your summer clothing looking their best when you pull them out next spring.

Start by getting some airtight containers. If you are storing your clothing in an attic or basement you want to make sure they are being stored in something that is completely airtight. Make sure your container has a rubber seal and locking clips to keep the lid secure. Another option you can try are vacuum sealed bags. In addition to being vacuum sealed, they also save a tremendous amount of space when storing.

Take some time to go through your summer clothing and see if there are some things you can purge. Try on each piece of clothing to see it fits the way you want. If you didn’t wear the piece of clothing at all during the summer, take a minute to decide if you really need to keep it. This is a great time to start minimalizing your wardrobe.

Once you’ve decided what you will be keeping and storing, you want to wash it in a gentle laundry soap and check for spots and discoloration. If the piece of clothing has a spot that hasn’t been addressed before you store it, the stain will become darker while stored.

Try to find a location to store your clothing that is in a neutral temperature area. An attic is a great option but be aware that the temperature fluctuates tremendously in an attic. In the winter it can get bitterly cold, then in a warm spell become extremely hot. This can lead to condensation inside your container which will lead to mold and mildew. Basements are notorious for dampness and will most likely breed mold in your clothing. Instead, look for some storage space in a closet or spare bedroom.

If you want to store your items on hangers, use padded hangers and leave enough space between each piece to avoid wrinkles. Never use wire hangers as they can disfigure your clothing. Make sure to hang pants from the hem so they don’t develop a crease that can’t be ironed out.

Moths can definitely damage clothing but using mothballs like our mothers and grandmothers did is not exactly the healthiest option. Instead, you can use cedar blocks that will repel the moths or you can also use cedar oil dripped onto cotton balls to keep the moths away. Just make sure not to have the oil-soaked cotton ball touching the fabric as it can leave marks on the clothing.

Repel pests with a simple trick of treating a piece of fabric with a bug repellent and putting it into the container when storing your clothing. You can treat a rag with the bug spray and put it in the corner of the storage container. It will work to keep pests away from your clothes.

Avoid smells by sprinkling some baking soda in the bottom of your airtight container. Baking soda is the perfect solution to rid your clothing from smells that may be deep within the fabric.

Avoid the plastic bags you get at the dry cleaner for storing items on a hanger. The plastic stops air flow and can trap smells, chemicals, and moisture. Instead, use a breathable fabric cover you can purchase at a store like The Container Store that will protect your clothing from dust but still let the air flow around the fabric.

Once your summer clothes have been stored away, you will have more room for sweaters, scarves, and boots! We hope you also feel relieved when summer rolls around and your summer clothes are easy to find and unpack. While we may already be wishing for warmer weather, the cold is here to stay…at least for a little while.

For more information on how you can clean and protect your home safely, visit Leslie's website!

Cleaning and Organizing Your Garage

The hardest part of organizing your garage is just getting started. For many homeowners, a garage begins as a clean parking space and evolves into a mess of equipment for your lawn, your child’s sports and other miscellaneous items from around the house. The best way to get going involves simple steps that start with emptying the garage, purging the junk and organizing the rest of the “stuff”.  I have some hacks I want to share with you that will help you with that last step of organizing all the stuff you want to continue to keep in your garage.

Hang your cords and hoses with a large linked chain:

Hoses and cords can take up a lot of space if they aren’t hung neatly in your garage. An easy way to hang them is to attach a large linked chain to the garage wall and use an S hook to wrap the chain around the cord so it will hang neatly from the wall.

String your paint brushing with a wire and hang from the ceiling:

Paint brushes need to be stored so the bristles don’t bend or warp. A great way to keep them looking new is to string a thin wire through the hole on the top of the brush handle and hang them from the ceiling of the garage.

Use a pallet for storing your rakes, shovels and other lawn tools:

Instead of having your rakes and shovels leaning against the garage wall, place a pallet on its side so that the opening is facing up. Slip your rakes in shovels into the opening and the pallet will hold them stationary.

Put your large garbage bags on a paper towel holder to make them easy to manage:

Purchase a large paper towel holder and put your garbage bags on it like they were paper towels. This will make them easy to manage when you need them.

Use a magnetic strip to hang metal tools on the wall:

Purchase a magnetic strip that you can place on the garage wall. You can organize all your metal tools by hanging them on this magnetic strip.

Use bungie cords with screw eyes to hold sports equipment:

This is a great tip for storing kid’s sports balls. You can place basketballs, soccer balls and even footballs inside the bungie cords to keep them contained.

Hang bikes on the garage walls or from the ceiling:

You will be surprised how much space you can save by hanging your bikes from the ceiling. You can store up to six bikes in the area in front of each car in your garage.

Use plastic tubs on a metal shelf for storing items in an organized manner:

Use athletic tape to label the tubs. (You can remove the tape and relabel when you are reorganizing).

Use old muffin tins to organize screws and other small parts:

It’s a great way to keep small parts organized and easy to manage.

Use a step ladder to store your wood:

Pieces of wood can be placed through the steps of the ladder and stored next to the wall to keep them in order.

Use a shoe organizer to keep smaller things off the garage floor:

A clean shoe organizer is great for storing small garden tools, gloves and even a baseball or two.

Use cut pieces of PVC piping:

Place PVP pipes on their ends to hold wire ties and other items that get disorganized easily.

Use pool noodles on the wall of your garage as bumpers for your car door:

Cut the pool noodle in half with a sharp knife and attach them to the wall of your garage. This will prevent bumps and scrapes on your car door.

Hang a tennis ball from a string:

This will to let the driver know how far they can pull into the parking space. This will give you to the maximum amount of storage space without having the car damage items by pulling in too far.

Whether you're looking for a few quick fixes for your garage or your garage needs a complete overhaul, we hope these tips provide some guidance. Enjoy the clean space and check back for even more tips for keeping your home clean.

For more information on how you can clean and protect your home safely, visit Leslie's website!


Keeping Your Home Safe for Your Child

September is baby safety month. Whether they’re a newborn or an active toddler, it’s a great reminder that you always need to be very cognizant when keeping your home safe for your children. There’s a lot of preparation before the baby arrives to make your home a safe place for them to come home. Below, we outline some important points to keep in mind

Home Safety Tips for Newborns

Getting your newborn’s room ready prior to their arrival is exciting but there are some things you need to consider.

Furniture –Know what materials are used in any of the furniture you are buying for the room. Pressboard and plywood contain formaldehyde that converts into a dangerous chemical at room temperature. The fumes can be harmful to a baby’s lungs.

Wall Paint – Before bringing out the paint swatches, make sure the paint that you’re planning to use doesn’t contain harmful toxins. Non-toxic paint will keep the air quality safe for you and your baby.

Flooring – Carpets and hardwood floors can both contain formaldehyde. Once installed, they can release toxins for months. Do your research and find a carpet or hardwood that uses chemical-free padding or adhesives.

Mattress –Look for a mattress manufacturer that uses all-natural materials so you don’t run the risk of buying one that may contain formaldehyde. Be sure to purchase a very firm mattress so that the baby sleeps on top of the surface instead of sinking into the mattress which can be a suffocation risk.

New clothing – Make sure that all new baby clothes get washed in a gentle, all-natural laundry soap. Stay away from fragrances that can affect your baby’s lungs. There are many DIY laundry soap options where you can control the ingredients if you’d prefer to make your own.

Keeping Your Toddler Safe At Home

As your sweet baby begins crawling and then gradually moves into walking, suddenly there are more safety concerns around your home. Everything from your waist down can be a danger so you’ll need to make sure to recognize those areas and baby proof wherever necessary. Here are a few safety items  to check on around your home:

Laundry Room

  • Keep your cleaning products in a place where your child can’t reach. Use an out-of-reach cabinet in your laundry room if possible. If one is not available, consider putting a child-proof lock on the cabinet you’ll be using.
  • Hide laundry pods that have recently become a safety issue for young children. Laundry pods are visually appealing because of their bright colors and resemblance to candy.

Living Room

  • Add a fireplace “fence” around a fireplace or woodstove.
  • Remove glass topped furniture as they can not only be a danger due to their sharp corners but can also crack and break should a child crawl on top of it.
  • Windows - Always open windows from the top down. Purchase window locks that prevent the window from being opened by your child.

Bathroom

  • Make sure items like razors, makeup, and medicine are put in locked closets or drawers. Remember that cotton swabs, cotton balls, and other small objects can be a choking risk for small children.
  • Add a safety latch to all toilets in your home.

Bedroom

  • Anchor tall furniture to the walls to prevent them from falling if your child were to climb them.
  • Avoid strangulation from a blind cord by installing cordless blinds or tying the cords up high next to the curtain rod.

Kitchen

  • Many kitchen appliances are a safety risk for children. They can burn themselves on a stove, get their hand caught in a dishwasher or crawl into a front-loading washer. Put safety locks on all your appliances and make sure you are always around when your child is near the kitchen area.

Smaller Areas Around the Home

  • Outlets - Not only do you want to use the outlet protectors for unused plugs but also find an outlet plug cover to keep cords and plugs out of reach.
  • Stairs - Use safety gates at the top and bottom of all stairways. Keep the stairs clear of clutter to prevent slips and falls.
  • Fire Alarms - Check your fire alarms monthly and change the batteries twice a year. Have a plan to evacuate your child from the home should you have a fire.

Keeping your children safe is on top of every parent’s mind. While Baby Safety Month is recognized in September, we know that their safety is a year-round concern. Take a look at your home’s biggest dangers and be sure to install the proper precautions wherever they are needed.

Removing "Back to School" Stains

For some families, back to school can be a terribly sad day in your household or parents are secretly throwing a “BTS” (back to school) party! It’s officially the end of the summer and the kids are off to school. For younger children especially, the school year brings stains and marks on their clothes. Be prepared to fight each stain with this Back To School Stain Guide.

Before we get into how to battle each different stain they might bring home, lets first get the supplies you will need to have on hand.

  • Hydrogen Peroxide
  • Rubbing Alcohol
  • Oxygen bleach
  • Chlorine bleach
  • White terry hand cloths
  • Iron
  • Bar of white soap (Ivory)
  • Cotton balls
  • Stiff brush
  • Distilled white vinegar
  • Small spray bottle

Markers – Place the stain face down on a white washcloth or a paper towel. Dab the area with a cotton ball dipped in rubbing alcohol. The stain will transfer to the cloth or paper towel. Do not pour the alcohol over the stain as it will bleed into the surrounding fabric.

Crayons – Scrap any excess crayon with a table knife or spoon. Using a hot iron, place a white washcloth over the stain and rub the iron over the area. You should see the stain transfer to the washcloth. Then use a drop of dish detergent and work the soap into the area. Rinse and let the fabric air dry. Repeat the process until the stain is gone.

Water-based glue – Place the stain in very warm water and let the water work to soften the glue. Peel the glue off as it softens.

Super Glue – Super Glue can be removed with an acetone-based nail polish. Place the stain in very warm water to soften the glue. Then using a cotton ball dampened with nail polish, dab the area. The glue should peel right off.

Lead pencil marks – Start by using a pencil eraser and rubbing the stain off the fabric. Then using a gentle liquid dish detergent, place a few drops on the stain and rub it into the fabric. Rinse out the soap and let the item air dry. Continue to repeat the process until the stain is removed.

Grass - Mix up a solution of one part distilled white vinegar and two parts water. Put it into a spray bottle. Spray the grass stain with the mixture and let it sit for 15 minutes. Using a stiff brush, rub the area until the stain is loosened and starting to come out of the fabric. Rinse the area and repeat by spraying and scrubbing until the stain is gone.

Salad dressing – Start by blotting the greasy stain with rubbing alcohol on a cotton ball. Soak the entire area and let it sit for a few minutes. Using a bar of white soap on the area, rub it until it creates a lather. Rinse the soap and alcohol out of the fabric and let it air dry. If the stain persists repeat the process until it disappears.

Chocolate milk – Start by running cool water through the back of the stain. This may remove most if not all of the chocolate milk. Then mix up a paste of powdered oxygen bleach and water and rub it into the area. Let it sit for a few minutes and then rinse the fabric. Wash normally and let the item air dry. Repeat the process until the stain is removed.

Ballpoint pen – Treat the area with a cotton ball dipped in nail polish. The pen mark will disappear.