Author: oi_admin

Keeping Kids Healthy This School Year

It’s that time of year when our kids are getting ready to go back to school. One of the biggest concerns for parents around this time is how to keep them germ-free at school. With the right information and the right tactics your children can stop germs in their tracks. Teach your children these important steps to keep themselves healthy this year!

Wash Hands Often & Correctly - Doctors all agree that hand washing is the most effective way to stop the spread of germs. It’s also the best way to remove germs from your hands. Since schools are full of ‘germy’ items, (we see you handrails and water fountains) it’s a good idea to teach your children effective hand washing techniques. Just putting some soap on your hands and doing a quick rinse with cool water does not constitute correct hand washing. Using a lathering soap and warm water are essential. Lather the soap for a minimum of 20 seconds, which is the standard given by the CDC website on handwashing. Some classrooms have a sink where the students can wash their hands without disrupting the flow of the day.

Keep Hands Away from Your Nose and Face – Since you never know where the germs are, a good habit is to avoid putting your hands anywhere near your face. Teach your children to keep their hands and fingers away from their nose and mouth.

Cover Your Mouth – Seeing an uncovered sneeze or cough can make someone run out the door. Remind your child to always sneeze or cough into their elbows to keep germs from spreading.

Maintain a Healthy Diet - Eating healthy foods like fruits and veggies will help their bodies be ready to fight off an infection should they get one.

Get a Good Night’s Sleep – Go to bed early and make sure their little bodies are rested and strong.  Viruses survive in bodies with weak immune systems.

Exercise Regularly – Have your kids get lots of exercise and have them do it outside so they get fresh air. This will keep their bodies strong and ready to fight off colds and flu. Consider giving your child the opportunity to join a school sports team. It is not only a healthy activity but great for teamwork and building lasting friendships.

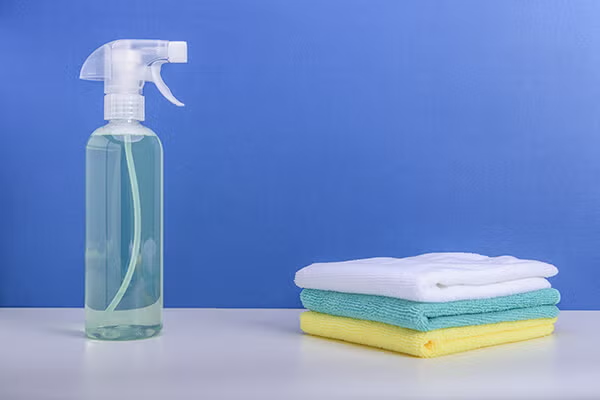
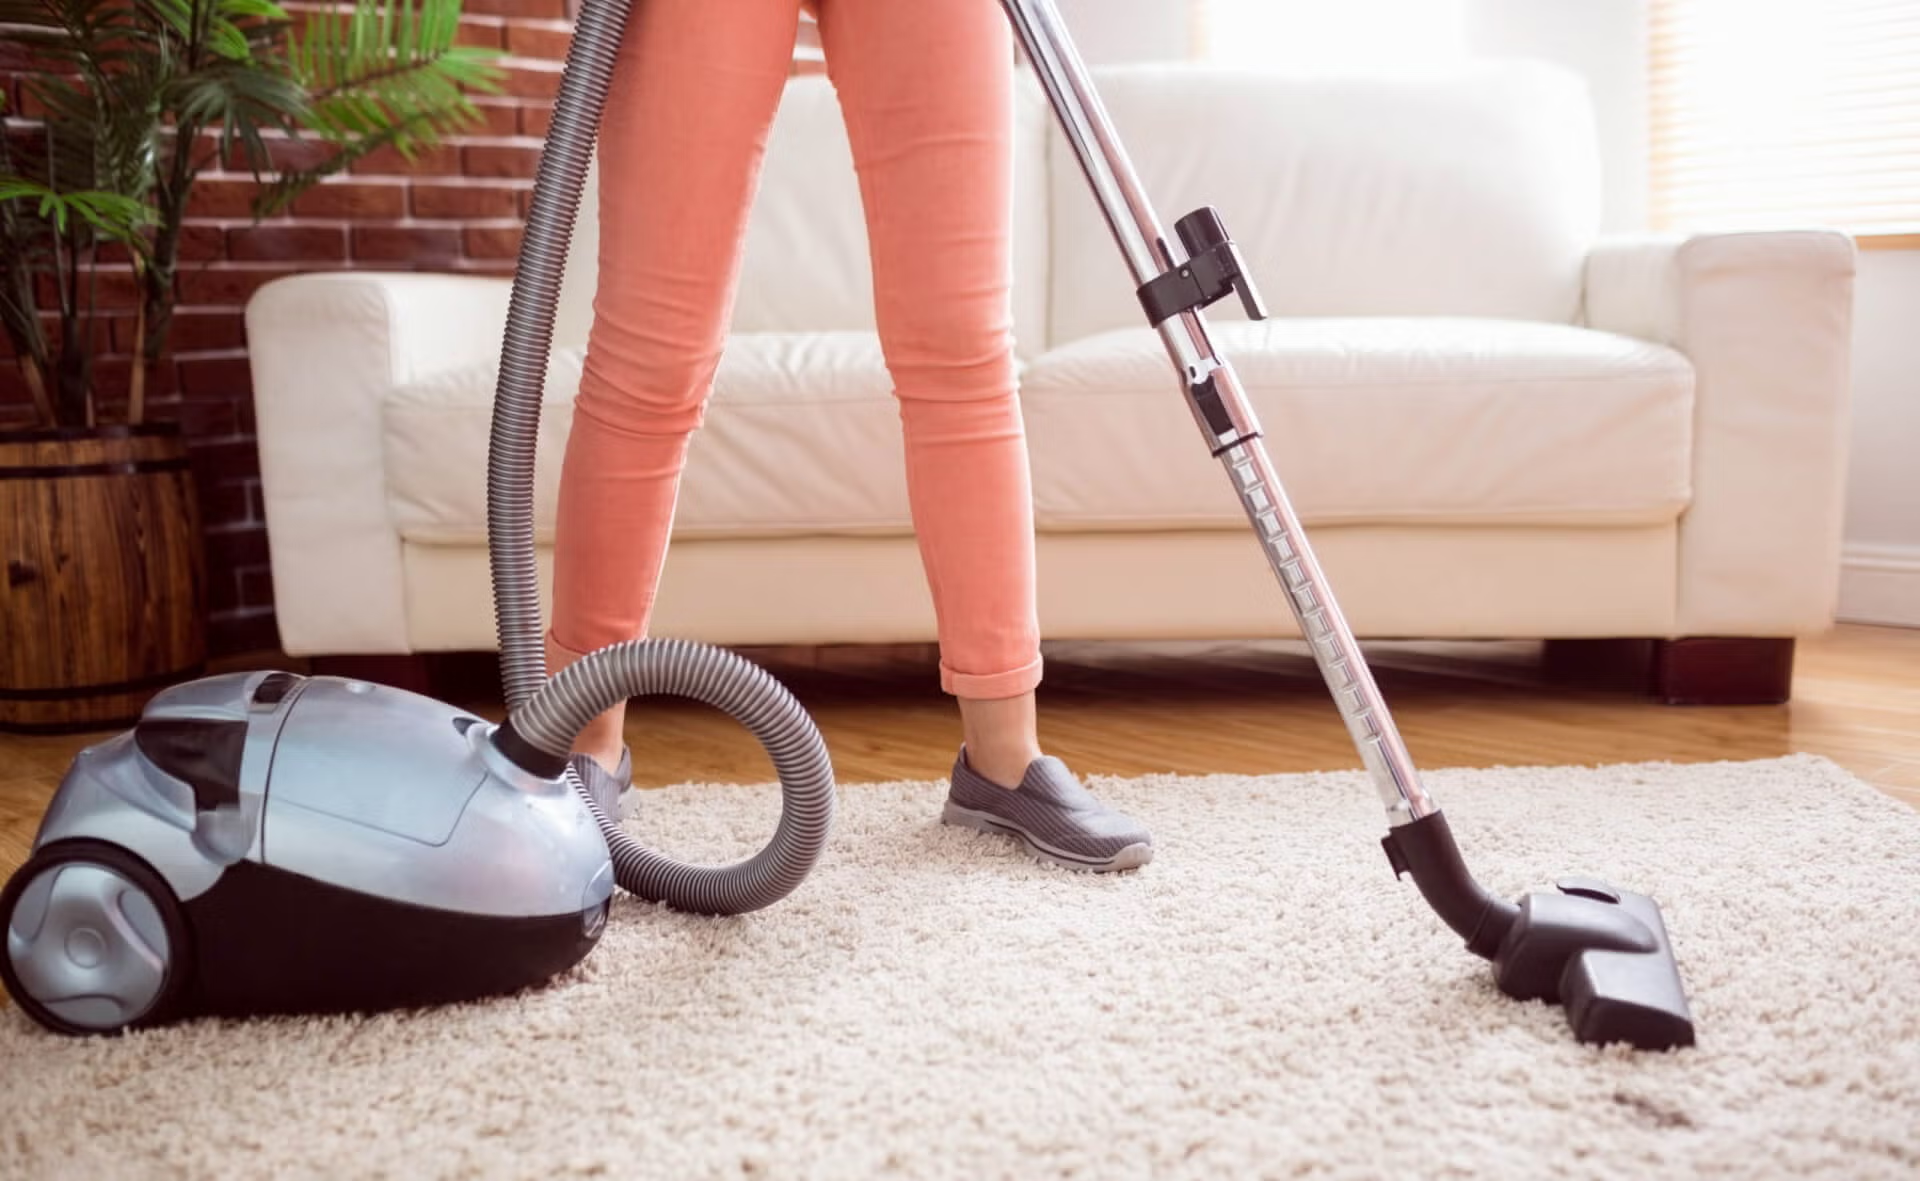
Clean and Vacuum Bedrooms with All-Natural Cleaning Products and a HEPA Rated Vacuum – Clean your entire home with all-natural cleaning products. Nighttime is when your body gets to rest and repair itself. It doesn’t need to be fighting with the chemicals found in traditional cleaning products while it’s trying to rest.  Instead use microfiber and a HEPA rated vacuum to clean the dust and dirt out of the room. Maid Brigade only uses HEPA rated vacuums and green cleaning products that will leave your home healthy and clean.

Feeling Sick? Keep the Germs at Home - While this seems like an obvious one, many kids and adults go to school or work when they’re sick. Make a new family rule that if you are sick you stay home. Don’t expose your student’s classmates to your germs. Take the time to let your kids recover completely before sending them back to school. All of your fellow parents will truly appreciate it.

Back to school time should be filled with learning and excitement, not germs! We want to help make your child’s school year the healthiest and most successful one yet. Having a clean home is another step to keeping the germs at bay. Maid Brigade provides house cleaning services for busy families. Our healthy cleaning products will leave your home sparkling and check one more item off your to-do list.


For more great cleaning tips, check out the Green Cleaning Expert, Leslie Reichert at greencleaningcoach.com

Microfiber Cloth Cleaning Hacks

Microfiber was developed in Japan during the 70’s for swimwear. Ten years later, European scientists found that it was the perfect fabric for cleaning due to its absorbency.  By the early 2000s, the microfiber industry had exploded.  Even though microfiber has been around for decades, there are many who have yet to try cleaning with microfiber tools. Take a look at all you can do with microfiber – it’s worth the investment!

Perfect windows – There are many different types of microfiber cleaning cloths. For windows, use a fine woven microfiber. It almost looks silky.  The microfibers are very small and will leave windows perfectly clean. Dunk the cloth into hot water and wring it out well so it’s damp. Wipe it over the glass and then watch as it picks up dirt then dries perfectly without streaks or smears. Or spray the glass with water and use a dry microfiber cloth as if it’s a paper towel. Dry the glass completely and it will be free of streaks, smears and lint.

Save on paper towels – Use microfiber cloths in place of paper towels when cleaning. Microfiber is more absorbent than paper towels and better for the environment since they are reusable. Be sure to launder microfiber cloths, towels and mop heads with only other microfiber materials.

Chemical free dusting – Most spray dusting polishes leave layers of silicone on furniture. Instead, use a dry microfiber cloth to dust your furniture. Microfiber has tiny fibers that hold onto dust. It will hold onto dust and dirt particles until laundered which makes dusting much faster.

Preventing cross-contamination – Hospitals have used microfiber mops for years to prevent cross-contamination. You can use in your home for the same reason! Microfiber mops have a cover that attaches with Velcro onto the end of the mop. Once it’s dirty it can be removed and laundered. It’s like using a brand-new mop every time you clean.  No more smelly, moldy mops!

Large outdoor windows – Homeowners may struggle keeping large windows clean from salt, pollen and other outdoor elements. A damp microfiber cloth wiped over large windows will remove any salt or pollen and leave the windows looking crystal-clear.

Dusting walls – Instead of washing the walls in your home, try dusting them instead. Use a microfiber mop with a dry mop head and dust your walls in minutes. The microfiber will pick up the dust without dealing with a bucket and rag.

Ceiling fans – Have you looked at the paddles of your ceiling fan lately? Dust them quickly with a large-looped microfiber cloth. Using the dry cloth, wipe it gently over the fan paddles to pick up and remove dust. This task will takes minutes and leaves the fan dust free.

Perfect granite – If you have dark granite counter tops, you may struggle with streaks and smears from cleaning. Try using a microfiber cloth designed for glass.  Dampen the cloth and wipe over the granite to leave it looking showroom perfect!

To read more from Leslie about cleaning with microfiber, check out this blog:

https://maidbrigade.com/blog/microfiber-for-cleaning/

Cleaning Tips Before an Extended Vacation

We’re looking forward to those final summer vacations this year! Packing and prepping for a vacation can be stressful. The last thing you want to think about before going on the vacation of your dreams is cleaning your home. But if you don’t think about a few strategic spots that need your attention, you will come home to a nightmare.

Enjoy a stress-free vacation by planning ahead of time. Starting a few days prior to leaving on your trip use these 10 tips to organize yourself and your home so you can leave for your vacation confident that everything is clean and ready to be left unattended.

  1. Turn off the water source to your washer and the power source to your dryer. Leave the lid up or open depending on if you have a top loader or a front loader. You want any moisture and evaporate which will prevent mold forming while you are gone.
  2. Go through your refrigerator and remove all the leftovers and items that could spoil. Place freezable food in the freezer and wipe all the refrigerator surfaces so they are free from spills. Condiments can be left for longer periods of time.
  3. Run the disposal with ice cubes and salt to remove any buildup of food inside it. Run hot water for a few minutes to remove food particles so the blades will be free of any built up rotting food.
  4. Wipe the sink of all moisture and cap the drain or disposal to prevent any rotting food particles from attracting flies or other small insects.
  5. Clean all your dirty laundry and fold it and put it away. You will enjoy everything being organized when you get home.
  6. Clean the sheets on your bed before leaving so that you can jump into a nice clean bed after a long relaxing vacation.
  7. Run the dishwasher so there is not a dirty dish left in the house. Empty the dishwasher and put away all the dishes. Leave the dishwasher ajar so that the leftover moisture can evaporate.
  8. Empty the trash in all rooms and leave it in your outdoor trash receptacle. Rinse the inside of the trash cans so there is nothing left to attract any “critters.” Move the outdoor trash receptacle away from your house. Trash inside the can attract flies and rodents that could try to move into your home.
  9. Give all the showers and bathtubs a good cleaning before you leave. Remove hair and debris from the drain. Wipe the walls dry and leave the shower curtain closed so mold will not grow in the creases of the curtain while you are away. Make sure you remove any wet towels or washcloths and run them through the washer and dryer. Never leave items in the washer or dryer while you are away.
  10. Remove the grounds from the last pot of coffee. Run the pieces of the coffee maker through the dishwasher and leave the water reservoir open so that moisture can evaporate. Nothing is worse than coming home to molding grounds in your coffee maker.

Once your vacation home prep is complete, you’ll be able to have an enjoyable, relaxing vacation. Arrive home to a clean house and pick up right where you left off!


For more great cleaning tips, check out the Green Cleaning Expert, Leslie Reichert at greencleaningcoach.com


Tips for Cleaning Patio Furniture

It's time to take out the outdoor furniture and relax outside! The sunshine and warmer weather has us craving grilled dinners on the deck. Whether you’ve had your patio furniture sitting outside all year or hidden away in the basement, you’ll want to give it a complete cleaning before lounging. After all, you want it looking its best before you invite guests over for an evening outside. Here are the cleaning tips you’ll need before kicking your feet up to relax on your patio furniture.

What type of furniture are you cleaning?

Whether you have wood, metal, or plastic furniture, you'll want to start by removing as much loose dirt as you can. You can use a yard blower or even a vacuum cleaner with a reverse blower option to blow the loose dirt off the furniture. Once you remove the outer layer of dust and dirt, you can now give the cushions a true clean.

Wood: Clean with a soft brush before washing it.

Metal: Use a metal brush to remove dirt and rust spots.

Plastic: Wipe with a dry microfiber cloth which will pick up dust, cobwebs, and dead insects.

For fabric cushions and umbrellas, clean with a gentle soap such as dishwashing soap or laundry detergent. Wet all the surfaces with a gentle spray of water, then use a sponge and warm soapy water and wipe over all the surfaces. Rinse immediately so that the soap does not dry on the fabric’s surface. You can repeat the process if there are spots or stains. Hard furniture surfaces can be cleaned with the same warm soapy water. Use a microfiber cloth to get into cracks and crevices. Make sure to rinse the surfaces completely.

*Keep in mind, white plastic outdoor furniture tends to stain from acid rain and general dirt. You can try to remove the dark stains with powdered oxygen bleach. Use the powder like a cleanser. Sprinkle it on a wet surface and scrub with a wet sponge until the stains disappear. Rinse the piece completely.

Keep it Clean All Summer Long

Patio furniture may pick up dirt as summer goes along. Keep it looking good all season long by putting it on a regular cleaning schedule just like your inside rooms. Wipe pollen and dust off weekly so it doesn’t build up on the surfaces. Using your blower, keep the cushions free from dust and pollen as well. You can also wipe your patio furniture with a dry microfiber cloth after it rains to keep it from spotting or having puddles of muddy water dry on the surfaces. By regularly wiping down the furniture, you'll be able to keep that shine for longer and enjoy your time outside on the patio more often.


For more information from DIY green cleaning expert Leslie Reichert, visit greencleaningcoach.com


A Connected Home

Artificial intelligence is an amazing thing. We prefer to ask Siri questions instead of others, Alexa knows our favorite songs and now we have introduced AI into our homes in the form of “Smart Thermostats.” Many of these different smart home devices can learn and respond to temperature preferences with the idea that using a smart thermostat will save money and energy. A more recognizable thermostat, the Nest claims to have saved over 22 billion kilowatt hours of energy since 2011 and some energy companies have given smart thermostats to their customers because of the ability to save more energy than traditional, manual thermostats.

How it works

Smart thermostats are connected via wireless internet in order for users and customers to monitor their energy and temperature and make adjustments through an app. These devices record the patterns and preferences of your home within a few days and program themselves to repeat the settings. Smart thermostats will also recognize when the house is empty and will adjust the temperature to an energy saving level and will record when the house becomes occupied again to return the temperature to normal.


Is the smart thermostat right for you?

  • If you are already considering a smart thermostats, check what system is compatible with the device. Most smart thermostats work with either Google or Amazon.
  • They can save customers about 10-12% on energy bills each year. Some argue that a traditional, manual thermostat is a better choice if you’re staying in a home less than 2 years.
  • Smart thermostats also have the ability to notify customers of needed maintenance or repairs. Notifications are customizable for each issue. This can potentially save on expensive repair bills should the system fail or have a weather related emergency.
  • If you’re considering installing a Smart Home System, make sure the brand will work with your current system and needs.

To read more about saving energy, check out these blogs:

https://maidbrigade.com/blog/save-money-by-using-less-energy
https://maidbrigade.com/blog/green-your-home-by-using-less-energy

Healthy Home Allergen Treatments for Spring

Protecting your home from allergens is simpler than you may think, however, some time and financial investments may need to be made in order to keep your allergy symptoms to a minimum and to reduce medical expenses. Preventative tools and products are worth the investment when it comes to allergies.

The goal is to create a safe, dust-free place where your body and lungs can rest after exposure to air pollution and other impurities. Cleansing the bedroom is a great place to begin since 30% of our lives are spent sleeping. Here are some tools and tips to follow.

The first step is to invest in an allergen-free pillow. Even though down pillows are soft and comfortable, they can aggravate allergies.  You can also find allergen-free pillowcases to create a barrier between you and the pillow.

Mattresses are the perfect breeding ground for dust mites. They love dark, warm and moist conditions. Start by vacuuming your mattress twice a month by using an upholstery tool to vacuum the top and the sides. After vacuuming, mattress covers are the best defense against dust mites. Similar to allergen-free pillowcases, a mattress cover will create a barrier between you and the mattress that will allow air to flow but will keep out dust mites.

The next step is to use a high quality, HEPA filtered vacuum when cleaning your bedroom and home. HEPA stands for high-efficiency particulate air. HEPA filters force air through a fine mesh to trap harmful air particles like pollen, pet dander and dust mites. Vacuuming at least twice a week with a HEPA filtered vacuum will help keep your bedroom dust free. Be careful when choosing a new vacuum as some are marketed as “HEPA-like” and may not be truly HEPA filtered.

Using a HEPA air purifier in your bedroom will also help prevent dust. When you’re out of the home, turn the air purifier to its lowest setting and turn it back up when you return. Purified air will help you sleep soundly and help your lungs rest after fighting polluted air during the day.

Next, dust your bedroom with a soft, large-loped microfiber cloth with a spritz of water. This tool will pick up dust and hold onto it. Aerosol cleaning products contain irritants that can aggravate allergies and should not be used in the bedroom. By using a microfiber cloth, you can clean your bedroom quickly without using toxic chemicals.

Fabric curtains and draperies harbor dust mites. You can either remove them completely and replace them with non-fabric blinds or shutters, or remove them at least twice a month and place them in the dryer on a hot setting. The heat will kill dust mites and remove dust and dirt.

Although this last tip is a major investment, it will help reduce allergens, dirt and germs in your home. Remove wall-to-wall carpeting in your room and replace with hardwood flooring. Carpets absorb dust and hold onto it. It’s very difficult to rid carpet of dust, dirt and allergens completely. Once carpet has been removed, you can use small area rugs. They will need to be placed in the dryer at least once a week to remove dust.

Keeping dust and dirt to a minimum within your home is the real goal when protecting yourself from allergens. These tips and tools will help reduce dust and allergens within your home and will lead to decreased medical costs and better health.

For more information on how you can protect your home safely, visit Leslie's website!

Celebrate Our Earth This April

This year, we celebrate the 48th Earth day across the world. In 1969, Senator Gaylord Nelson decided to create an official day to celebrate the Earth and raise awareness of the environmental concerns he had after the devastating oil spill in Santa Barbara that year. The first Earth Day was celebrated on April 22, 1970. An incredible 20 million people attended celebrations and festivals around the country. It was a national event that was held to demonstrate support for the environment. The stage was set by Rachel Carson’s Silent Spring Book which raised public awareness and a concern for all living organisms. The book was sold in 23 countries and began a worldwide movement. It shared Carson’s compassion for the future of the planet and all living things on it. Since then, Earth Day is recognized every year across the world. At Maid Brigade, we’re proud to keep our earth healthy by using green cleaning products that are safe for the environment.

In 1990, a campaign began which would make Earth Day a worldwide event. This brought the environmental issues to a world stage that included 122 countries and over 200 million people. EarthDay.org states, "Earth Day is the largest secular observance in the world, celebrated by more than a billion people every year, and a day of action that changes human behavior and provokes policy changes.”

Earth Day will be celebrating its 50th anniversary in 2020.  There are ways you can celebrate this special day in your own home.

Here are some things you can do:

  • Plant a tree in your backyard
  • Check the air pressure in your tires and make sure they are at the right levels for the best gas mileage.
  • Donate your clothing instead of throwing them out.
  • Try growing your own organic garden. You can start with an organic herb garden.
  • Wash your laundry in cold water and dry them on a line.
  • Lower the temperature on your hot water heater by 5 degrees.
  • Buy energy efficient light bulbs for your house.
  • Have an energy audit done in your home. This audit can be free.
  • Invest in a reusable coffee cup.
  • Use earth-friendly cleaning products.
  • Switch your bills to e-bills so you use less paper.
  • Check your faucets for leaks.

Be on the lookout for more of our earth-friendly tips this month!

For more green cleaning and green living information, check out Leslie’s website.


At home allergy treatments

Dealing with dust allergies is a battle that affects many people, especially during the spring. To win the battle you need strategies that will help reduce the triggers in your home. Creating safe spaces where your lungs can “rest” is the key. Allergists refer to our immune system as a bucket that fills up over time. When our buckets become full we deal with allergic reactions. Each of us have different sized buckets, but we all need places in our homes where we can let our immune systems rest from dust, pollutants and irritants. Here are some things you can do in your home to create a clean and safe environment.

Cleaning more often – A simple, inexpensive step is to dust and vacuum more often. People in Europe use their vacuum to do most of their dusting. They use the dusting brush and go over all the wood and fabric surfaces with the vacuum. This makes cleaning quick and easy as well as very efficient. The vacuum captures and holds the dust. Wiping the dust with a dry cloth can put the allergens back into the air which defeats the purpose of cleaning.

Plants – Indoor plants are not only beautiful to look at, they also help clean the air we breathe in our homes. In fact, NASA calls plants “nature’s life support system”. By adding a potted plant like a Peace Lilly or Spider Plant to your home you will be naturally removing allergic toxins in your air. Place plants in the most used areas of your home, such as the living room and bedrooms..

Air purifiers – Our indoor air has been shown to be  much more polluted than the air we breathe outdoors. We spend 90 percent of our time indoors, so it’s important that we clean it constantly. During most of the year we keep our windows closed to keep out the cold or heat. With limited air exchange we end up breathing the same air over and over again. Using a HEPA rated air purifier throughout the house will remove the allergens and keep pollutants to a minimum.

Mattress and pillow covers – We spend more than a third of our lives sleeping so an important place to focus on air quality is in the bedroom. Starting with your bed, find encasement covers for your pillows and mattresses to keep dust mite allergens away from your body. For some allergy sufferers, investing in hypoallergenic pillows and bedspreads may be the best solution. Down pillows are soft and very comfortable but can trigger allergies while you are sleeping.  Wash pillows and blankets often in very hot water and dry on a hot setting to kill dust mites and remove their droppings

Remove stuffed animals and draperies – Dust accumulates in fabrics. Since we don’t dust or wash our draperies every time we clean, they tend to collect a tremendous amount of dust which can be a trigger for those suffering from dust allergies. Stuffed animals also collect dust in a child’s room and can trigger an allergic or asthmatic reaction. The safest alternative is to completely remove drapes, curtains and stuffed animals - especially in the bedroom. Instead, use hard window treatments such as window blinds and shutters. If your child has trouble parting with their favorite stuffed animal, place it in a pillow case once a week and wash it in hot water and dry on a hot setting.

Considering hard flooring vs carpeting – Carpeting, like draperies, are dust magnets. Even the best vacuum can’t remove all the dust and dander from a carpet. Allergist recommend removing all the carpeting in a home and replacing it with hard wood flooring.  Hard floors are much easier to keep clean and the dust can be kept to a minimum. However, removing carpet throughout a home and replacing with hardwoods can get expensive. For a more economical solution, we recommend a professional carpet cleaning to reach the harmful dust mites hidden below the surface.

HEPA rated vacuum – Make sure you have a high-quality vacuum that has a HEPA rated filtering system. There are many different vacuums advertising they are good at removing allergens, but make sure you research the brand before making a purchase. There are only a few vacuums that are rated HEPA. Remember that you want to look for a vacuum that is rated HEPA not a vacuum that uses HEPA rated filters. A vacuum rated HEPA cleans the surfaces it touches as well as the surrounding air you breathe.

Dust mite sprays on furniture – Some people ask if dust mite removal sprays work and the answer is yes, but you need to be careful should someone in your home also have a chemical sensitivity. Spraying your fabric furniture with these sprays will kill the dust mites living in them, but they also add another type of pollutant to your air.

Keep humidity low – Dust mites like dark, moist environments so keeping the humidity low in your home is a great way to combat dust mites naturally. Use a dehumidifier all year round to keep the moisture in the air below 50%.

Keep pets out of the bedrooms – We all love our pets but their dander can be a trigger for someone dealing with allergies or asthma. Keep pets out of the sleeping area of someone dealing with allergies.

For more green cleaning and green living information, check out Leslie’s website.

For other allergy and asthma health tips, read these blogs:

https://maidbrigade.com/blog/support-your-immune-system
https://maidbrigade.com/blog/5-tips-to-get-you-through-an-earlier-allergy-season

How to treat head lice

A case of lice does not reflect a lack of cleanliness or personal hygiene as some would like to think.  Head lice cause itching and discomfort but are not found to transfer dangerous diseases in the United States like lice in other countries. Here are answers to the most common questions about lice:

How can I get infected with lice?

Head lice can be transferred by sharing things like brushes, combs and even hats.  They can transfer from direct head-to-head contact and lice can transfer from pillows and sheets too. But there is no evidence that lice are transferred from pets to humans.

Do head lice jump from person to person?

Head lice don’t have the body type to jump.  They are transferred only by direct contact.

How long do lice live?

Lice can only live 24 hours without a host, but with a host they can live up to 30 days.  Lice reside in pillows and sheets and return to the host for feeding.  Lice, like bed bugs, bite their hosts for blood. Their bites are annoying and itchy but are not dangerous unless they get scratched and infected.

What’s the best way to rid lice from hair?

Some feel that they should treat for lice even when they only suspect that there is an infestation.  There are no shampoos that totally kill head lice and their nits so manual removal is the only solution. Wash hair with a specialized, over-the-counter shampoo, rinse completely and then go through hair with a nit comb.  Remember that the shampoo is extremely strong and toxic so overuse is not recommended.

Two different types of louse combs used when treat of head lice.

How do I remove lice from my home?

Removing lice from your home is an extremely labor intensive project.  All fabric furniture must be completely vacuumed. Pillows and stuffed animals should be put into a garbage bag for 10 days to make sure that any nits that hatch in that time period die, separated froma host. Other items can be put into the dryer for 30 minutes on a high heat.  All sheets, pillows and comforters should be washed and dried on a hot setting. The entire house should be cleaned before treating the infected person.

How do I know if I really have head lice?

Persistent itching can be indication that an infestation exists. Professionals use a magnifying glass or a florescent light although some feel the florescent light highlights hair lint as well as nits and confuses the diagnosis.  Regardless, lice are normally visible with a magnifying glass.

For more green cleaning and green living information, check out Leslie's website.

Holiday stain guide

Holiday stains are like little presents no one intended to give you. But don’t stress, we’ve got a stain guide that will help you get through the holidays - stress and stain free. Download it free, then post it in your laundry room so it will be at your fingertips if there's a fumble.

download-holiday-stain-guide

Happy Holidays, from Maid Brigade!


This infographic was created in collaboration with Leslie Reichert, our DIY green cleaning expert. To read more from Leslie, visit greencleaningcoach.com.

How to deep clean the guest room

Preparing for holiday visitors forces us to address chores and projects we kept postponing when the weather was warmer and the days were longer. Even during this busy time of year, it's possible to get things checked off “the list” whether routine maintenance or improvement project. But it’s important to start early, so it can all happen before the big day your holiday guests arrive. Like the guest room. Deep cleaning the guest room ahead of time will relieve stress as you get closer to their arrival.

Deep cleaning the guest room may take a few hours but if you divide it into small 15 minute jobs, it that can be something that you can work on throughout the week. Find a timer or use a smart phone to keep track of how long you are cleaning.  My motto is:” I can do anything for fifteen minutes”.

Methodical deep cleaning will make the process go quickly and efficiently. This generally means to start at the ceiling and finishing with the floor, moving around the room clockwise, to make sure you cover every spot and cover it only once. Although there are some exceptions to this rule (see below).

Step 1: LIGHTS – Start with cleaning the lighting fixtures.  Remove the covers of ceiling and wall fixtures, taking ample safety precautions if using a step ladder. For light to medium dust, clean the fixture in the dishwasher. If the fixture has a thick coat of dust, fill up the sink with warm soapy water and give it a good scrub by hand. Ceiling fans can be easily cleaned with an old pillowcase. With the pillow case and a damp microfiber cloth, climb the step ladder, place the pillowcase over the dusty fan paddle and pull the dust off and into the pillowcase. Repeat this process on each of the paddles.

deep-clean-the-guest-room

Follow by dusting each blade with the microfiber cloth to make sure any remaining residue is gone. After you have safely descended the ladder, take the pillowcase outside, turn it inside out and shake out the dust. Launder the pillowcase with soiled cleaning cloths and store with clean cloths so it will always be handy.

Step 2: WALLS – Instead of washing the walls use a microfiber mop and dust them.  Use a microfiber mop cover and a spray bottle of water. My favorite microfiber mop is called a Duop Mop has a ball joint that easily clean large open areas with just a wipe. Place the dry microfiber mop cover on the mop and spritz it lightly with water (never spritz water or cleaner directly on your walls or you may permanently spot them). Start at the base of the wall and clean up to the ceiling (walls are the one area where you will clean bottom to top to prevent staining them). Then wipe the dry mop head over the ceiling to collect cobwebs and dust.

Step 3: WOODWORK – Use a damp microfiber cloth to wash woodwork and baseboards. Start with the tops of door jams and windows, follow with the trim around the windows, ledges and sills and finish with the baseboards and toe molding. Don’t worry about smearing the glass on the windows, you will clean windows in a latter step.

Step 4: WINDOW TREATMENTS – Remove drapes and place them in the dryer to remove dust. Don’t bother placing them in the washer.  If they have a thick layer of dust, put a damp towel in the dryer with the curtains. This will remove the dust and leave them wrinkle free.

ow-to-dust-window-blinds


Dust blinds by fulling closing them, wiping horizontally (with the blind slats) from top to bottom with a dampened microfiber cloth. Then, reverse the direction of the slats to the opposite fully closed position and completely dust this side in the same pattern.

dusting-blinds

Step 5: WINDOWS – Using a fine woven microfiber cloth and a bucket of hot water, clean the glass on the windows - inside and out. You want your windows to be crystal clear when your guests wake in the morning.

Step 6: BED LINENS – Strip the bed and place the bedspread, comforter and pillows in the dryer on a high heat. This will remove dust and also kill dust mites. This is a perfect solution for those guests that could have dust and dust mite allergies. Wash all the sheets using a fragrance free laundry soap. Your guests may be sensitive to fragrances, so using a simple soap to clean the sheets will let them have a peaceful night’s sleep.

Step 7: DUSTING – Dust all the furniture with a damp microfiber cloth. Move the furniture away from the walls and clean behind and underneath them. Using a crevice tool on the vacuum, remove built up dust in the tight spots where the carpet meets the wall.  Use the soft upholstery brush to clean the outside edges of hardwood floors.

Step 8: FLOORS – Vacuum carpets by starting in the farthest spot and gradually working your way out of the room. Use the vacuum’s pattern to make sure you have covered every inch of carpet. Hardwood floors can be cleaned with the Duop Mop. Start with a damp mop head and a spray bottle of a gentle hardwood floor cleaner. Use my “bucketless mopping” technique, spraying and mopping as you go, for fuss-free floors that look like glass.

Step 9: COMFORT BASICS – Help your guests feel at home by attending to basic needs. Like placing bottled water on their night stand.  Make sure the room has an alarm clock set to the current time. Add a luggage rack or ottoman so suitcase contents are most accessible. Leave a charging cube in a convenient outlet so guests can power devices overnight.

deep-clean-the-guest-room-for-holidays

Step 10: COMFORT EXTRAS – Purchase a few new magazines on subjects they find interesting and array them on the dresser. Place some fresh flowers and some hard candies on the dresser so guests will feel like they are staying in a 5-star hotel.

Smoke alarms: How to clean them, when to maintain them, where to install them

Smoke alarms: a How-to Guide

A fire fighter once told me, “The best way to survive a fire is to prevent it. If you can’t prevent it, you want to use early detection as your shield.”  Early detection means having smoke alarms properly installed throughout your home and maintaining them regularly. These small devices will save your life, but only if you keep them functioning properly.  Smoke alarms should be cleaned and maintained on a regular basis. The change to daylight standard time is one good time for this simple but important task.

How to clean your smoke detectors

First, remove the smoke alarm unit from the ceiling or wall. (Be sure to use a sturdy ladder, don’t climb higher than the ladder cautions, and if someone else cannot be home while you do this put your phone at the base of the ladder before you climb. Climb down and off the ladder before proceeding with the following steps.)

Dust the outside of the smoke detector with a dry microfiber cloth. Remove the battery and plan to dispose of it safely. Use a paint brush or your vacuum’s upholstery tool to clean the interior and the air vents of the unit. Be gentle in order to avoid causing damage to the circuit board. Compressed air works well too but be careful around electric components.

Connect a new battery securely, close the lid carefully, and test the unit. If all is well, replace the unit on the wall or ceiling, taking precaution for your safety. Repeat this process for every smoke detector in your home. Read the following pointers before starting this task:

  • Make sure to never submerge any part of the smoke detector in water
  • Don’t use any type of liquid cleaning chemicals
  • Wipe the entire outside with a microfiber cloth
  • Be sure the air vents are well cleaned for good air flow

Some other things to consider about taking care of your smoke alarms are...

When to replace smoke detector batteries

Most people don’t realize that the batteries should be replaced TWICE a year.   An easy way to keep on track with this is to time it with daylight savings time and daylight standard time. When you set your clocks back or forward, replace the smoke alarm batteries on the same day. So when we “fall back” to daylight standard time on the first Sunday of November (11/5/2017), change all smoke alarm batteries and clean and test each unit.

Testing your smoke alarm unit

Test the smoke detector once the new batteries are installed. Simply push the red button down until it starts to beep. It will continue to beep a few times and then reset itself. Once reset it’s ready to be returned to its mounting frame.

If testing a hard wired system that’s connected directed to the fire department or a security company, make sure to let them know you’re cleaning and testing the system. They will take you off line to prevent a false alarm. Call them back when you’re finished to be put to active status.

Chirping smoke alarm

If it chirps, follow these steps:

  • Remove the smoke alarm unit from the ceiling.
  • Remove the battery.
  • Hold the test button down for a few seconds to drain the smoke alarm of any power left in the system.
  • Hold the test button down for another 15 seconds which will reset the unit and clear out the reason for it chirping.
  • Clean it out with canned compressed air or your vacuum cleaner.

Location and lifespan of smoke detectors

Every bedroom should have a smoke alarm unit as well as the hallways outside of the bedrooms.  Common areas like living rooms and dens should all have smoke alarms.  Each stairway should also have one. And don’t forget the basement and the garage.  Follow the manufacturer's instructions for installation. All smoke alarm units should be replaced every ten years.

Some smoke detectors use lithium batteries which can last up to 10 years, but 9V and other battery types are still common. Be sure you know what your smoke alarms need and stock up next time you shop so you’ll be prepared to follow these steps when you change your clocks back to daylight standard time. Remember what the fireman said about early detection…


For more information from DIY green cleaning expert Leslie Reichert, visit greencleaningcoach.com