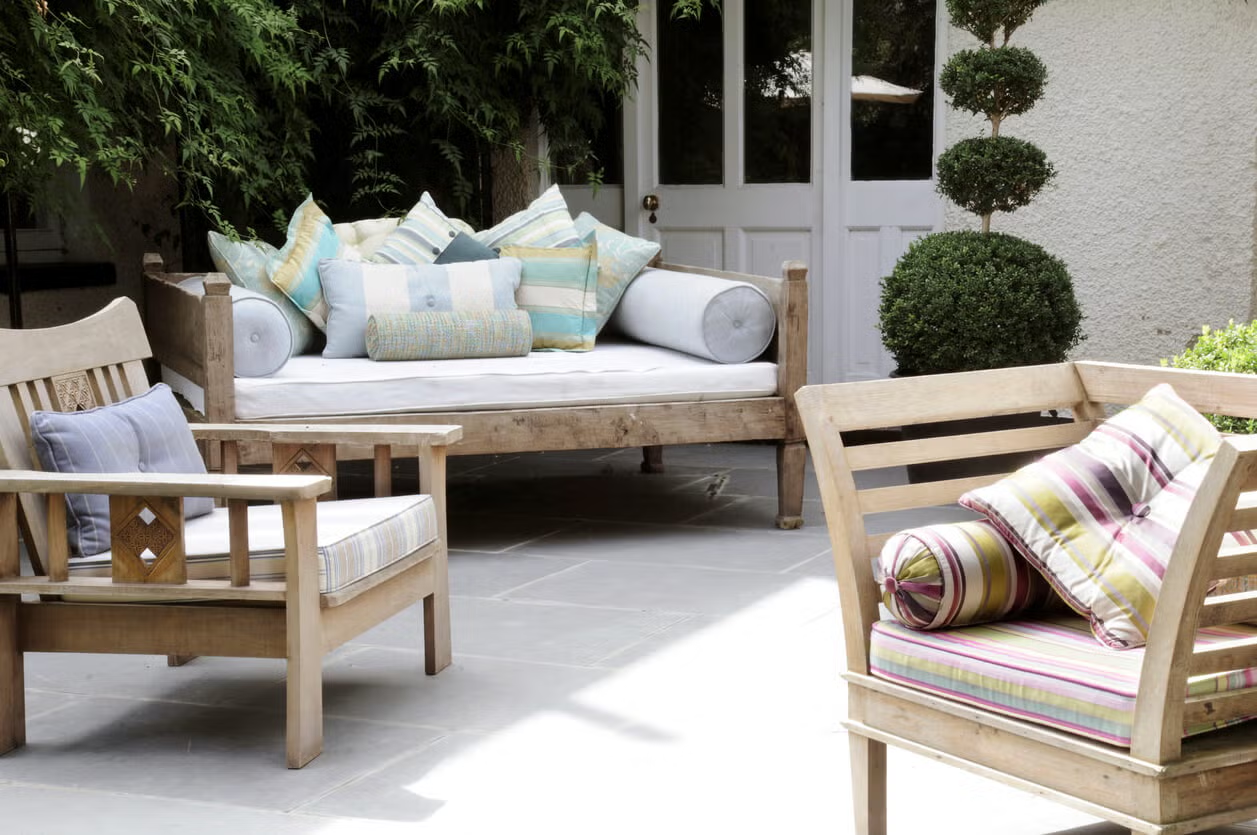
It's time to take out the outdoor furniture and relax outside! The sunshine and warmer weather has us craving grilled dinners on the deck. Whether you’ve had your patio furniture sitting outside all year or hidden away in the basement, you’ll want to give it a complete cleaning before lounging. After all, you want it looking its best before you invite guests over for an evening outside. Here are the cleaning tips you’ll need before kicking your feet up to relax on your patio furniture.
What type of furniture are you cleaning?
Whether you have wood, metal, or plastic furniture, you'll want to start by removing as much loose dirt as you can. You can use a yard blower or even a vacuum cleaner with a reverse blower option to blow the loose dirt off the furniture. Once you remove the outer layer of dust and dirt, you can now give the cushions a true clean.
Wood: Clean with a soft brush before washing it.
Metal: Use a metal brush to remove dirt and rust spots.
Plastic: Wipe with a dry microfiber cloth which will pick up dust, cobwebs, and dead insects.
For fabric cushions and umbrellas, clean with a gentle soap such as dishwashing soap or laundry detergent. Wet all the surfaces with a gentle spray of water, then use a sponge and warm soapy water and wipe over all the surfaces. Rinse immediately so that the soap does not dry on the fabric’s surface. You can repeat the process if there are spots or stains. Hard furniture surfaces can be cleaned with the same warm soapy water. Use a microfiber cloth to get into cracks and crevices. Make sure to rinse the surfaces completely.
*Keep in mind, white plastic outdoor furniture tends to stain from acid rain and general dirt. You can try to remove the dark stains with powdered oxygen bleach. Use the powder like a cleanser. Sprinkle it on a wet surface and scrub with a wet sponge until the stains disappear. Rinse the piece completely.
Keep it Clean All Summer Long
Patio furniture may pick up dirt as summer goes along. Keep it looking good all season long by putting it on a regular cleaning schedule just like your inside rooms. Wipe pollen and dust off weekly so it doesn’t build up on the surfaces. Using your blower, keep the cushions free from dust and pollen as well. You can also wipe your patio furniture with a dry microfiber cloth after it rains to keep it from spotting or having puddles of muddy water dry on the surfaces. By regularly wiping down the furniture, you'll be able to keep that shine for longer and enjoy your time outside on the patio more often.
For more information from DIY green cleaning expert Leslie Reichert, visit greencleaningcoach.com
Holiday stains are like little presents no one intended to give you. But don’t stress, we’ve got a stain guide that will help you get through the holidays - stress and stain free. Download it free, then post it in your laundry room so it will be at your fingertips if there's a fumble.
Happy Holidays, from Maid Brigade!
This infographic was created in collaboration with Leslie Reichert, our DIY green cleaning expert. To read more from Leslie, visitgreencleaningcoach.com.
Preparing for holiday visitors forces us to address chores and projects we kept postponing when the weather was warmer and the days were longer. Even during this busy time of year, it's possible to get things checked off “the list” whether routine maintenance or improvement project. But it’s important to start early, so it can all happen before the big day your holiday guests arrive. Like the guest room. Deep cleaning the guest room ahead of time will relieve stress as you get closer to their arrival.
Deep cleaning the guest room may take a few hours but if you divide it into small 15 minute jobs, it that can be something that you can work on throughout the week. Find a timer or use a smart phone to keep track of how long you are cleaning. My motto is:” I can do anything for fifteen minutes”.
Methodical deep cleaning will make the process go quickly and efficiently. This generally means to start at the ceiling and finishing with the floor, moving around the room clockwise, to make sure you cover every spot and cover it only once. Although there are some exceptions to this rule (see below).
Step 1: LIGHTS – Start with cleaning the lighting fixtures. Remove the covers of ceiling and wall fixtures, taking ample safety precautions if using a step ladder. For light to medium dust, clean the fixture in the dishwasher. If the fixture has a thick coat of dust, fill up the sink with warm soapy water and give it a good scrub by hand. Ceiling fans can be easily cleaned with an old pillowcase. With the pillow case and a damp microfiber cloth, climb the step ladder, place the pillowcase over the dusty fan paddle and pull the dust off and into the pillowcase. Repeat this process on each of the paddles.
Follow by dusting each blade with the microfiber cloth to make sure any remaining residue is gone. After you have safely descended the ladder, take the pillowcase outside, turn it inside out and shake out the dust. Launder the pillowcase with soiled cleaning cloths and store with clean cloths so it will always be handy.
Step 2: WALLS – Instead of washing the walls use a microfiber mop and dust them. Use a microfiber mop cover and a spray bottle of water. My favorite microfiber mop is called a Duop Mop has a ball joint that easily clean large open areas with just a wipe. Place the dry microfiber mop cover on the mop and spritz it lightly with water (never spritz water or cleaner directly on your walls or you may permanently spot them). Start at the base of the wall and clean up to the ceiling (walls are the one area where you will clean bottom to top to prevent staining them). Then wipe the dry mop head over the ceiling to collect cobwebs and dust.
Step 3: WOODWORK – Use a damp microfiber cloth to wash woodwork and baseboards. Start with the tops of door jams and windows, follow with the trim around the windows, ledges and sills and finish with the baseboards and toe molding. Don’t worry about smearing the glass on the windows, you will clean windows in a latter step.
Step 4: WINDOW TREATMENTS – Remove drapes and place them in the dryer to remove dust. Don’t bother placing them in the washer. If they have a thick layer of dust, put a damp towel in the dryer with the curtains. This will remove the dust and leave them wrinkle free.
Dust blinds by fulling closing them, wiping horizontally (with the blind slats) from top to bottom with a dampened microfiber cloth. Then, reverse the direction of the slats to the opposite fully closed position and completely dust this side in the same pattern.
Step 5: WINDOWS – Using a fine woven microfiber cloth and a bucket of hot water, clean the glass on the windows - inside and out. You want your windows to be crystal clear when your guests wake in the morning.
Step 6: BED LINENS – Strip the bed and place the bedspread, comforter and pillows in the dryer on a high heat. This will remove dust and also kill dust mites. This is a perfect solution for those guests that could have dust and dust mite allergies. Wash all the sheets using a fragrance free laundry soap. Your guests may be sensitive to fragrances, so using a simple soap to clean the sheets will let them have a peaceful night’s sleep.
Step 7: DUSTING – Dust all the furniture with a damp microfiber cloth. Move the furniture away from the walls and clean behind and underneath them. Using a crevice tool on the vacuum, remove built up dust in the tight spots where the carpet meets the wall. Use the soft upholstery brush to clean the outside edges of hardwood floors.
Step 8: FLOORS – Vacuum carpets by starting in the farthest spot and gradually working your way out of the room. Use the vacuum’s pattern to make sure you have covered every inch of carpet. Hardwood floors can be cleaned with the Duop Mop. Start with a damp mop head and a spray bottle of a gentle hardwood floor cleaner. Use my “bucketless mopping” technique, spraying and mopping as you go, for fuss-free floors that look like glass.
Step 9: COMFORT BASICS – Help your guests feel at home by attending to basic needs. Like placing bottled water on their night stand. Make sure the room has an alarm clock set to the current time. Add a luggage rack or ottoman so suitcase contents are most accessible. Leave a charging cube in a convenient outlet so guests can power devices overnight.
Step 10: COMFORT EXTRAS – Purchase a few new magazines on subjects they find interesting and array them on the dresser. Place some fresh flowers and some hard candies on the dresser so guests will feel like they are staying in a 5-star hotel.
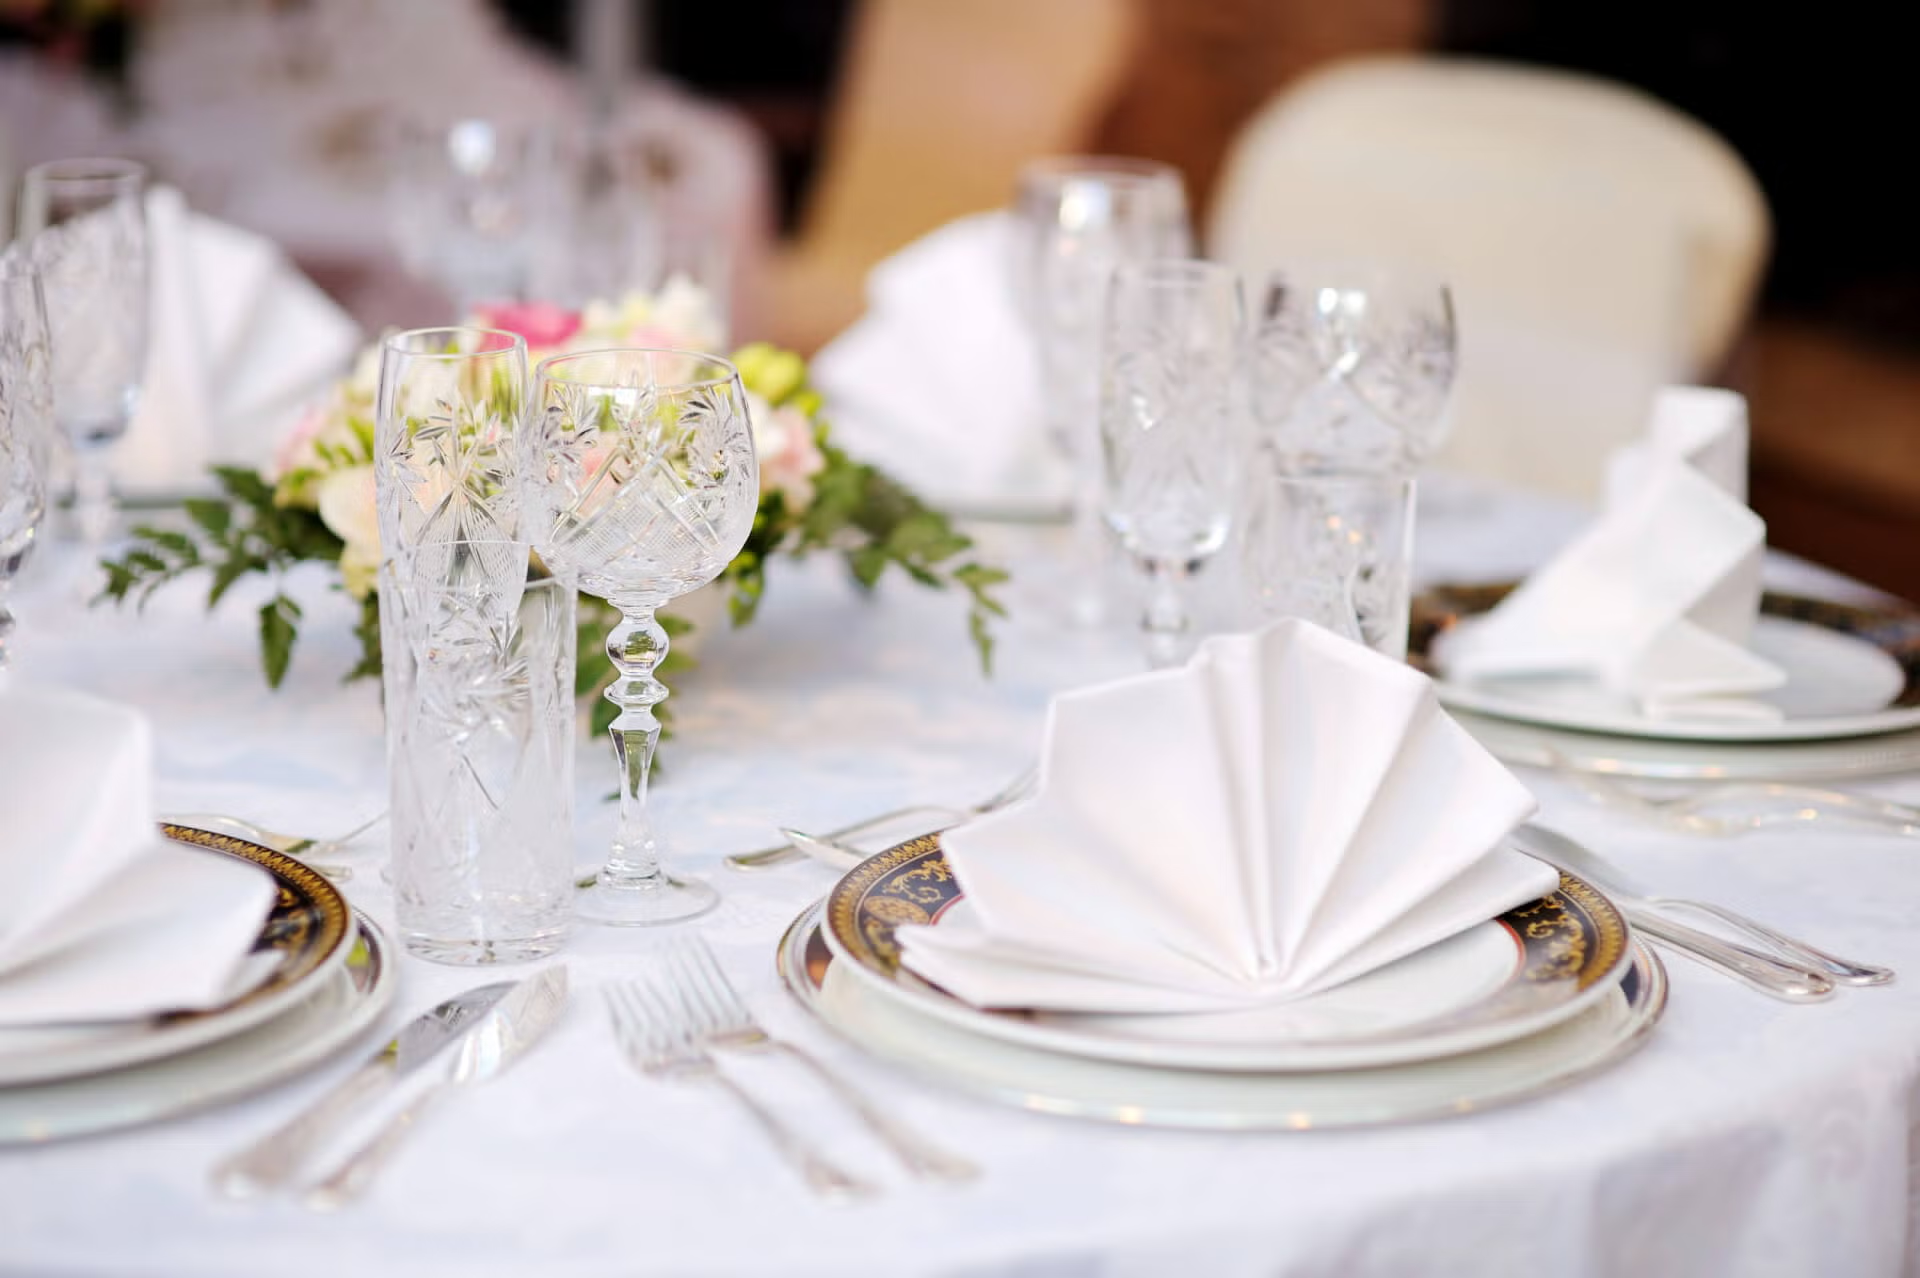
October marks the start of the entertaining season. Nothing makes entertaining easier than having all your tablecloths, table runners and cloth napkins cleaned and ready for use. Knowing how to clean table linens and store them correctly is the key.
Washing
Start by knowing exactly what material your table linens are. Fifty years ago you could assume your table cloth was either linen or cotton but today a variety of other materials are used. Check to see if there is a care label anywhere on the table cloth and follow it exactly. If there are no care instructions, then just place it in cool water and hand wash it with a gentle old fashioned laundry soap. Rinse it thoroughly and do not use a fabric softener, as it will discolor the fabric in storage. Let it hang dry and press with a cool iron.
Stain removal
Knowledge is power when trying to remove a stain. There are three major stains that occur on a table cloth or cloth napkins. The first is red wine. Wine tends to drip down the edge of the bottle or glass and leave a ring on the table cloth. This stain can easily be removed with hydrogen peroxide. Treat the stain as soon as possible. You can even dab the area with the hydrogen peroxide while it’s still on your table. The hydrogen peroxide will start to work and fade the stain. Place the tablecloth in a cool soaking bucket and add more hydrogen peroxide onto the stained area. Leave it overnight. Spot wash the area with a gentle laundry soap and keep working at the stain until it disappears. Place the tablecloth in the washer with a gentle laundry soap on a cool water setting. Use a permanent press setting if it’s available. After the rinse cycle, remove the tablecloth and let it air dry. If the stain persists, repeat the entire process. Patience will win when tackling a red wine stain.
Another typical stain on a tablecloth is greasy oil. The stain is tricky, and needs to be addressed before you put the tablecloth into the wash. Pre-treat the oily spot with rubbing alcohol. Let it sit for 15 minutes then go over the spot with a pure bar soap. Do not use a colored deodorant soap for this job. The rubbing alcohol will break down the oil and the soap will surround it and pull it out when you rinse the fabric. Place the treated table cloth into the washer and wash on a cool water setting. Let the tablecloth air dry and check the spots. As long as the table cloth does not go in the dryer you can continue to treat the spots until they have disappeared.
The third spot that occurs on cloth napkins is lipstick. Lipstick should be treated like the oil stains above but before and during your treatment you want to dab the area with a clean white cloth so as not to spread the lipstick into the surrounding area. Start by dabbing the stain with the cloth treated with rubbing alcohol. Continue to dab it until you don’t see any of the color coming out of the fabric. Then pour the alcohol on the spot and let it sit for 15 minutes. The alcohol will break down the oil. Before rubbing the bar of soap over the stain, dab the area again to see if there’s any more color coming from the fabric. If you get more lipstick on the clean white cloth, repeat treating the area with the rubbing alcohol. Once the white cloth is no longer pulling color from the cloth you can proceed by rubbing the bar soap of the area and putting the napkin into the washer. Make sure to check that the stain is totally gone before putting the napkin in the dryer.
Overall yellowing
If you have an heirloom tablecloth that is starting to yellow or fade, add some oxygen bleach to the wash cycle to brighten the colors and remove the dingy look. Remember to avoid fabric softeners in the rinse cycle as they can affect the coloring of the table cloth.
Ironing
It's much easier to iron a damp tablecloth is much easier than a dry one. Plus, it gives your table cloth a nice crisp look. Remove the tablecloth from the rinse cycle and let it air dry until it’s just damp. If any areas get too dry, spritz them with plain tap water in a spray bottle. If you're feeling nostalgic, they still make the laundry sprinkler head you can place in a glass bottle.
Check your iron’s plate and make sure it’s clean and free from burn marks. There are commercial cleaning products you can use or try toothpaste. Wipe it completely clean before you start your ironing.
Check the steam mechanism as well. You can avoid mineral spots by using distilled water. Test the steam system on an old t-shirt or rag before starting to iron your tablecloth.
Start ironing on the wrong side of the tablecloth first. Once that side is completely finished, turn the tablecloth over and iron the front side. Avoid starches if possible as they can leave a film on the iron and the fabric. If you must use them, spray the area you are ironing with a light mist. More is not better in this case.
The iron should be on a medium setting to start. If the wrinkles aren’t being totally ironed out, you can slowly turn up the heat of the iron. Do this in small steps so that you don’t damage the tablecloth with too much heat.
Leave the ironed tablecloth out until it’s completely cooled down. You want to fold it so that it will fit on a padded hanger. Then cover it with a dark garbage bag that is open on the bottom and hang it in a cool, dry closet. The dark bag will protect it from light damage.
Storage
Hang your tablecloths on a padded hanger and store them in a clean, dry closet. Avoid hanging them in a basement or attic as they will tend to absorb the smells from those areas. It’s easiest if you store them in the room where they will be used. Then you don’t have to search the entire house when you need them.
Cloth napkins and place mats should be stored in a drawer and wrapped in a light paper. This will keep them clean, fresh and free from dust.
Table runners should also be hung on a padded hanger. You can wrap them in a plastic dry cleaning bag or a trash bag to keep it free from dust. Don’t seal the bag at the bottom. You want air to be able to flow around it.
A great way to store heirloom linens as well as napkins and place mats is to use a cardboard wrapping paper tube. Wrap the linens around the tube and store them in an airtight plastic container. Wrapping them around the tube will prevent wrinkles and fold marks. You can use a soft piece of ribbon or a rubber band to hold them in place.
It's so nice to be able to share a holiday meal with family and friends. And with beautifully clean, fresh table linens, the meal will seem even more special.
Deep cleaning the kitchen is a large undertaking with many smaller projects that need your attention. Try to break down this deep cleaning project in to smaller bites so you don’t become overwhelmed. That's why we used two blogs to cover how to deep clean the kitchen and everything in it. If you missed Part 1, click here.
How to clean the oven
Before starting to clean the oven, do a little research and find out if you have a self-cleaning oven and if it still works. If you’ve ever used oven cleaner or abrasives inside your self-cleaning oven interior, you may have damaged the oven walls, making the self-cleaning feature less effective. Manual cleaning can also damage the fiberglass gasket that seals the door. So the self-cleaning option is always the best if you can use it.
If manual cleaning is necessary, the safest and most effective method uses baking soda. When cleaning the walls and floors of your oven, make a paste of baking soda and water and “paint” all the oven surfaces. Fill a spray bottle with distilled white vinegar and spray the surfaces covered with the paste. When the surfaces are sprayed with the vinegar the baking soda will foam up. The vinegar is activating the lifting action of the baking soda which will remove baked on debris. Continue to spray the oven walls and floors every 10 to 15 minutes. Let the paste sit for at least an hour and then wipe the surfaces clean. Rinse the oven walls with warm water and a microfiber cloth.
Oven racks can be cleaned with Barkeeper’s Friend and a sponge. If you have some really difficult spots you can use a pumice stone to remove them.
How to clean the stove top
Gas burners – Use the same technique used inside the oven on gas top grates. Place the grates in warm water mixed with a de-greasing dish detergent and let them soak for 30 minutes. Rinse them off and “paint” them with the baking soda mixture. Spray them with the distilled white vinegar and let them sit for an hour or so. Rinse them with warm water and a microfiber cloth. Scrub difficult spots with Barkeeper’s Friend or the pumice stone.
Electric burners – The drip pans on an electric stove can be very difficult and time consuming to clean. If there’s a heavy build-up of baked on food and grease, you may want to just invest in some new ones. But if there’s only mild to moderate build-up there are a few options to tackle the job. Remove the drip pans and place them in hot water and dish soap so they can soak for at least an hour. Then place them in a zip lock bag filled with distilled white vinegar and let them soak overnight. The next day remove them and scrub the tough spots with some Barkeeper’s Friend and a green scrubby sponge. Don’t use a pumice stone on the drip pans as it will scratch.
Glass stove top – The best trick to clean burn spots is a flat razor. Use a new razor and make sure to hold it at a 45-degree angle. Scrape underneath the build up until you feel the razor gliding over the glass. Use some baking soda and a scrubby sponge to loosen stubborn spots and then use the razor to remove them.
How to clean the dishwasher
It seems a little strange to clean something that cleans, but there are two parts of your dishwasher that need your attention so it will work better. The first spot is the food trap that’s found in the base of the dishwasher. This trap captures food, debris and even pet hair. The trap is either a mesh filter or a tray that can be completely removed and cleaned. The food trap can be the cause of a smelly dishwasher. Food that gets caught in the trap will continue to breakdown and rot with each wash cycle which is why it needs to be a part of your deep cleaning.
The other spots that need to be deep cleaned are the seals around the door, the soap dispenser and the rinse-aid compartment. Dish washing detergent can build up on each of these seals and create a film that prevent the dishwasher from being water tight. Wiping all these areas with distilled white vinegar will remove the “ick” and keep the seals working the way they should.
How to clean the garbage disposal
There is nothing worse than a stinky disposal. Rotting food on the disposal blades is usually the culprit. You can remove this buildup by placing ice cubes or frozen lemon peels into the disposal and then running it with cold water until clear. The other smelly spot in your disposal is the underneath of the rubber splash guard. This can be cleaned with baking soda and a toothbrush. Remove the rubber splash guard and sprinkle the guard with baking soda and scrub it with the stiff brush. Rinse with soapy water and replace the rubber guard.
How to clean the kitchen sink
Using a stiff toothbrush, scrub around the faucet and also where the sink connects to the counter top. If you have a sink that is mounted under the counter top, there is a hidden rim that needs your attention. Use a toothbrush and baking soda to get up underneath this rim. The area gets splashed with food and soap that can build up with mold and mildew.
Follow these tips every quarter and the job becomes easier over time using these tried-and-true techniques that are the most effective and efficient tips on deep cleaning the kitchen.
When we use the phrase “high traffic area” when talking about our home, we usually think of places that get a lot of foot traffic. But there are also "high touch" surface areas, ones that get touched a lot.
Surveys have shown that many people don’t wash their hands after using the bathroom, working around food or after coughing. A study done by the Hygiene Council of the UK found that 25% of their population handle food after “stroking their pets” without considering disinfecting their hands after they have touched them.
You may not realize it but there are some germs that can live for months in your home. C. difficile has shown to survive up to five months and Norovirus can survive for days or weeks on a hard surface.
So it's important that high touch areas be cleaned and sanitized properly to prevent germs getting transferred from one person to another. Read on to learn how to clean germs from high touch areas.
Bathroom
Let’s start in the bathroom which is where you’d expect to find the germ-iest places in a home. Research shows that most people don’t use basic hygiene and men are the biggest offenders.
Bathroom faucet handles – Have you ever thought that you go straight from the toilet to the faucet handle to start washing your hands. The faucet handles are full of germs from the last person that used it. Faucets can be cleaned and sanitized simply with rubbing alcohol and a microfiber cloth. If you are looking to avoid germs in between cleanings, you can use a paper towel to turn the water on and off.
Toilet flush handle – This is another place that sees a lot of hand traffic, yet gets overlooked even during a regular cleaning. We are so focused on cleaning and disinfecting the toilet bowl that the flush handle can get overlooked. It’s very easy to sanitize with a quick spray of rubbing alcohol and a wipe with a microfiber cloth. In between cleanings you can avoid germs by using some unused toilet paper to flush the toilet.
Door knobs – All door knobs throughout the house are germ “havens”, but if someone isn’t practicing good hygiene, the doorknob in the bathroom is the worst offender in the home. All your door knobs should be cleaned and sanitized once a week with a disinfecting solution. In between cleanings you can avoid touching a germy door knob by opening the door with a paper towel or Kleenex.
Kitchen
We probably feel that our kitchens are the cleanest room in our homes. And they should be since we are preparing food for our families in this room. But the kitchen has THE germiest areas in your entire home. Worse than your bathroom! Let’s take a look at some of those places and find out how to keep them clean.
The handles on your refrigerator – It’s a funny habit that happens in most families. You enter the kitchen and go straight to the refrigerator to get a snack. The handles of your refrigerator are getting exposed to germs from school, work and the outside. The handles should be wiped down multiple times during the day, especially before and after fixing a meal. This routine will prevent cross contamination.
Kitchen sink faucet – Your kitchen sink is the germiest place in your entire home. It contains more germs than your toilet! And it contains bacteria that comes from wet rotting food. The kitchen sink faucets are an area that get lots of use from hands that are working in the kitchen to hands that are just grabbing a drink. These faucets need to be wiped down numerous times during the day to prevent cross contamination.
Hand towels – The hand towels in your kitchen are a breeding ground for germs and bacteria. We tend to wipe our hands while cooking with raw food and other raw items. The towel is then used to dry our hands after we’ve washed them. This makes your hands subject to cross contamination. A simple solution is to always use a paper towel when working with raw foods and to only use the hand towel for drying washed hands.
Around the house
TV remote – I never considered how dirty a TV remote could be until a friend of mine and I spent the night in a hotel room. The first thing she did when we got into the room was to pull out a zip lock bag and popped the remote inside it. I was stunned. “What are you doing? “, I asked her looking extremely confused.
She told me that the TV remote is NEVER cleaned by the maid staff and she wasn’t looking to be exposed to the germs and bacteria of hundreds of other people. Ever since then, I’ve realized how dirty our remotes can be. A quick tip is to clean it with a quality microfiber that has been sprayed with rubbing alcohol. If someone in your home is sick, place their remote in a zip lock bag and throw the bag away at the end of the day so you prevent spreading the illness.
Hand rails on stairways – We subconsciously hold onto hand railings inside and outside of our home. There can be 50 or 60 exposures to germs on those hand rails every day. We should get into the habit of wiping the handrails every other day to keep them clean and free from bacteria.
Washing machine buttons –Our laundry is full of dirt, germs and bacteria from our workplaces and our own bodies. We use our hands to put the laundry into the washer and then we touch the buttons to start the machine. Your hands are full of the germs that were on your clothing and you transfer all of those germs onto the controls of your washer. Get into habit of wiping the controls with a simple disinfectant after using the machine.
Cleaning Tools
Cleaning tools and aids should be clean and germ free or using them just spreads germs around your home. Germs and bacteria multiply quickly. One bacteria on a damp cloth can multiply to eight million in less than eight hours.
Mops – Mops are a breeding ground for mold, mildew and bacteria. If your mop has a moldy smell before you start to clean with it, you are not going to be cleaning, but instead spreading germs around. Purchase a mop that has a removable head or cover that can be placed in the washer and sanitized.
Reusable cloths – All reusable cloths should be clean and disinfected after each use. If they are wet or damp, put them into the washer right away. Dry dirty cloths should be cleaned in hot water before reuse.
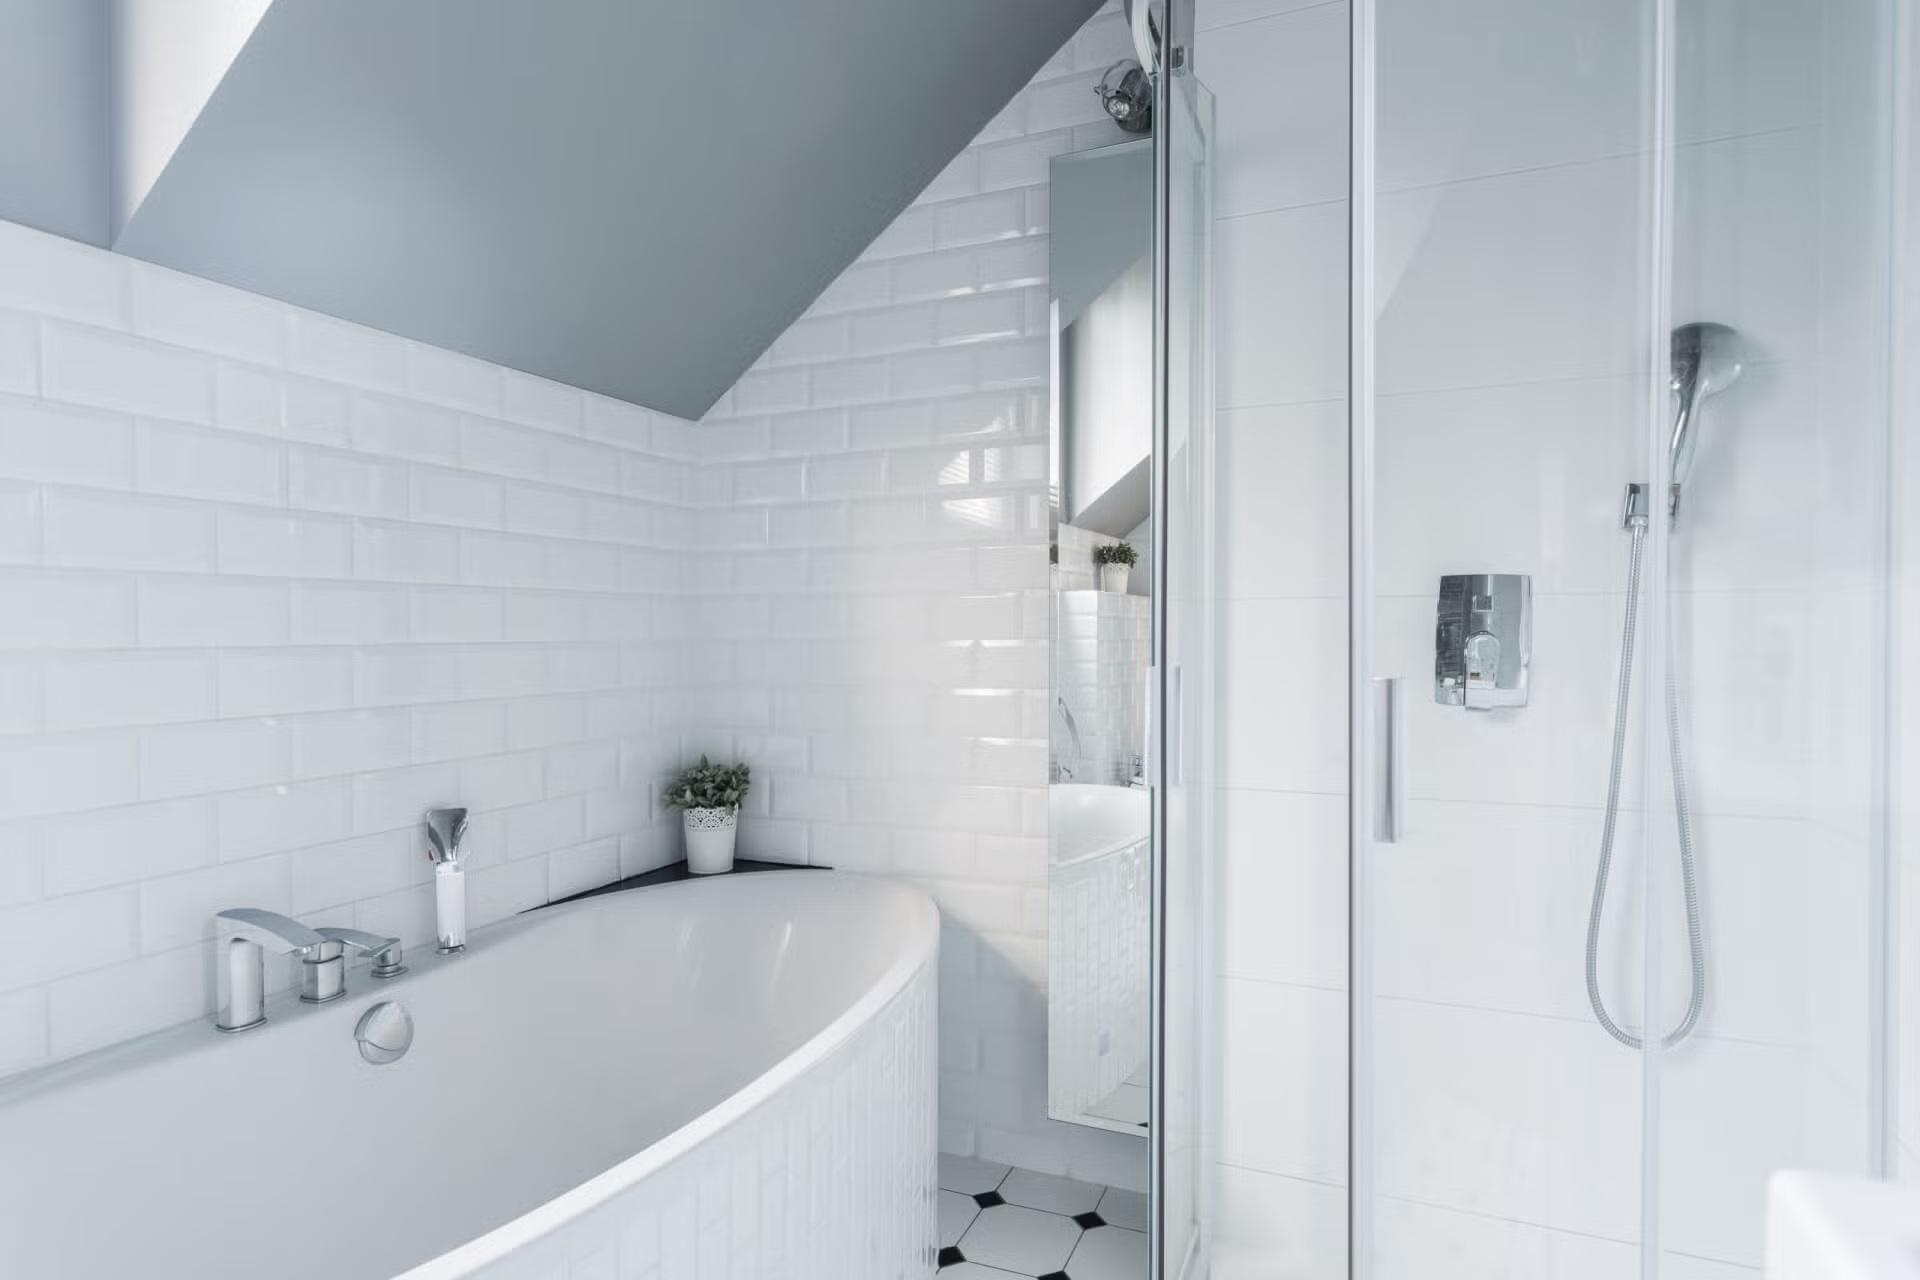
Tile on the walls of your shower can have a very dramatic look. I love how the Fixer Upper Show uses the different colored Subway tiles in all their renovations. But when I’m watching them install it, I have a little voice reminding me that the grout is going to be a real job to keep clean. Grout is very porous and absorbs all the moisture and soap scum in the shower. Add in that the shower area is dark and moist and you’ve got the perfect conditions to grow mold and mildew. Here are a few daily maintenance tips that will keep the tile grout looking good.
Run your exhaust fan for 20 minutes after the fog on the mirror disappears. Just because you can’t see the moisture doesn’t mean it’s not still in the air. You want to keep the room as dry as possible.
Use a squeegee Removing the water from the tile will help the grout dry quicker. Keeping the walls of the shower free from moisture will prevent mold and mildew from growing.
Wipe the area down with a dry microfiber cloth. Even if you use a squeegee, you’ll still have drips and water on the tile and grout. Dry the entire shower with the microfiber so there is hardly any moisture left in the shower when you are done.
These maintenance tips will help your tile grout stay cleaner longer, but regular cleaning is a must to keep your grout bright, clean and free of mold. The ideal cleaning frequency for bathrooms is weekly but many of us don't have the time to do it that often. So, if bi-weekly is as often as you can clean your bathroom, relax knowing you're in the majority, and/or get a cleaning estimate - Maid Brigade would love to help you out with your house cleaning!
Follow these instructions on how to clean tile grout in your shower and bathroom floor and you'll have a sparkling bathroom every time you clean.
Things you will need:
Bucket of hot water
Stiff grout brush
Baking Soda
Oxygen bleach
Borax
Steam Cleaner (optional but awesome)
How to clean tile grout in the shower
Step 1 Set aside 30 minutes or more to spend cleaning the grout. Cleaning the grout is not a quick process. Start in an inconspicuous area to see if the cleaning will make a drastic difference to the color of the grout.
Step 2 Start with a bucket of hot water and add in 1 cup of oxygen bleach. Using a microfiber cloth, wipe the grout with a generous amount of the oxygen bleach mixture.
Step 3 Let the oxygen bleach mixture sit on the tile grout for 30 minutes.
Step 4 Wipe the grout with a clean microfiber cloth.
Step 5 If the grout needs more cleaning, reapply the hot water mixed oxygen bleach. Then sprinkle 1 teaspoon of baking soda and one teaspoon of borax over a small area and scrub with a small stiff brush. The powders will mix with the oxygen bleach mixture and will create a paste that will penetrate the grout to leave it clean.
Step 6 Let the powdered mixtures sit on the grout for another 30 minutes.
Step 7 Using a microfiber cloth, rinse off all the powder, paste and oxygen bleach mixture and let the grout dry.
Step 8 Once the grout is completely cleaned and dry, seal it with a grout sealer to keep it clean and stain free.
How to clean tile grout in the floor
Step 1 Vacuum the entire floor to remove sand and dirt from the area.
Step 2 Place warm water in your steam cleaner and use the attachment hose with a small nylon or brass bristle brush.
Step 3 Each steam cleaner is different, but look for the button, light or signal to let you know that the cleaner is producing steam.
Step 4 Using the small bristle brush, target the steam over the grout. You will see dirt and debris moving away from the grout onto the tile. Use a dry microfiber cloth and wipe up the dirty water as you go.
Step 5 Work in small areas and let the grout dry before proceeding to the next area.
Step 6 Let the entire floor dry and wash completely with plain hot water and a microfiber mop.
How to maintain your floor tile grout
After your tile grout is cleaned apply a clear tile grout sealer to protect it from stains and dirt.
Wash the entire floor with hot water and oxygen bleach. Let the water and oxygen bleach mixture sit on the floor as long as possible (at least 30 minutes) and then wipe the floor dry.
If you liked these tips, you may want to also read:
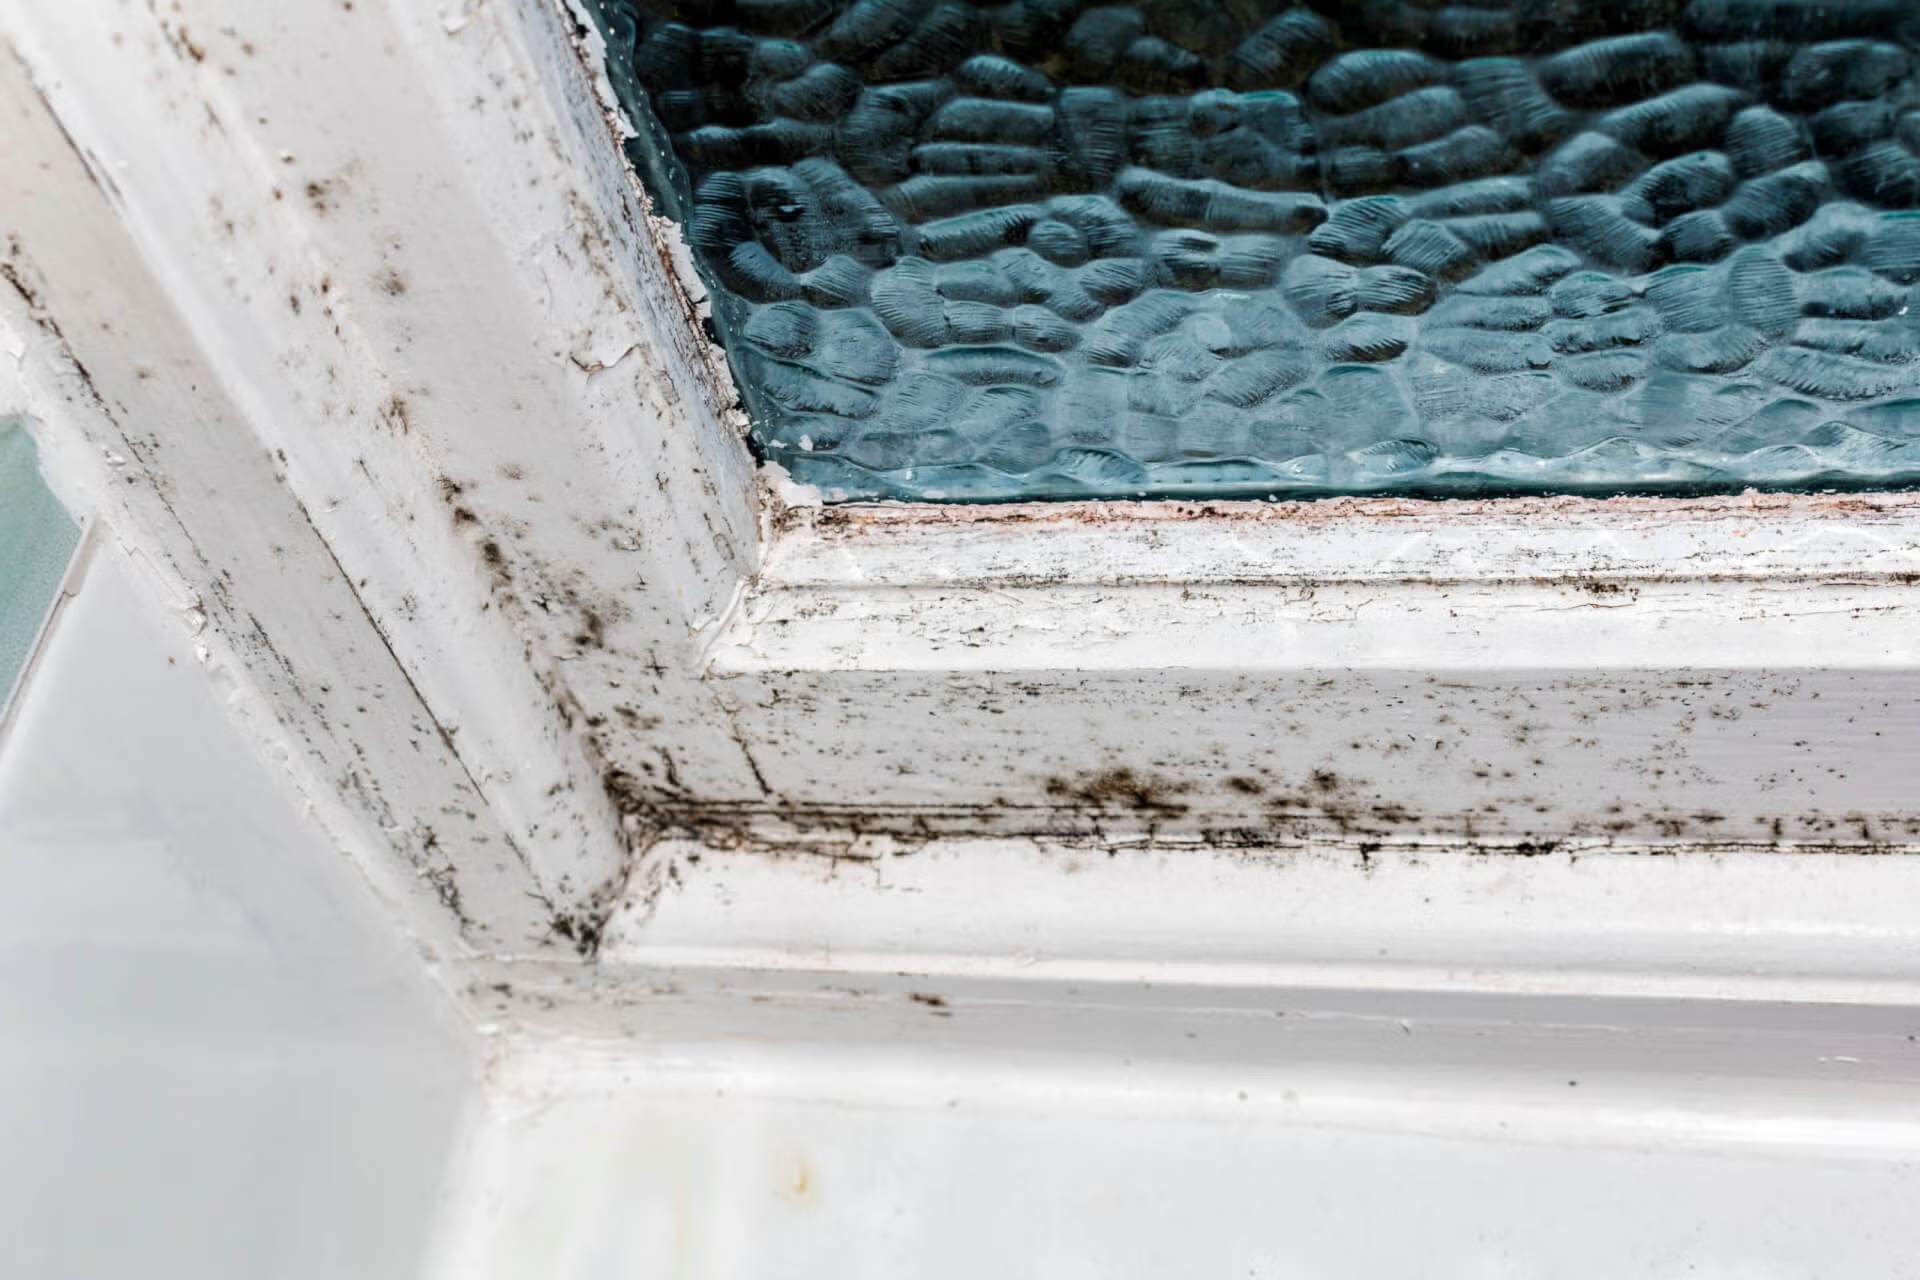
Almost every house has a little mold in it somewhere. Mold grows when you mix moisture and darkness. Mold actually uses your home’s plaster, drywall or wood as it’s food. And it destroys its food source as it grows. Address mold early, when tiny spots just appear, and remove it as soon as you find it so it doesn’t create a larger problem and potential damage your home.
Removing mold from your home
Before trying to remove mold from your home, make sure no one in your family has an allergy to mold. Some molds can be highly toxic and can cause a severe reaction. If you have any reservations about removing the mold in your home, consider calling a professional mold expert to handle the job.
Look for mold in damp, wet or steamy areas. This areas can include bathrooms, kitchens, flooded areas, basements, cabinets with plumbing leaks, garages or outdoor areas in humid climates.
Remove all the contents of the affected area and place them in sunlight to dry up the mold spores that may be on the items.
Mix up a bucket or spray bottle of oxygen bleach and water. Oxygen bleach will kill mold and bacteria just as well as chlorine bleach. Plus, it’s safer to use and won’t affect your respiratory system. Mix a few tablespoons of oxygen bleach in hot water until it’s dissolved.
Using a microfiber cloth, wipe all the items that were in the moldy area with the oxygen bleach solution. Place the item back into the sunlight to dry. If there are a lot of mold spores on some of the items, use a mask to protect yourself from the moldy dust.
Once the area is emptied and any affected items are clean and dry, use the oxygen bleach solution to wipe the visible mold off of any hard surfaces in the room. If it’s easier, you can put the oxygen bleach solution into a spray bottle and spray the areas. Let the oxygen bleach solution sit on the areas for 10-15 minutes. Then wipe the areas with a clean damp microfiber cloth. Once wiped clean the area needs to dry completely. Use a hair dryer for small, tight areas or use a room fan for larger areas. You also want to keep a window or door open to the outside to let fresh air into the area.
When the area is completely dry, spray the surfaces that were affected with mold with a mixture of witch hazel and 15 drops of Tea Tree oil. Tea tree oil is a natural essential oil that not only kills mold but also kills the mold spores that may be left in the surface. If the spores are not terminated, the mold will reappear. Tea Tree oil is a great option for removing the spores from the area naturally. Let the Tea Tree solution dry completely on the surface. It does not need to be wiped off after spraying.
If you have a severe mold problem in a bathroom or kitchen area, consider using a mold inhibiting paint primer on the surface. There are a number of primers that are available on the market. Some manufactures say that you can paint right over the mold, but most recommend removing the mold before painting the affected area. Painting the primer on the cleaned surface will prevent the mold from returning. These primers contain an EPA recommended antimicrobial ingredient that prevents the growth of mold, mildew and other fungal organisms. These primers can be found at your local hardware or paint store and can even be tinted to match your existing paint.
For more information on how to clean and control mold, see these posts:
Summer is a great time to swim, grill and clean the garage. That’s right – summer is the best time to clean out and organize your garage. If you wait until the fall, you’ll be fighting with bad weather and falling leaves. So look at your calendar and set aside one afternoon in the next seven weeks which will be WHEN you clean out your garage. Read below to learn HOW to clean the garage.
Empty
Start by removing your cars and all the other large equipment. Move all mowers, blowers and paint cans to the driveway or the yard so you can get into the corners and also clean behind shelves and storage areas. Clean the large items as they come out of the garage. There’s no point to clean the garage just to put dirty items right back into it. Use the blower on a low setting to remove dust and dirt from smaller things. Use your hose to clean off the mower and other large items and for stubborn dirt then, let these items sit outside to dry off while you do the next steps.
Purge
While cleaning out the garage, put items that need to be thrown out into separate piles. Make sure all flammable and toxic chemicals are kept in a pile that can be taken to a recycling center. If you don’t know where to take these types of items check out Earth911.com, where you will find a recycling solution for every item in your garage. Be very careful when packing your car with hazardous waste. You want to avoid any potentially dangerous spills while you are transporting it to the recycling center.
Clean
Once the garage has been cleared out, it's time to clean. Start from the ceiling and work your way down the walls. You can use a shop vac to clear out spider webs and dirt. Don’t try blowing the dirt off the ceiling or the walls until you’ve first used the vacuum to avoid blowing insect eggs or other nasty things (mice droppings) around the garage. Instead use the floor attachment of your shop vac and vacuum the ceiling and the walls. This will pull dust off the walls and make it easier to deep clean them.
The floor
Clean the floor with the shop vac instead of a broom. A broom will stir up the dust and dirt and leave it back on the walls. Using a vacuum will avoid this problem. If the floors are extremely dirty, move this step in front of cleaning the walls and ceiling. Use your blower on a low setting and blow the large debris out of the garage. There’s no point in vacuuming the walls only to stir up more dust and have to redo them. Spot wash the floor with a degreasing soap or even a dish soap mixed with rubbing alcohol. The alcohol will work to break down the oil and the soap will wash it away.
Deep Cleaning
Once the ceiling and the walls have had the large debris and dust removed, use a damp microfiber mop head on the end of the mop to deep clean them from bottom to top. (NOTE: The direction is very important. If you wash walls from the top down, you risk staining your walls when the dirty water from the top of the walls runs over the dry lower wall. But if you wash from the bottom up, the lower wall will already be damp and surface tension will prevent the wall from absorbing any of the dirty water pulled down by gravity when you wash above.)
The microfiber mop head will work to pick up any leftover dust left by the shop vac. Rinse the head out frequently or buy additional heads so you don’t have to bother rinsing the microfiber covers out when they get dirty. Let the walls dry completely.
Organizing
Before putting items back into the garage, separate them into categories. Keeping similar things together makes them easier to find. For example, keep all your gardening items together and close to the lawn mower. This way you will have an area of the garage where you know you should look when you are needing to use something. Here are some of the categories you will use to organize your garage. These tips are the same as we shared in our blog article about cleaning out your garage before moving.
Tools - gather all your tools together and organize them by size. Remove any duplicates and keep only the good quality tools.
Outdoor furniture - make sure all your outdoor furniture is clean and free from mold and mildew before you store it in the garage. Use a blower to remove the dust and dirt or give it a good scrubbing with hydrogen peroxide if it has mildew spots.
Camping equipment – camping equipment should be cleaned and dried before storing in the garage. Use sunlight to remove stale smells and store it only after it’s completely dry.
Sports equipment – bikes, scooters and skateboards should be stored together. Smaller items like balls and gloves should be placed in plastic containers with lids and labeled on every side.
Hardware – smaller items such as paint brushes, tools and maintenance items should also be placed in plastic bins with lids. Put a label on all four sides and on the lid so that you will know what’s inside. I highly recommend using clear, stack-able tubs in the same size.
When was the last time you “fed” the wood in your home? In reality, we can’t feed any wood unless it’s still living as a tree. But the term refers to adding moisture to the finish of a piece of furniture. Your home’s climate, along with the amount of light, can dry out and damage the finish on your furniture. Even though manufacturers have conditioned us to believe that furniture needs to be cleaned and waxed, the goal really should be to keep our wood furniture and floors free from dust and put a protective coating on it to help the wood retain moisture. If you've ever wondered about cleaning and conditioning your wood furniture and floors, read on.
Cleaning the wood
We’ve been told to avoid using water on our furniture, but a damp cloth with a gentle soap won’t hurt the finish or the wood at all. Cleaning and conditioning wood furniture annually will keep the dust and dirt from damaging the finish as well as keep it from building up in the cracks, corners and indents of the wood.
Start with a soft rag like a cotton baby diaper or t-shirt. Place a few drops of a gentle hand soap in a bucket of warm water. Use just a few drops of soap to help lift off the dirt and grime. Place the rag in the soapy warm water and wring it out really well. Start at the bottom of the piece of furniture and work your way up. Working in this direction will help protect the wood from water streaks. Use a gentle brush to get into cracks and tight curves on the piece. You can also use a toothpick or a knife covered over with the rag to get into tight places. Rinse the rag in plain warm water and wring it out really well again, then rinse the soapy film off the wood. Dry the piece completely using a microfiber cloth.
Conditioning the wood
Now that the piece is completely clean and dried, you may want to add a sealant to the surface to keep it looking it’s best. Most furniture manufacturers recommend avoiding furniture polishes that contain silicone or oils. Silicone sprays tend to give you a shiny finish, but leave the surface oily which doesn’t absorb into the wood. Oils tend to attract dust and they can mix with the dust and leave a foggy film on the piece of furniture.
Another rule of thumb is to never put a wax on an oil based finish. A simple way to remember how to add a sealant is oil on oil, wax on wax. It may take a little investigation to figure out the type of finish you are treating, especially if it is a vintage or antique piece. Most newer furniture and cabinets have wonderful finishes that actually can just be wiped with a damp rag, with no need to worry about ever “conditioning” it.
Conditioning wood floors
Cleaning and conditioning wood floors should also happen on a regular basis. The best way to clean a hard wood floor is with a microfiber mop and a spray bottle of water. Start with a dry microfiber mop cover and lightly spray the floor with a mist of water. Using the dry mop, go over the area with the microfiber pad. It will pick up dust and leave the floor looking as clean as glass.
If hardwood floors look dull after this process, the floor finish is damaged. Before addressing this problem be sure you know what your wood floors are made of - the varied materials and finishes available today call for different treatments. Know what you are dealing with because damage to the surface could be expensive to correct.
Some great finishes are available to put the shine back on your floor. Eventually finishes will wear off so they need to be re-applied on a regular basis. A number of high quality manufacturers make a liquid floor wax for hardwood floors. The floors should be cleaned and prepped per the directions and after the wax is applied, must be avoided for 24 hours. The shine can last up to a year depending on the foot traffic in the room and the type of cleaning products used to clean the floor. It’s an inexpensive way to bring the shine back to your hardwood floors.
With the official start of summer outdoor pools are starting to warm up enough to enjoy splashing around in the water. It also means a look at how to care for your swimsuit so it will last through this season and beyond. Without the right care, even a high quality swimsuit may not make it through one swimming season. Here are some do’s and don’ts for caring for your swimwear.
Do wash your new bathing suit in cold water before wearing it the first time. The cold water will set the colors in your suit and keep it looking new. Chlorine and the sun will work to fade the colors so this one simple step can protect your suit from fading all season.
Do wash your swimming suit out every time you wear it. Even if you didn’t go in the water, your body oils and sun tan lotion can damage your suit.
Do use an outdoor shower and wet your suit before going into the water. A dry bathing suit is extremely absorbent and will act like a sponge, absorbing all the chemicals in the water. A wet suit is less absorbent and won’t get as much of the chemicals into the fabric.
Do rinse off after swimming in a cool outdoor shower so you can rinse off as much of the salt or chlorine as you can. Then store your suit in a plastic bag until you can get home to rinse it out and let it soak.
Do hand wash your suit instead of using the washing machine. Machines are too hard on a swimming suit and pull on straps and openings that break down the elastic. Instead, turn your swimsuit inside out and place it in cool water with a gentle hand soap for 30 minutes to let the soap work to break down body oils and other chemicals. Rinse out the suit with warm water and roll your suit up inside two clean, dry towels to remove the water. Then place it on a flat surface to dry.
Do use a simple technique of sprinkling corn starch on any spot or stains on your suit before soaking. Corn starch is very absorbent and will work to pull lotion or oils out of your suit so they won’t stain. Just sprinkle the area with the corn starch and let it sit for 30 minutes before rinsing it off.
Do use a drying rack to dry your suit. Don’t place your suit on wood or metal as those materials can catch the fabric or leave a rust mark. Invest in a drying rack that you can put in your bathtub or outside on a deck.
Do use a lingerie bag if you HAVE to wash your suit in a washing machine. The bag will prevent the straps and strings getting caught on other items and prevent the fabric from being pulled out of shape. Make sure you don’t put the suit, even in the lingerie bag, into the dryer. The hot temperature will dry out the elastic in the suit.
Do look for chlorine resistant fabric when purchasing a new suit. This new fabric can make your suit last 25 times longer than a typical swimsuit.
Do purchase two swimsuits for your summer season. Having the ability to switch suits gives the fabric time to “remember” and go back to its original shape. Most swimsuits are made with some Lycra in the fabric. Lycra has a memory so giving it a day off will help it go back to its original shape.
Don’t use a laundry detergent when washing your swimsuit. Use a very gentle soap that will rinse totally out of the fabric. A simple bar of soap will do – run it under the water so it’s dissolved in the water before you add your suit. Remember to let it soak for 30 minutes so the soap can break down the oils and remove the chemicals.
Don’t let your swimming suit sit in the soaking solution for longer than 30 minutes. The chemicals will go into the soaking water during the 30 minutes, but after that you are just letting the suit sit in the chemicals you are trying to remove from it. To avoid this chemical cocktail, rinse it out after 30 minutes.
Don’t wring out your bathing suit. The intense pulling will break down the fabric and the elastic. Use the towel method mentioned above.
Don’t hang your suit over a rod or deck railing to dry. The water that pools at the base of the fabric will pull and stretch the fabric so that it will become distorted. Always let your suit dry on a flat surface.
Don’t dry your suit in the sun. The sun is very powerful and will fade the colors and dry out the elastic fabric in your suit. Instead, find a shady spot for a drying rack so you can lay your suit flat. Turn the suit over after the top feels dry to let the air get to the underneath.
Don’t sunbath in a wet bathing suit. A wet bathing suit has the chlorine or salt in it and when those items are exposed to direct sunlight the damage to your suit is multiplied. Instead, sunbath first and then go swimming or use an outdoor shower to rinse off before laying in the sun.
Don’t you just love the feeling of clean sheets? Crawling into a nice clean bed after a long day can be so relaxing. When I was little, my mother ALWAYS washed our bedding on Mondays and Monday night was so much fun. I used to crawl into to bed and tell my mom the sheets felt “sugary”. I’m not sure where “sugary” came from but I do remember they felt wonderful. Don’t you wish you could have that wonderful feeling every night? I remember reading somewhere that Oprah has clean sheets put on her bed every morning. Oh if only….
Instead of talking about the “how oftens” of cleaning our bedding, let’s focus on the “hows”. There are two different types of cleaning for bedding: the standard weekly washing and the seasonal cleaning done every two to three months.
Pillows
Our poor pillows take a real beating – literally. We punch them during the night and shake them out the next morning. And we don’t want to even talk about the drool and dust mites inside of them. Down pillows are wonderful to sleep on but not if you have allergies, because they also hold onto dust mites and the mite dander. That’s not a good scenario when you are allergic and spending eight hours with your head on that pillow. A simple solution is to place your pillows in the dryer for 10-15 minutes on very high heat. The heat will kill the dust mites and shake out the dander.
Wash your pillows once a quarter to remove dust, dander and dust mites. If you have gruesome stains that have accumulated on your pillows, try this DIY recipe for removing stains and cleaning your pillows so they are lovely and fresh. Sugary, even.
Miracle Laundry Whitening Formula (for a top loading washing machine)
Dissolve the powdered ingredients in 1/3 cup boiling water (boil in a microwave safe container until it reaches a full boil). Mix in the liquid ingredients and add the entire mixture to the water in the washing machine before placing the pillows in the water. Make sure the entire mixture is evenly distributed in the water. Wash at the hottest water setting and the highest spin cycle. Remove and place the pillows in the dryer with four dryer balls to make them dry faster and come out of the dryer nice and fluffy.
Sheets
Most experts (including myself) recommend washing your sheets on a weekly basis. If you have two sets of sheets, you can take off the dirty sheets, replace them with the clean ones and wash the dirty sheets at your convenience. If you deal with dust allergies, wash the sheets in the hottest water possible and dry them in the dryer on a hot setting. The hot water and the hot air will kill the dust mites and remove their “dirt”. Hanging sheets outside is not an option if you are dealing with allergies because dust and pollen will aggravate allergies. Instead, get that “fresh” smell by using a DIY linen spray.
DIY Linen Spray
2 cups witch hazel
12 drops of an essential oil in your favorite fragrance
Mix the two ingredients in a 16-ounce spray bottle. Set the spray nozzle to a light mist. Mist the linen spray over your sheets and pillows and let dry. The oil will make your sheets smell like they were dried outside.
Comforters
Put comforters in the dryer on a weekly basis to refresh and remove any dust that’s accumulated on them. Since they are fabric they attract and hold onto dust just like carpeting. Use the dryer's cool setting to fluff it and remove the dust. Dealing with dust allergies? Set the dryer on the hottest setting and leave the comforter in the dryer for 10 – 15 minutes. The heat will kill the dust mites and the tumbling action will remove the dust mite allergens.
Once a season, wash your comforter (if it’s washable) or have a local dry cleaner launder it, preferably without chemicals. Most dry cleaners are very accommodating and realize that people don’t want the harsh chemicals used on their items unnecessarily.
For DIY cleaning, use a gentle soap that will rinse totally out of the comforter and the batting. Fill the washing machine with water and place the soap in the water for even distribution. Never put the soap directly on the comforter. Place the comforter carefully in the washing machine and make sure everything is balanced. After it’s gone through the wash and spin cycle, place it in the dryer with six dryer balls to help it dry quicker. If it’s a warm hang it outside, then bring it in and finish drying it in the dryer to remove any dust or pollen.