Category: Healthy Home

Kitchen Cleaning Hacks - Cleaning Your Stovetop

The stove has been called the “heart of the kitchen”, mainly because it’s where most of the family meals are prepared. Keeping your stove’s cooktop clean should be a priority.  Built-up grease and food debris can cause smoke which can damage the surrounding walls or even worse, start a fire. Let’s look at a few tips that will keep you keep the top of your stove clean and safe.

Never clean your stovetop while it’s still hot. It doesn’t matter whether you have a gas or an electric cooktop, never clean it while it’s hot. The heat will turn your cleaning product into a vapor which is dangerous if you breathe it in. Instead, wait until the stove has completely cooled before cleaning.

Remove any movable parts from the stove before cleaning. This includes grates, spill trays, and knobs. Move these pieces out of the way so you will be able to clean every nook on your stovetop. It will also let you concentrate on cleaning those pieces separately – away from the stove.

Soak the items you’ve removed in warm soapy water. Let them soak for a few minutes to loosen the grease and the oils. Wipe them with a large looped microfiber cloth. If the buildup doesn’t come right off, spray them with rubbing alcohol and let them sit for a few minutes on a paper towel. The alcohol will work to break down the grease so you won’t have to scrub too hard to remove it.

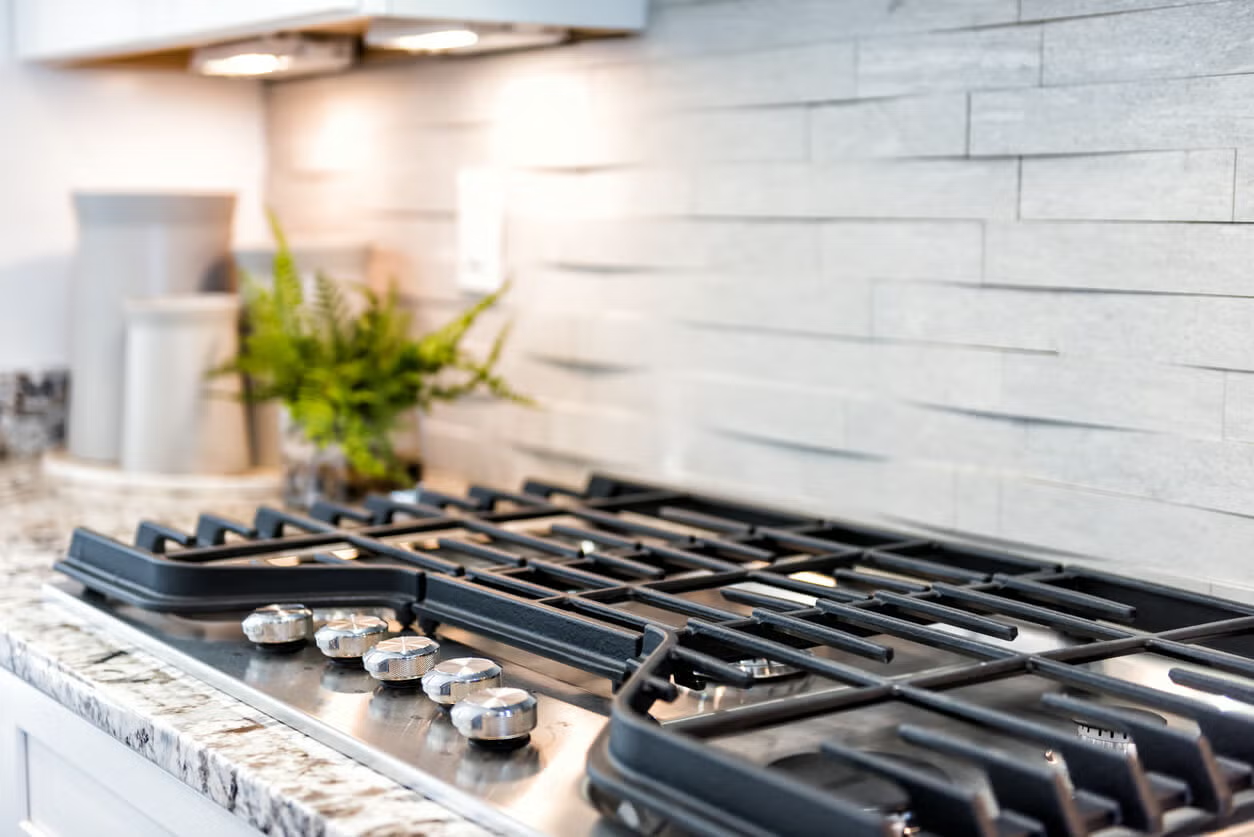
If you have a gas stove do NOT spray any cleaner directly onto the cooktop. Instead, spray the cleaner on a microfiber cloth and wipe the stovetop with the cloth. Without knowing the ingredients in your cleaner, it is not safe to spray anything around an open flame.  Remember a gas stovetop has a pilot light underneath that could be exposed to the ingredients in the cleaner.  Another item to avoid around a gas stove is alcohol.  Alcohol is a great product to use to break down grease and oil but do not use anywhere near a gas flame.

Glass stovetops have a lovely look but can be extremely difficult to clean.  The glass needs to be cleaned thoroughly after each use or the residue will become burnt on. There are a lot of specialized creams that you can use to clean the glass. The trick is to use a damp sponge with the cream and apply it in a circular motion. If you have spots that just won’t come clean, you can use a straight edge razor tipped at a 45-degree angle to scrape off the spots. Don’t be afraid of scratching the glass. Just use a new razor blade each time you clean and the residue will slide right off. Finish with a damp microfiber cloth.

Stainless steel stovetops also need to be cleaned after every use.  The stainless in between the burners will oxidize and look very spotty. Wipe the cooktop down with a degreasing cleaner, Then, use a powdered cleanser like Shadazzle to remove the oxidation and leave the stainless steel looking perfect. Wipe off the cleanser, then finish with a light coat of baby oil.  The baby oil will seal the stainless steel, prevent further oxidation and keep it looking streak free.

A hack for cleaning drip pans is to boil some hot water in a large pot big enough to submerge the drip pans. Add a cup of dishwashing detergent and stir until it’s dissolved. Place the drip pans in the boiling water, turn off the heat and cover. Let them sit in this mixture overnight. In the morning just give them a quick rinse and most of the crud should come right off.

Brown burn marks on your stovetop can gently be removed with baking soda and a soft sponge. Just sprinkle the spot with the baking soda and use the damp sponge to gently scrub the spot away. Be very careful not to be too aggressive or you could scratch the surface.

Make a DIY grease cutter to remove grease and oil from your stovetop. Just add some pure lemon juice to a bowl of baking soda until it becomes a thick paste. Then apply this mixture to your stovetop or hood. Let the paste sit for a minute or two then spray the area with HOT distilled white vinegar.  The hot vinegar will activate the baking soda to lift and remove the oils from the surface while the acid in the lemon juice will work to cut through the greasy buildup so it’s easier to remove.  Just give the stovetop a quick wipe and it will be sparkling.

For more information from DIY green cleaning expert Leslie Reichert, visit https://www.facebook.com/GreenCleaningCoach/

Why is Consistent House Cleaning Good for Your Health?

Let’s face it, constantly cleaning, organizing and putting stuff away is not anyone’s idea of a good time.  But keeping your home clean on a consistent basis is important for a number of reasons. You might not realize that cleaning can give you a sense of satisfaction which releases endorphins and makes you feel better. Even if the reasons below don’t spark motivation for you to keep your house clean, maybe remembering that feeling good when you are done can keep you focused.

Removing allergens – Keeping your home dust free will remove allergens from your home. Dust contains dust mite excrement, which is the true cause of dust allergies. Dusting your home on a weekly basis keeps the allergens at a safe and manageable level. You can also use a HEPA air filter to help remove dust from the air, which keeps the dust from settling on the furniture, meaning you can dust less often.

Lowers stress – A clean and organized house can lower stress levels for you and your family. Marie Kondo’s “KonMari Method” of tiding up recommends getting rid of anything that doesn’t give you joy. Things that don’t give you joy are probably adding stress to your life and should be removed. Once removed, you will feel better and will have a little less stress in your life.

Home safety – For the safety of your family and pets, you want to remove the dirt and clutter from your home. Frequent cleaning removes germs. Not to mention too much clutter can cause trips, falls and accidents.  Items stacked too high can fall down and be dangerous. Items left in the middle of the floor can cause a fall which can lead to a debilitating injury.

Germ-free – Cleaning and disinfecting should be a priority for your cleaning regimen. Some people do not realize that you cannot disinfect a surface that has not been cleaned first. Using disinfecting wipes on a dirty surface does not kill germs. Areas must be cleaned first with soap and warm water, rinsed completely, and then disinfected. The disinfectant needs to sit on the surface for 10 minutes or more to kill the germs.

Pest removal – Dirty homes are a haven for nasty pests such as ants, spiders, mice, and even flour moths. Leftover food attracts ants which are very difficult to remove from your home.  They are attracted to spills and drips on floors and cabinets.  By keeping your kitchen spotless you are working to keep ants and rodents away. Cobwebs are really just spider webs with dust on them. You’ll want to dust and vacuum walls and ceilings to get rid of the spiders that are making the webs.  Keep your food products in airtight containers which will keep the flour moths from infiltrating your pantry. Keep your shelves spotless so there is nothing in the pantry to attract them.

Naturally Remove Mold from Window Sills

CleaningWindowSill

Sometimes, windows don’t get the attention they need, especially in the winter. Windows can “sweat’ in the wintertime and the combination of condensation and warm temperatures in a room are the perfect conditions for growing mold and mildew.  Let’s look at some techniques you can use to clean your windows, sills and remove mold and mildew.

Control the humidity in your house   Start by purchasing a hygrometer so you can measure exactly what the humidity levels are in your home. The optimum humidity level in a home should be between 40% and 50%.  In the winter months, you want to keep the levels closer to 40% to prevent condensation on the windows.

Purchase a dehumidifier with an automatic pump   Spend a few extra dollars and buy a dehumidifier with a water pump. These dehumidifiers work day and night, extracting moisture from the air. You can put the drain tube for the dehumidifier into your washing machines drain hose so you never have to worry about emptying the container. These humidifiers come with a hygrometer built in so you can set the levels of humidity for your home and it will work to keep the humidity levels exactly where you want them.

Wipe away condensation   If you find that your windows still have condensation, lower the humidity level of your dehumidifier then wipe the windows with a dry microfiber cloth. Make sure to wipe off the moisture on the glass as well as the window frames and sills.

how-to-clean-and-control-mold

Make your own all-natural mold remover   You can make your own all-natural mold remover by using a spray bottle filled with rubbing alcohol and 10-15 drops of Tea Tree oil. The alcohol will be the carrier and will carry the Tea Tree oil onto the moldy area. The alcohol will then evaporate quickly to prevent more moisture in the area.  The Tea Tree oil will work to kill the mold and mold spores so that the area will be free of mold.  Once the area is treated and left to dry for a day, wipe with a damp microfiber cloth and then spray again with the Tea Tree mixture. This will prevent mold and mildew from growing in the area.

Keep the window sills clean   Cleaning and maintaining window sills on a biweekly schedule will help you be aware if mold or mildew is accumulating on the sills. Just treat with your all-natural mold spray to keep mold and mildew away.

For more information from DIY green cleaning expert Leslie Reichert, visit greencleaningcoach.com

Tips for Cleaning Your Dining Room Table

Have you heard of the flat surface rule? It says that a flat surface like a floor, a table or countertop should always be cleared of anything that is not a permanent fixture. This sounds like a great rule but my dining room table constantly challenges that flat surface rule. My table attracts mail, paperwork, bills and even clothing. I’ve put a new rule in place that says that the dining room table must be cleared of all clutter by dinner time. Much more doable! If there are items left on the table, they are placed in a laundry basket and given 24 hours to be dealt with. After 24 hours they will be discarded. This new rule seems to be working and has left my table top free from clutter. I’ve found that my next challenge is keeping the tabletop clean and dust free. Here are a few tips I’ve learned:

Cleaning

Start by washing the table with warm water and a touch of dish detergent.  Whether you have a wood, glass or plastic dining room table, they can all be cleaned with a damp cloth and a touch of dish detergent. Start with a bucket of warm water and a drop or two of a gentle dish soap. Use a large looped microfiber cloth wrung out until it’s slightly damp. Go over the entire table including the legs and chairs. Rinse the table with warm water and then use a fine woven microfiber cloth to dry it completely.

Conditioning

Once the furniture is completely clean and dry, apply liquid beeswax to seal in the moisture and condition the wood. A favorite product of mine is Howard’s Feed-N-Wax, which is a polisher and conditioner. This product combines beeswax, carnauba wax and orange oil to enhance the natural beauty of the grain in both finished and unfinished wood. It also seals the wood and prevents it from drying out. This product is something you’ll want to use on your dining room table once a month.

Dusting

You’ll want to dust your dining room table to keep it clean on a weekly basis. I suggest using a dry large-looped microfiber cloth to remove dust easily and gently. The microscopic fingers in the microfiber pick up the dust and hold onto it until you place the cloth in the laundry. This makes dusting extremely easy. Because microfiber is so efficient you don’t have to use a dusting polish which cuts your cleaning time in half.

Environmental Conditions

Wood furniture reacts to the environment so you’ll want to keep the temperature and the humidity at constant levels. The room temperature should be between 60 and 80 degrees all year long. The humidity should be in the 35 to 45 percent range to keep the wood from becoming too dry. You’ll also want to keep your furniture out of direct sunlight. The sun can bleach the wood and can damage the piece. Avoid storing wood furniture in attics and basements as they are not stable environments for wood furniture.

Maintenance

You want to pay close attention to your wood furniture. Cleaning, dusting, and conditioning will keep it from deteriorating. Some people think that it doesn’t matter how often you dust a wood piece of furniture. But dust can build up and combine with moisture in the air which will permanently damage the finish. Maintaining a schedule of cleaning, dusting and conditioning your wood dining room table will keep it looking its best for generations. It will be something special to hand down to your children or even your children’s children.  Remember a dining room table is where family memories are made.

For more information on how you can clean and protect your home safely & efficiently, visit Leslie's website!

How to Take Care of Hardwood Floors

Taking care of your hardwood floors can be difficult, especially if you are using the wrong cleaning products, mop or vacuum.  Foggy, smeary floors look old and abused, but with a few simple tips and tricks we can have your floors looking shiny and new!

Vacuum often with a canister vacuum - Sand and dust can damage the shine on your hardwood floors. You’ll want to vacuum them as often as you can.  Use a soft, horsehair brush attachment made specifically for hardwood floors.  The gentle brush picks up the dirt without scratching the floor.

Use the correct vacuum - Don’t use an upright vacuum that has a beater bar, as it will scratch the wood. It’s fine to use an upright vacuum if it has a switch that will turn off the beater brush, but the best vacuum to use on a hardwood floor is a canister vacuum. The hardwood floor attachment gently glides of the hardwood floor.

Dry mop the floor - Use a microfiber mop to dry dust your floors in between vacuuming. Dry dusting is a quick way to pick up dust and hair when you don’t have time to vacuum. Use a microfiber mop head that will pick up and hold the dirt.

Washing your hardwood floors - You can use a microfiber mop to wash your hardwood floors. Try my bucket-less mopping technique to have them looking perfect. Bucket-less mopping is a system that uses a microfiber mop and a spray bottle of diluted cleaner. You simply spray the cleaner onto the hardwood floor and wipe it away with the microfiber mop.

Winter time tip - During the winter you’ll want to wipe off any salt that gets onto your hardwood floors immediately, as salt can damage the finish on your hardwood.  Make sure you have plenty of area rugs near the doorways. Should someone come in with salt on their shoes, use a wet towel on the area and wipe off all the salt.

Shoes must come off - Ask your family and guests to remove their shoes when they come into your home. This habit will prevent dirt and dust from scratching the floor.

Use area rugs at entrances to catch dirt before it gets to the hardwood floor. Area rugs will capture dust and dirt at the doorway. There are some great brands of area rugs that are designed to really grab the dirt from the bottoms of shoes as you walk over them. These will remove the maximum amount of grime before walking into the house.

Don’t use straight vinegar to clean your hardwood floor - The acid in the vinegar will damage the finish on your floors. You can use a tablespoon or two of vinegar in a 16-ounce spray bottle but don’t use too much or the acid will work against the finish of the floor.

Consider bringing in an expert if the floor has lost its’ luster. A professional can apply a new coat of finish and recommend other products that will keep it looking its best. He may also recommend having the floor refinished if it’s very damaged.

Protect your floor from sunlight - UV rays can change the color of the wood which may not be obvious until it’s too late.  If you have an area rug, you’ll find that when you remove the rug the wood underneath will be much darker. You can protect the wood with UV filtering blinds or curtains.

Black scuff marks? You can remove black scuff marks with a tennis ball. Just rub the ball over the scuff and it will disappear.

Keep pets nails trimmed at all times - Their claws can really damage hardwood floors.

Try to keep your humidity between 35 and 50% to avoid too much moisture which can warp and damage the wood. You’ll see the wood cup if there’s too much moisture in your home. If the room under the hardwood is damp, make sure you run a dehumidifier to keep the moisture from damaging the floor from underneath.

Keeping Your Home Safe for Your Child

September is baby safety month. Whether they’re a newborn or an active toddler, it’s a great reminder that you always need to be very cognizant when keeping your home safe for your children. There’s a lot of preparation before the baby arrives to make your home a safe place for them to come home. Below, we outline some important points to keep in mind

Home Safety Tips for Newborns

Getting your newborn’s room ready prior to their arrival is exciting but there are some things you need to consider.

Furniture –Know what materials are used in any of the furniture you are buying for the room. Pressboard and plywood contain formaldehyde that converts into a dangerous chemical at room temperature. The fumes can be harmful to a baby’s lungs.

Wall Paint – Before bringing out the paint swatches, make sure the paint that you’re planning to use doesn’t contain harmful toxins. Non-toxic paint will keep the air quality safe for you and your baby.

Flooring – Carpets and hardwood floors can both contain formaldehyde. Once installed, they can release toxins for months. Do your research and find a carpet or hardwood that uses chemical-free padding or adhesives.

Mattress –Look for a mattress manufacturer that uses all-natural materials so you don’t run the risk of buying one that may contain formaldehyde. Be sure to purchase a very firm mattress so that the baby sleeps on top of the surface instead of sinking into the mattress which can be a suffocation risk.

New clothing – Make sure that all new baby clothes get washed in a gentle, all-natural laundry soap. Stay away from fragrances that can affect your baby’s lungs. There are many DIY laundry soap options where you can control the ingredients if you’d prefer to make your own.

Keeping Your Toddler Safe At Home

As your sweet baby begins crawling and then gradually moves into walking, suddenly there are more safety concerns around your home. Everything from your waist down can be a danger so you’ll need to make sure to recognize those areas and baby proof wherever necessary. Here are a few safety items  to check on around your home:

Laundry Room

  • Keep your cleaning products in a place where your child can’t reach. Use an out-of-reach cabinet in your laundry room if possible. If one is not available, consider putting a child-proof lock on the cabinet you’ll be using.
  • Hide laundry pods that have recently become a safety issue for young children. Laundry pods are visually appealing because of their bright colors and resemblance to candy.

Living Room

  • Add a fireplace “fence” around a fireplace or woodstove.
  • Remove glass topped furniture as they can not only be a danger due to their sharp corners but can also crack and break should a child crawl on top of it.
  • Windows - Always open windows from the top down. Purchase window locks that prevent the window from being opened by your child.

Bathroom

  • Make sure items like razors, makeup, and medicine are put in locked closets or drawers. Remember that cotton swabs, cotton balls, and other small objects can be a choking risk for small children.
  • Add a safety latch to all toilets in your home.

Bedroom

  • Anchor tall furniture to the walls to prevent them from falling if your child were to climb them.
  • Avoid strangulation from a blind cord by installing cordless blinds or tying the cords up high next to the curtain rod.

Kitchen

  • Many kitchen appliances are a safety risk for children. They can burn themselves on a stove, get their hand caught in a dishwasher or crawl into a front-loading washer. Put safety locks on all your appliances and make sure you are always around when your child is near the kitchen area.

Smaller Areas Around the Home

  • Outlets - Not only do you want to use the outlet protectors for unused plugs but also find an outlet plug cover to keep cords and plugs out of reach.
  • Stairs - Use safety gates at the top and bottom of all stairways. Keep the stairs clear of clutter to prevent slips and falls.
  • Fire Alarms - Check your fire alarms monthly and change the batteries twice a year. Have a plan to evacuate your child from the home should you have a fire.

Keeping your children safe is on top of every parent’s mind. While Baby Safety Month is recognized in September, we know that their safety is a year-round concern. Take a look at your home’s biggest dangers and be sure to install the proper precautions wherever they are needed.

Removing "Back to School" Stains

For some families, back to school can be a terribly sad day in your household or parents are secretly throwing a “BTS” (back to school) party! It’s officially the end of the summer and the kids are off to school. For younger children especially, the school year brings stains and marks on their clothes. Be prepared to fight each stain with this Back To School Stain Guide.

Before we get into how to battle each different stain they might bring home, lets first get the supplies you will need to have on hand.

  • Hydrogen Peroxide
  • Rubbing Alcohol
  • Oxygen bleach
  • Chlorine bleach
  • White terry hand cloths
  • Iron
  • Bar of white soap (Ivory)
  • Cotton balls
  • Stiff brush
  • Distilled white vinegar
  • Small spray bottle

Markers – Place the stain face down on a white washcloth or a paper towel. Dab the area with a cotton ball dipped in rubbing alcohol. The stain will transfer to the cloth or paper towel. Do not pour the alcohol over the stain as it will bleed into the surrounding fabric.

Crayons – Scrap any excess crayon with a table knife or spoon. Using a hot iron, place a white washcloth over the stain and rub the iron over the area. You should see the stain transfer to the washcloth. Then use a drop of dish detergent and work the soap into the area. Rinse and let the fabric air dry. Repeat the process until the stain is gone.

Water-based glue – Place the stain in very warm water and let the water work to soften the glue. Peel the glue off as it softens.

Super Glue – Super Glue can be removed with an acetone-based nail polish. Place the stain in very warm water to soften the glue. Then using a cotton ball dampened with nail polish, dab the area. The glue should peel right off.

Lead pencil marks – Start by using a pencil eraser and rubbing the stain off the fabric. Then using a gentle liquid dish detergent, place a few drops on the stain and rub it into the fabric. Rinse out the soap and let the item air dry. Continue to repeat the process until the stain is removed.

Grass - Mix up a solution of one part distilled white vinegar and two parts water. Put it into a spray bottle. Spray the grass stain with the mixture and let it sit for 15 minutes. Using a stiff brush, rub the area until the stain is loosened and starting to come out of the fabric. Rinse the area and repeat by spraying and scrubbing until the stain is gone.

Salad dressing – Start by blotting the greasy stain with rubbing alcohol on a cotton ball. Soak the entire area and let it sit for a few minutes. Using a bar of white soap on the area, rub it until it creates a lather. Rinse the soap and alcohol out of the fabric and let it air dry. If the stain persists repeat the process until it disappears.

Chocolate milk – Start by running cool water through the back of the stain. This may remove most if not all of the chocolate milk. Then mix up a paste of powdered oxygen bleach and water and rub it into the area. Let it sit for a few minutes and then rinse the fabric. Wash normally and let the item air dry. Repeat the process until the stain is removed.

Ballpoint pen – Treat the area with a cotton ball dipped in nail polish. The pen mark will disappear.

Keeping Kids Healthy This School Year

It’s that time of year when our kids are getting ready to go back to school. One of the biggest concerns for parents around this time is how to keep them germ-free at school. With the right information and the right tactics your children can stop germs in their tracks. Teach your children these important steps to keep themselves healthy this year!

Wash Hands Often & Correctly - Doctors all agree that hand washing is the most effective way to stop the spread of germs. It’s also the best way to remove germs from your hands. Since schools are full of ‘germy’ items, (we see you handrails and water fountains) it’s a good idea to teach your children effective hand washing techniques. Just putting some soap on your hands and doing a quick rinse with cool water does not constitute correct hand washing. Using a lathering soap and warm water are essential. Lather the soap for a minimum of 20 seconds, which is the standard given by the CDC website on handwashing. Some classrooms have a sink where the students can wash their hands without disrupting the flow of the day.

Keep Hands Away from Your Nose and Face – Since you never know where the germs are, a good habit is to avoid putting your hands anywhere near your face. Teach your children to keep their hands and fingers away from their nose and mouth.

Cover Your Mouth – Seeing an uncovered sneeze or cough can make someone run out the door. Remind your child to always sneeze or cough into their elbows to keep germs from spreading.

Maintain a Healthy Diet - Eating healthy foods like fruits and veggies will help their bodies be ready to fight off an infection should they get one.

Get a Good Night’s Sleep – Go to bed early and make sure their little bodies are rested and strong.  Viruses survive in bodies with weak immune systems.

Exercise Regularly – Have your kids get lots of exercise and have them do it outside so they get fresh air. This will keep their bodies strong and ready to fight off colds and flu. Consider giving your child the opportunity to join a school sports team. It is not only a healthy activity but great for teamwork and building lasting friendships.

Clean and Vacuum Bedrooms with All-Natural Cleaning Products and a HEPA Rated Vacuum – Clean your entire home with all-natural cleaning products. Nighttime is when your body gets to rest and repair itself. It doesn’t need to be fighting with the chemicals found in traditional cleaning products while it’s trying to rest.  Instead use microfiber and a HEPA rated vacuum to clean the dust and dirt out of the room. Maid Brigade only uses HEPA rated vacuums and green cleaning products that will leave your home healthy and clean.

Feeling Sick? Keep the Germs at Home - While this seems like an obvious one, many kids and adults go to school or work when they’re sick. Make a new family rule that if you are sick you stay home. Don’t expose your student’s classmates to your germs. Take the time to let your kids recover completely before sending them back to school. All of your fellow parents will truly appreciate it.

Back to school time should be filled with learning and excitement, not germs! We want to help make your child’s school year the healthiest and most successful one yet. Having a clean home is another step to keeping the germs at bay. Maid Brigade provides house cleaning services for busy families. Our healthy cleaning products will leave your home sparkling and check one more item off your to-do list.


For more great cleaning tips, check out the Green Cleaning Expert, Leslie Reichert at greencleaningcoach.com

Microfiber Cloth Cleaning Hacks

Microfiber was developed in Japan during the 70’s for swimwear. Ten years later, European scientists found that it was the perfect fabric for cleaning due to its absorbency.  By the early 2000s, the microfiber industry had exploded.  Even though microfiber has been around for decades, there are many who have yet to try cleaning with microfiber tools. Take a look at all you can do with microfiber – it’s worth the investment!

Perfect windows – There are many different types of microfiber cleaning cloths. For windows, use a fine woven microfiber. It almost looks silky.  The microfibers are very small and will leave windows perfectly clean. Dunk the cloth into hot water and wring it out well so it’s damp. Wipe it over the glass and then watch as it picks up dirt then dries perfectly without streaks or smears. Or spray the glass with water and use a dry microfiber cloth as if it’s a paper towel. Dry the glass completely and it will be free of streaks, smears and lint.

Save on paper towels – Use microfiber cloths in place of paper towels when cleaning. Microfiber is more absorbent than paper towels and better for the environment since they are reusable. Be sure to launder microfiber cloths, towels and mop heads with only other microfiber materials.

Chemical free dusting – Most spray dusting polishes leave layers of silicone on furniture. Instead, use a dry microfiber cloth to dust your furniture. Microfiber has tiny fibers that hold onto dust. It will hold onto dust and dirt particles until laundered which makes dusting much faster.

Preventing cross-contamination – Hospitals have used microfiber mops for years to prevent cross-contamination. You can use in your home for the same reason! Microfiber mops have a cover that attaches with Velcro onto the end of the mop. Once it’s dirty it can be removed and laundered. It’s like using a brand-new mop every time you clean.  No more smelly, moldy mops!

Large outdoor windows – Homeowners may struggle keeping large windows clean from salt, pollen and other outdoor elements. A damp microfiber cloth wiped over large windows will remove any salt or pollen and leave the windows looking crystal-clear.

Dusting walls – Instead of washing the walls in your home, try dusting them instead. Use a microfiber mop with a dry mop head and dust your walls in minutes. The microfiber will pick up the dust without dealing with a bucket and rag.

Ceiling fans – Have you looked at the paddles of your ceiling fan lately? Dust them quickly with a large-looped microfiber cloth. Using the dry cloth, wipe it gently over the fan paddles to pick up and remove dust. This task will takes minutes and leaves the fan dust free.

Perfect granite – If you have dark granite counter tops, you may struggle with streaks and smears from cleaning. Try using a microfiber cloth designed for glass.  Dampen the cloth and wipe over the granite to leave it looking showroom perfect!

To read more from Leslie about cleaning with microfiber, check out this blog:

https://maidbrigade.com/blog/microfiber-for-cleaning/

Cleaning Tips Before an Extended Vacation

We’re looking forward to those final summer vacations this year! Packing and prepping for a vacation can be stressful. The last thing you want to think about before going on the vacation of your dreams is cleaning your home. But if you don’t think about a few strategic spots that need your attention, you will come home to a nightmare.

Enjoy a stress-free vacation by planning ahead of time. Starting a few days prior to leaving on your trip use these 10 tips to organize yourself and your home so you can leave for your vacation confident that everything is clean and ready to be left unattended.

  1. Turn off the water source to your washer and the power source to your dryer. Leave the lid up or open depending on if you have a top loader or a front loader. You want any moisture and evaporate which will prevent mold forming while you are gone.
  2. Go through your refrigerator and remove all the leftovers and items that could spoil. Place freezable food in the freezer and wipe all the refrigerator surfaces so they are free from spills. Condiments can be left for longer periods of time.
  3. Run the disposal with ice cubes and salt to remove any buildup of food inside it. Run hot water for a few minutes to remove food particles so the blades will be free of any built up rotting food.
  4. Wipe the sink of all moisture and cap the drain or disposal to prevent any rotting food particles from attracting flies or other small insects.
  5. Clean all your dirty laundry and fold it and put it away. You will enjoy everything being organized when you get home.
  6. Clean the sheets on your bed before leaving so that you can jump into a nice clean bed after a long relaxing vacation.
  7. Run the dishwasher so there is not a dirty dish left in the house. Empty the dishwasher and put away all the dishes. Leave the dishwasher ajar so that the leftover moisture can evaporate.
  8. Empty the trash in all rooms and leave it in your outdoor trash receptacle. Rinse the inside of the trash cans so there is nothing left to attract any “critters.” Move the outdoor trash receptacle away from your house. Trash inside the can attract flies and rodents that could try to move into your home.
  9. Give all the showers and bathtubs a good cleaning before you leave. Remove hair and debris from the drain. Wipe the walls dry and leave the shower curtain closed so mold will not grow in the creases of the curtain while you are away. Make sure you remove any wet towels or washcloths and run them through the washer and dryer. Never leave items in the washer or dryer while you are away.
  10. Remove the grounds from the last pot of coffee. Run the pieces of the coffee maker through the dishwasher and leave the water reservoir open so that moisture can evaporate. Nothing is worse than coming home to molding grounds in your coffee maker.

Once your vacation home prep is complete, you’ll be able to have an enjoyable, relaxing vacation. Arrive home to a clean house and pick up right where you left off!


For more great cleaning tips, check out the Green Cleaning Expert, Leslie Reichert at greencleaningcoach.com


A Connected Home

Artificial intelligence is an amazing thing. We prefer to ask Siri questions instead of others, Alexa knows our favorite songs and now we have introduced AI into our homes in the form of “Smart Thermostats.” Many of these different smart home devices can learn and respond to temperature preferences with the idea that using a smart thermostat will save money and energy. A more recognizable thermostat, the Nest claims to have saved over 22 billion kilowatt hours of energy since 2011 and some energy companies have given smart thermostats to their customers because of the ability to save more energy than traditional, manual thermostats.

How it works

Smart thermostats are connected via wireless internet in order for users and customers to monitor their energy and temperature and make adjustments through an app. These devices record the patterns and preferences of your home within a few days and program themselves to repeat the settings. Smart thermostats will also recognize when the house is empty and will adjust the temperature to an energy saving level and will record when the house becomes occupied again to return the temperature to normal.


Is the smart thermostat right for you?

  • If you are already considering a smart thermostats, check what system is compatible with the device. Most smart thermostats work with either Google or Amazon.
  • They can save customers about 10-12% on energy bills each year. Some argue that a traditional, manual thermostat is a better choice if you’re staying in a home less than 2 years.
  • Smart thermostats also have the ability to notify customers of needed maintenance or repairs. Notifications are customizable for each issue. This can potentially save on expensive repair bills should the system fail or have a weather related emergency.
  • If you’re considering installing a Smart Home System, make sure the brand will work with your current system and needs.

To read more about saving energy, check out these blogs:

https://maidbrigade.com/blog/save-money-by-using-less-energy
https://maidbrigade.com/blog/green-your-home-by-using-less-energy

Healthy Home Allergen Treatments for Spring

Protecting your home from allergens is simpler than you may think, however, some time and financial investments may need to be made in order to keep your allergy symptoms to a minimum and to reduce medical expenses. Preventative tools and products are worth the investment when it comes to allergies.

The goal is to create a safe, dust-free place where your body and lungs can rest after exposure to air pollution and other impurities. Cleansing the bedroom is a great place to begin since 30% of our lives are spent sleeping. Here are some tools and tips to follow.

The first step is to invest in an allergen-free pillow. Even though down pillows are soft and comfortable, they can aggravate allergies.  You can also find allergen-free pillowcases to create a barrier between you and the pillow.

Mattresses are the perfect breeding ground for dust mites. They love dark, warm and moist conditions. Start by vacuuming your mattress twice a month by using an upholstery tool to vacuum the top and the sides. After vacuuming, mattress covers are the best defense against dust mites. Similar to allergen-free pillowcases, a mattress cover will create a barrier between you and the mattress that will allow air to flow but will keep out dust mites.

The next step is to use a high quality, HEPA filtered vacuum when cleaning your bedroom and home. HEPA stands for high-efficiency particulate air. HEPA filters force air through a fine mesh to trap harmful air particles like pollen, pet dander and dust mites. Vacuuming at least twice a week with a HEPA filtered vacuum will help keep your bedroom dust free. Be careful when choosing a new vacuum as some are marketed as “HEPA-like” and may not be truly HEPA filtered.

Using a HEPA air purifier in your bedroom will also help prevent dust. When you’re out of the home, turn the air purifier to its lowest setting and turn it back up when you return. Purified air will help you sleep soundly and help your lungs rest after fighting polluted air during the day.

Next, dust your bedroom with a soft, large-loped microfiber cloth with a spritz of water. This tool will pick up dust and hold onto it. Aerosol cleaning products contain irritants that can aggravate allergies and should not be used in the bedroom. By using a microfiber cloth, you can clean your bedroom quickly without using toxic chemicals.

Fabric curtains and draperies harbor dust mites. You can either remove them completely and replace them with non-fabric blinds or shutters, or remove them at least twice a month and place them in the dryer on a hot setting. The heat will kill dust mites and remove dust and dirt.

Although this last tip is a major investment, it will help reduce allergens, dirt and germs in your home. Remove wall-to-wall carpeting in your room and replace with hardwood flooring. Carpets absorb dust and hold onto it. It’s very difficult to rid carpet of dust, dirt and allergens completely. Once carpet has been removed, you can use small area rugs. They will need to be placed in the dryer at least once a week to remove dust.

Keeping dust and dirt to a minimum within your home is the real goal when protecting yourself from allergens. These tips and tools will help reduce dust and allergens within your home and will lead to decreased medical costs and better health.

For more information on how you can protect your home safely, visit Leslie's website!