Tag: deep cleaning

How Often Should You Schedule a Deep Cleaning for Your Home?

Although a quick pass with the vacuum or a routine dusting will keep your home looking fresh, clean, and inviting, hidden grime and hard-to-reach areas need to be addressed on a regular basis. Why? Allergens, bacteria, and mold can build up right under your nose, potentially impacting the health and safety of your family and guests. Overlooked dirt and filth can also eat through paint and finishes, affecting the lifespan of your furniture and surfaces. Thankfully, deep cleaning can prevent these issues before they even start. 

Deep cleaning requires careful attention to detail, something your busy lifestyle may not allow you to make time for. That’s where our experts come in. At Maid Brigade, we encourage you to plan deep cleaning services as often as your home needs them. For a consistently clean home, be sure to schedule regular cleanings in between. We understand that every home and family is unique, which is why this blog is dedicated to helping you determine just how often your house needs a more thorough cleaning and what you can expect from this kind of service. 

Deep Cleaning Checklist 

Maid Brigade’s deep cleaning house service varies by location, but the following is a list of example tasks that may be performed during a routine deep cleaning. 

  • All Rooms: A deep clean begins with standard cleaning tasks like dusting, removing cobwebs, vacuuming, mopping, wiping surfaces, and general tidying from room to room. Our experts then go the extra mile to wipe down woodwork and windows, spot clean walls, and vacuum furniture. Area rugs and light, movable furniture will be cleaned as well. 
  • Bathrooms: Cleaning and disinfecting toilets, tubs, showers, sinks, counters, faucets, mirrors, floors, and cabinet fronts will make your bathroom look shiny and brand new, but that’s just a standard cleaning. Deep cleaning will include spot cleaning walls, vacuuming non-floor surfaces, and tackling the grime under bath rugs, cabinets, consoles, etc. 
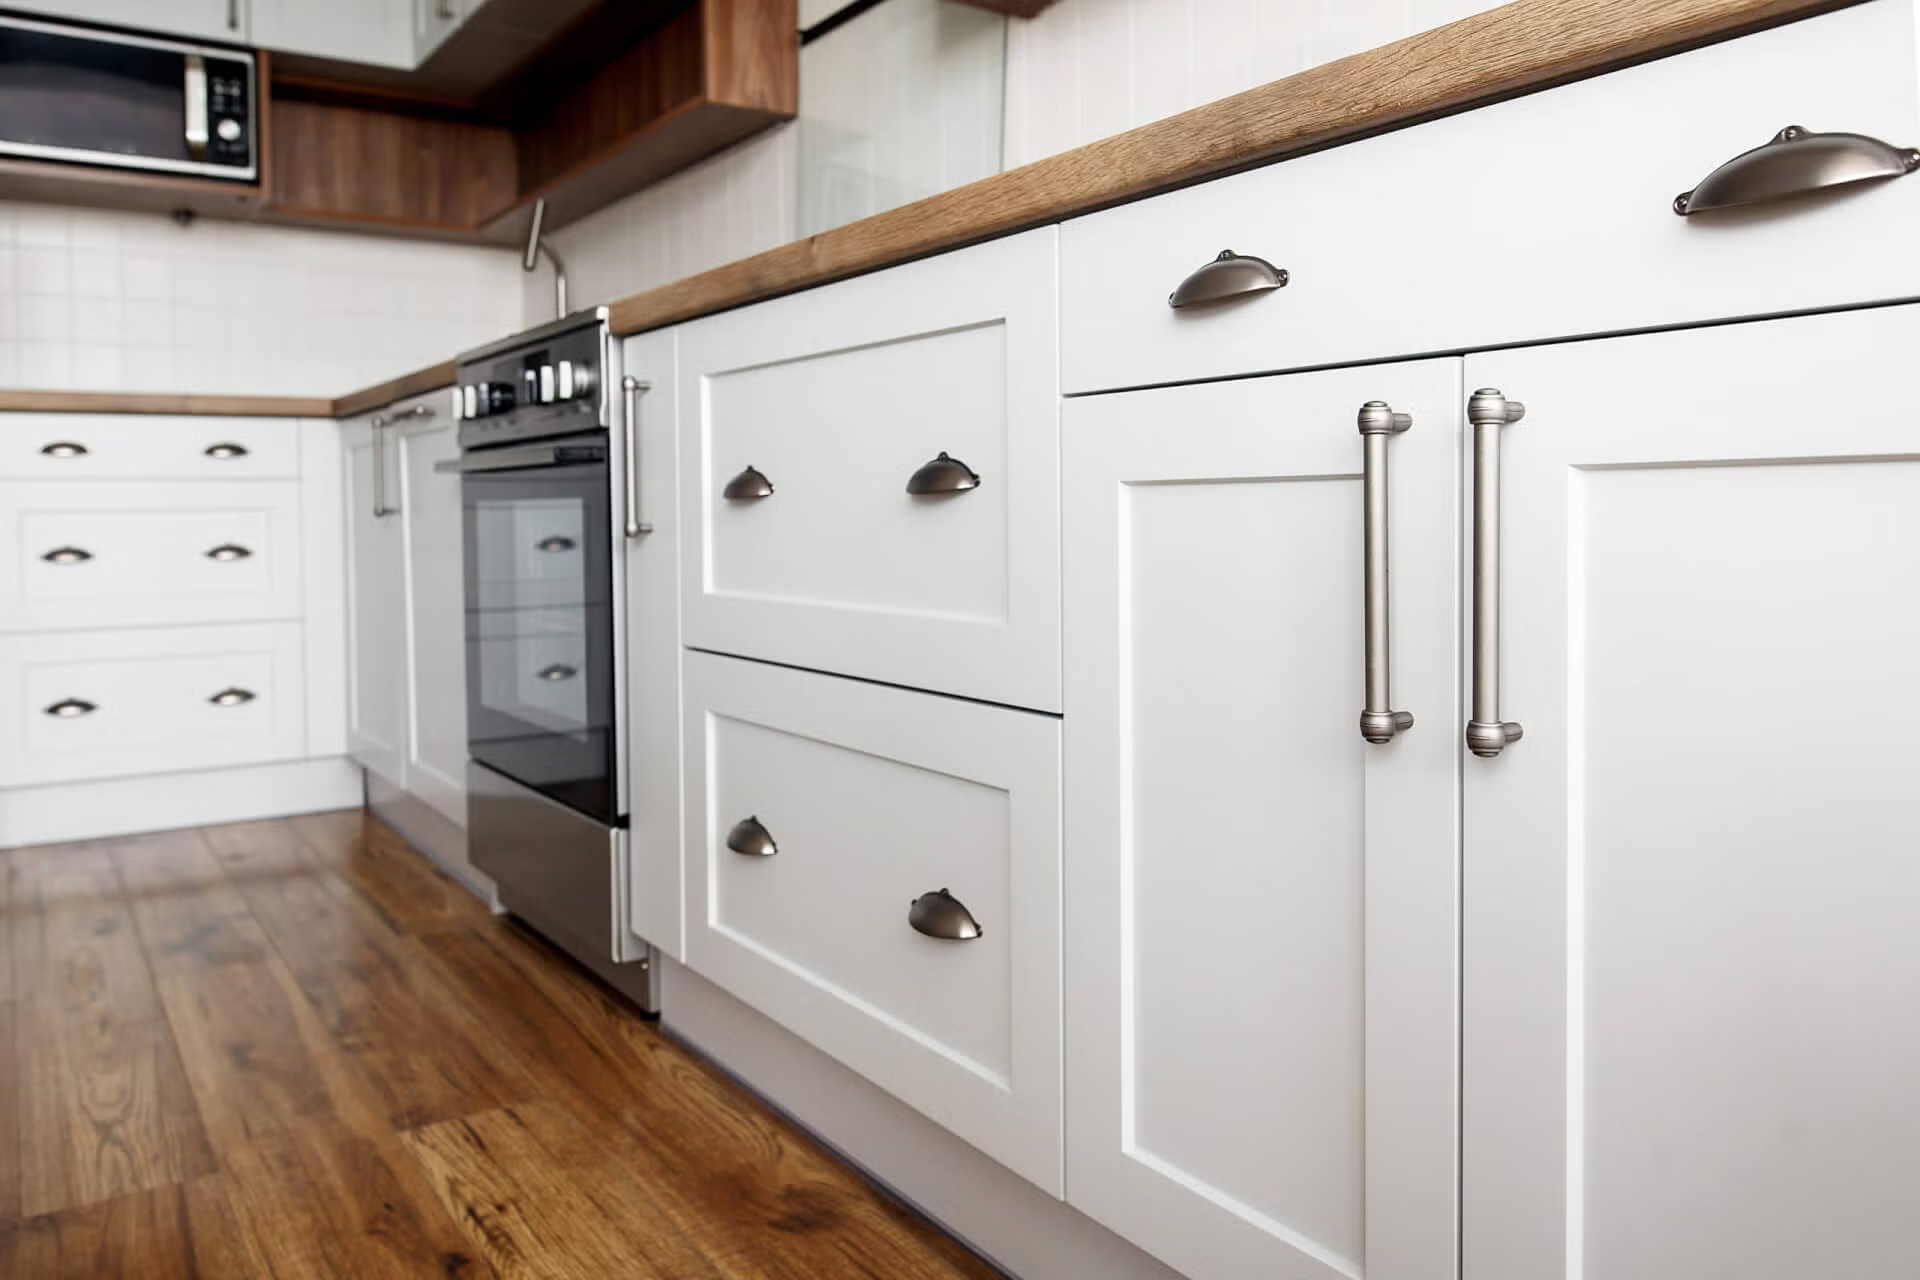
  • Kitchen: Tackling your kitchen’s surfaces is standard, but a more meticulous approach will require spot cleaning and disinfecting everything from cabinet handles to walls to that forgotten spot underneath your island’s area rug. Starting with your sinks, faucets, and countertops, our experts move to your exterior appliances, like stovetops and drip pans, for a true top-to-bottom cleaning. 

Does your home need a service that you don’t see in our deep cleaning checklist? No worries! We can work with you to choose a speciality cleaning that makes sense for you. 

Find the Deep Cleaning House Service Schedule that Works for You

Are you ready for a deep cleaning house service? Here are some lifestyle factors that may contribute to unseen grime, stubborn stains, and musty, unpleasant odors:

  • Large household size
  • Frequently open doors and/or windows
  • Children
  • Pets
  • Allergies and health sensitivities
  • Frequent visitors
  • Entertaining large gatherings 

The first cleaning is only the beginning. This is how you can assess whether you need a deep cleaning on a monthly, quarterly, seasonal, or annual basis:

Monthly 

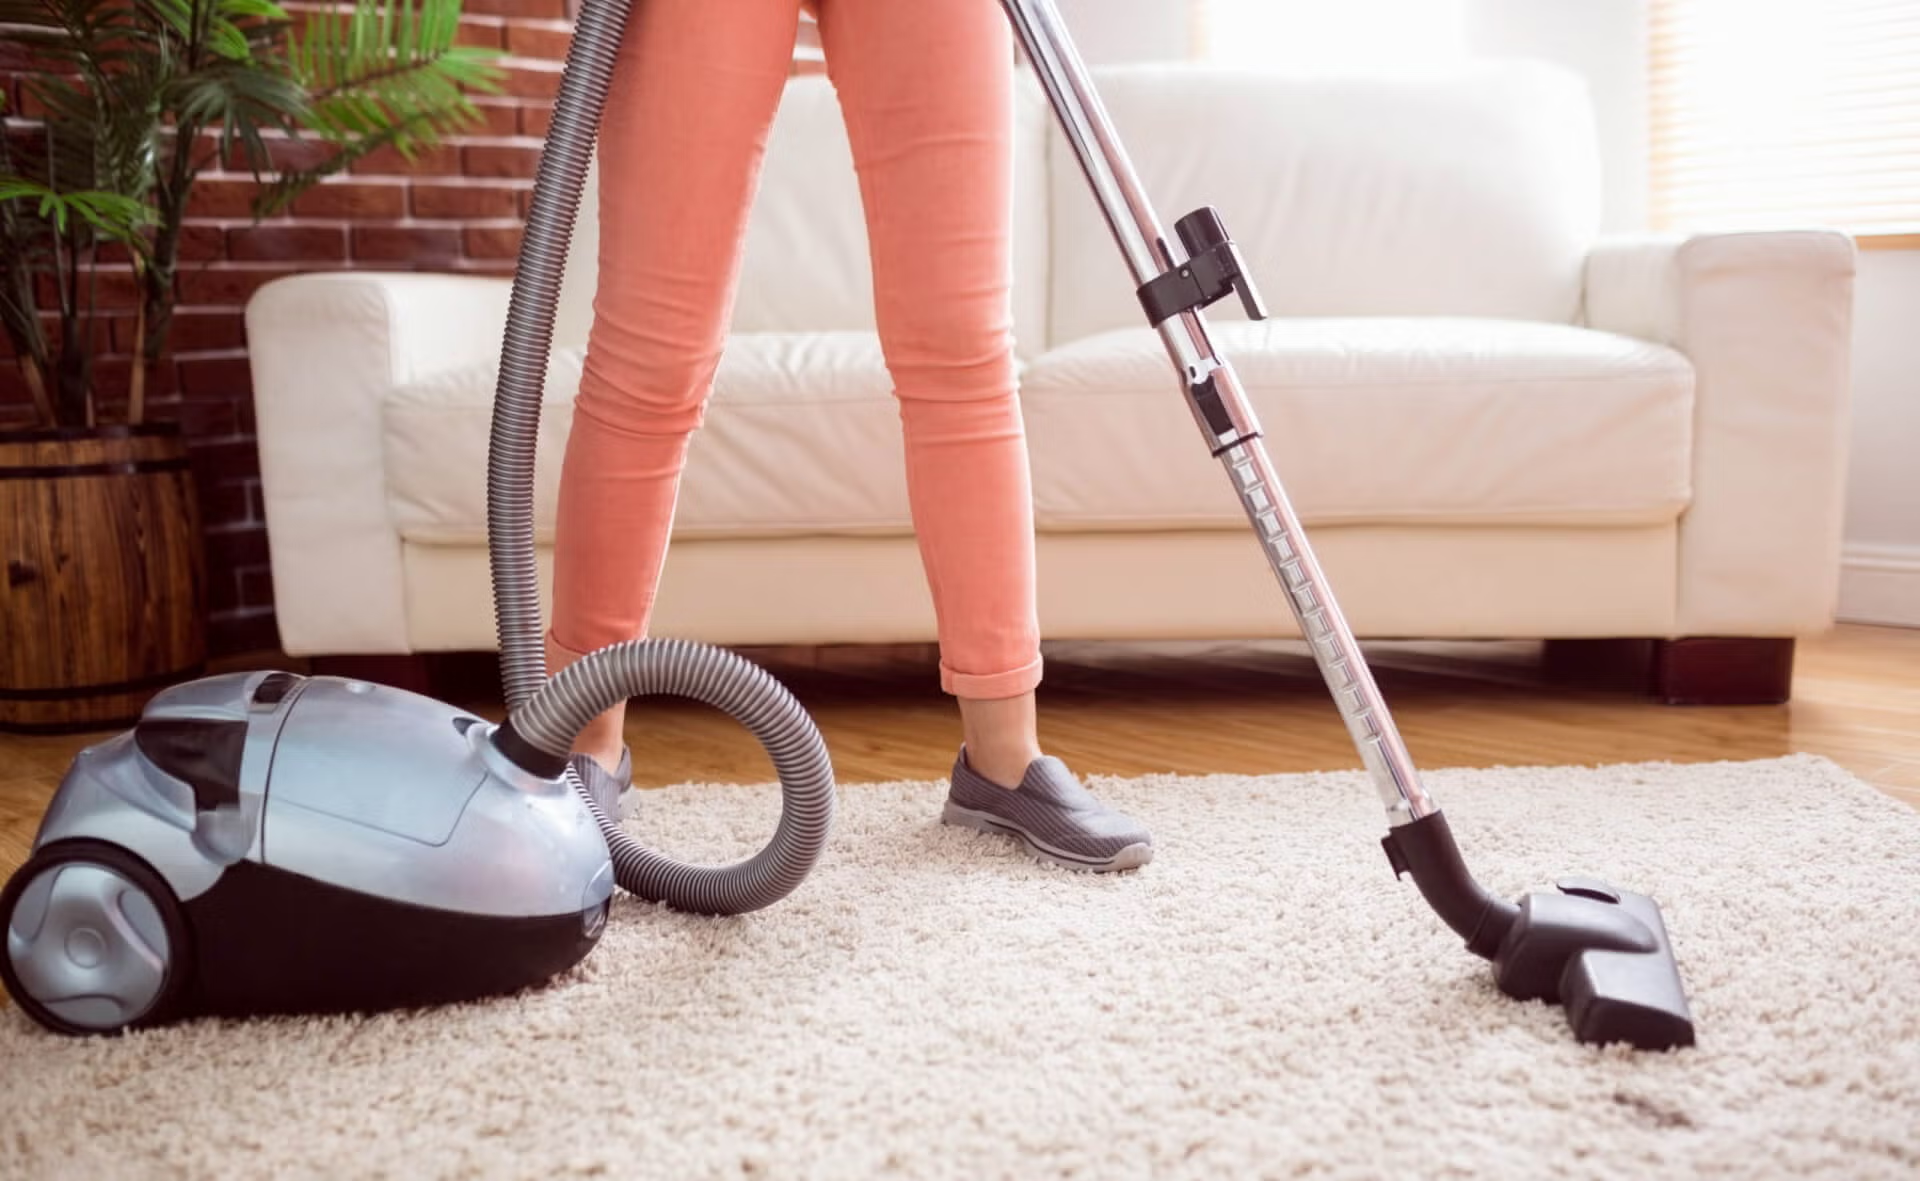
If you have pets or a highly active family, monthly deep cleaning will prevent grime and dust from collecting and keep your floors and baseboards squeaky clean. You’ll also enjoy better air quality as dust and allergens are removed from carpets, upholstery, and curtains. Even with this frequency of service, your home can still benefit from weekly or biweekly maintenance cleanings. Don’t forget that regular cleanings can help reduce stress and anxiety as they create a sense of calm in both your mind and your living space.  

Quarterly

Maybe your home doesn’t accumulate dirt and grime so quickly. In this case, a deep cleaning every three to four months will likely be enough to keep crevices, corners, and regular-use surfaces sanitary and tidy. Additionally, you lower your risk of pest infestations. 

Seasonal

Depending on where your home is located, different seasons may present different cleaning challenges. For instance, if you live in the southern U.S., the transition from winter to spring may inspire a deep cleaning if pollen and pollen-related allergies are a concern for your family. In areas where colder weather is common in the winter months, a seasonal service can help address the salt and chemicals that get tracked in with the snow. 

What about the holidays? A deep cleaning ahead of family visits and celebrations can help keep your kitchen and guest rooms spotless. We also recommend scheduling a deep cleaning if you’re bringing a new baby home. A happy home is a healthy home, especially for your latest family member. 

Annual 

Every home can benefit from an annual deep cleaning. This type of service will address everything from your windows to your carpets to ensure that no surface is left unscrubbed. Looking forward to this service on a yearly basis may be beneficial to your productivity and peace of mind, too, as you can rest assured that your home will be well looked after. 

Schedule Your Deep Cleaning House Service Today

We’re committed to providing you with a sparkling clean home. Whether you need cleaning on a weekly basis or a seasonal deep cleaning, we can help you create a comfortable and safe living environment that’s easy to enjoy and maintain. Our offerings include powerful, eco-friendly disinfecting techniques and custom cleanings to suit your precise cleaning needs. What are you waiting for? Contact us today before our schedule fills up!

How To Deep Clean Your Kitchen

I don’t know about you but I spend most of my time trying to keep my kitchen clean and clutter free. I’m doing things like; putting things in the dishwasher, picking up papers on the counters and constantly vacuuming up dog hair.  Deep cleaning?  It’s not on my radar. Let’s look at some of the places in the kitchen that probably haven’t been cleaned in a long while.

Cleaning the Refrigerator, Freezer, & Sink Disposal

Refrigerator ice/water dispenser - Drip trays are a breeding ground for bacteria.  It’s actually be called the “dirtiest place in the kitchen.” To clean this area, wipe out the drip tray with a dry, clean microfiber cloth. Then remove any buildup in the drip tray by filling it with distilled white vinegar and allow it to soak for 10 minutes. Mix 1 tbsp. of baking soda with 1 cup of warm water and place the mixture inside the dispenser tray. Rinse the dispenser and wipe it with a dry microfiber cloth.

The freezer – Even if you have a self-defrosting freezer, you occasionally need to turn off the power and clean the entire area.  Crumbs and droppings along with dust and dirt need to be removed. By turning up the temperature, you’ll be able to wash the freezer walls without the moisture freezing on your cleaning cloth. Use warm soapy water to wash the floor and walls of the freezer, then rinse completely. Let it air dry before turning down the temperature.

Disposal – Food particles and gunk build up on the blades of the garbage disposal. A simple way to clean the blades are to freeze some lemon peels and place them, with some salt, into the disposal.  Run the disposal until they are gone.  Your disposal will be clean and smell wonderful.

Cleaning Your Cook Top & Microwave

Stove – Clean the stove from the inside out. If you have a self-cleaning oven, follow the directions and let it do the dirty work. If you don’t have a self-cleaning oven, you can use a paste of baking soda and water, and spread it on the walls and floor of the oven. Then spray it with distilled white vinegar. Let it sit overnight and wipe clean.

The top of the stove – The best way to clean the top of the stove is to remove all the pieces of the stove top and start scrubbing. Try not to use anything aggressive as you can scratch the finish. Once it’s completely clean, use a clean damp microfiber cloth to leave it sparkling clean.

The bottom drawer of your stove – This is one place that hardly gets cleaned. Remove all the items of the drawer then use your vacuum to remove crumbs and dirt. Wipe the drawer with soapy warm water and a microfiber cloth. Let the drawer air dry.

Microwave – A quick way to clean the inside of your microwave is to put a bowl of hot water with lemon juice in the microwave and turn on the power until it starts to boil. This can be from 2 to 4 minutes. Let the bowl sit in the microwave for 5 more minutes. Open the microwave and wipe the walls and the base clean with a microfiber cloth.

Cleaning Other Areas Around the Kitchen

Cabinet Knobs - Kitchen knobs hardly get cleaned even if you wipe the cabinets frequently. Use some hydrogen peroxide on a microfiber cloth to remove buildup and germs.

Floors – Cleaning your floor with a sponge mop actually leaves buildup on the perimeter of your floor.  For a deep cleaning, get a bucket of hot water with a few drops of dish detergent and get down on your hands and knees. Give your floor a good scrubbing.  Use a microfiber cloth and a scrubbing sponge for tough spots. You can also use a steam machine to deep clean the floor.

Chairs and table – Wiping down your table after dinner is probably part of your routine, but when was the last time you “deep cleaned” your kitchen chairs? And how about the base of the table?  When you are ready to deep clean your table and chairs, start with a bucket of hot water and a microfiber cloth and wipe off dust, grime and grease. Don’t bother with a cleaning product. Using the hot water and microfiber will leave the table and chairs clean without a film from a cleaner.

Light fixtures – A quick tip to deep cleaning your kitchen light fixtures is to pop the glass shades into the dishwasher. The hot water and agitation will remove built up dirt and grease. They will come out of the dishwasher sparkling clean.

For more information from DIY green cleaning expert Leslie Reichert, visit https://www.facebook.com/GreenCleaningCoach/

Monthly Home Cleaning Checklist

Every season our homes tend to build up dust and dirt that we might not see immediately. While weekly or bi-weekly cleanings will keep your home looking clean regularly, it's the areas in your home that aren't always easiest to get to that will need seasonal care. For this reason, it's important to do a deep clean every month to keep your home healthy. Scheduling a deep cleaning in a different room in your home each month will let you rotate your cleaning and keep your home truly clean.

These are the things you want to clean in each room monthly. This list is outside of your regular cleaning chores:

  • Take down the curtains and place them in the dryer to knock the dust out of them. If the dust is excessive, you may need to pop them in the washer.
  • Using furniture movers, pull all the furniture away from the walls. Also remove pictures from the walls. Using a dry microfiber mop, wipe all the walls and ceiling to remove the dust.
  • Remove any glass light fixtures and place them in the dishwasher.
  • While the furniture is pulled out, use a vacuum and clean the woodwork and the carpet behind the piece.
  • Before putting the furniture back, use a microfiber cloth and dust the back of the piece of furniture.
  • Using a wet, fine-woven microfiber cloth go over the inside of the windows as well as the window frames.
  • Place the furniture back and dust it completely including the sides and fronts.
  • Vacuum all fabric furniture completely, including the seat pillows, sides and base.
  • Any knick-knacks can be deep cleaned by placing them in the dishwasher.
  • Use a paintbrush to remove dust on lamp shades. Then go over the shade with the upholstery tool on your vacuum hose

Additional items for bedrooms:

  • When deep cleaning bedrooms, place bedspreads in the dryer to remove dust.
  • Vacuum books on bookshelves.
  • Vacuum under the bed.
  • Remove the sheets and vacuum the mattress. On a quarterly schedule you should also flip the mattress.

For more information from DIY green cleaning expert Leslie Reichert, visit https://www.facebook.com/GreenCleaningCoach/

Microfiber Cloth Cleaning Hacks

Microfiber was developed in Japan during the 70’s for swimwear. Ten years later, European scientists found that it was the perfect fabric for cleaning due to its absorbency.  By the early 2000s, the microfiber industry had exploded.  Even though microfiber has been around for decades, there are many who have yet to try cleaning with microfiber tools. Take a look at all you can do with microfiber – it’s worth the investment!

Perfect windows – There are many different types of microfiber cleaning cloths. For windows, use a fine woven microfiber. It almost looks silky.  The microfibers are very small and will leave windows perfectly clean. Dunk the cloth into hot water and wring it out well so it’s damp. Wipe it over the glass and then watch as it picks up dirt then dries perfectly without streaks or smears. Or spray the glass with water and use a dry microfiber cloth as if it’s a paper towel. Dry the glass completely and it will be free of streaks, smears and lint.

Save on paper towels – Use microfiber cloths in place of paper towels when cleaning. Microfiber is more absorbent than paper towels and better for the environment since they are reusable. Be sure to launder microfiber cloths, towels and mop heads with only other microfiber materials.

Chemical free dusting – Most spray dusting polishes leave layers of silicone on furniture. Instead, use a dry microfiber cloth to dust your furniture. Microfiber has tiny fibers that hold onto dust. It will hold onto dust and dirt particles until laundered which makes dusting much faster.

Preventing cross-contamination – Hospitals have used microfiber mops for years to prevent cross-contamination. You can use in your home for the same reason! Microfiber mops have a cover that attaches with Velcro onto the end of the mop. Once it’s dirty it can be removed and laundered. It’s like using a brand-new mop every time you clean.  No more smelly, moldy mops!

Large outdoor windows – Homeowners may struggle keeping large windows clean from salt, pollen and other outdoor elements. A damp microfiber cloth wiped over large windows will remove any salt or pollen and leave the windows looking crystal-clear.

Dusting walls – Instead of washing the walls in your home, try dusting them instead. Use a microfiber mop with a dry mop head and dust your walls in minutes. The microfiber will pick up the dust without dealing with a bucket and rag.

Ceiling fans – Have you looked at the paddles of your ceiling fan lately? Dust them quickly with a large-looped microfiber cloth. Using the dry cloth, wipe it gently over the fan paddles to pick up and remove dust. This task will takes minutes and leaves the fan dust free.

Perfect granite – If you have dark granite counter tops, you may struggle with streaks and smears from cleaning. Try using a microfiber cloth designed for glass.  Dampen the cloth and wipe over the granite to leave it looking showroom perfect!

To read more from Leslie about cleaning with microfiber, check out this blog:

https://maidbrigade.com/blog/microfiber-for-cleaning/

At home allergy treatments

Dealing with dust allergies is a battle that affects many people, especially during the spring. To win the battle you need strategies that will help reduce the triggers in your home. Creating safe spaces where your lungs can “rest” is the key. Allergists refer to our immune system as a bucket that fills up over time. When our buckets become full we deal with allergic reactions. Each of us have different sized buckets, but we all need places in our homes where we can let our immune systems rest from dust, pollutants and irritants. Here are some things you can do in your home to create a clean and safe environment.

Cleaning more often – A simple, inexpensive step is to dust and vacuum more often. People in Europe use their vacuum to do most of their dusting. They use the dusting brush and go over all the wood and fabric surfaces with the vacuum. This makes cleaning quick and easy as well as very efficient. The vacuum captures and holds the dust. Wiping the dust with a dry cloth can put the allergens back into the air which defeats the purpose of cleaning.

Plants – Indoor plants are not only beautiful to look at, they also help clean the air we breathe in our homes. In fact, NASA calls plants “nature’s life support system”. By adding a potted plant like a Peace Lilly or Spider Plant to your home you will be naturally removing allergic toxins in your air. Place plants in the most used areas of your home, such as the living room and bedrooms..

Air purifiers – Our indoor air has been shown to be  much more polluted than the air we breathe outdoors. We spend 90 percent of our time indoors, so it’s important that we clean it constantly. During most of the year we keep our windows closed to keep out the cold or heat. With limited air exchange we end up breathing the same air over and over again. Using a HEPA rated air purifier throughout the house will remove the allergens and keep pollutants to a minimum.

Mattress and pillow covers – We spend more than a third of our lives sleeping so an important place to focus on air quality is in the bedroom. Starting with your bed, find encasement covers for your pillows and mattresses to keep dust mite allergens away from your body. For some allergy sufferers, investing in hypoallergenic pillows and bedspreads may be the best solution. Down pillows are soft and very comfortable but can trigger allergies while you are sleeping.  Wash pillows and blankets often in very hot water and dry on a hot setting to kill dust mites and remove their droppings

Remove stuffed animals and draperies – Dust accumulates in fabrics. Since we don’t dust or wash our draperies every time we clean, they tend to collect a tremendous amount of dust which can be a trigger for those suffering from dust allergies. Stuffed animals also collect dust in a child’s room and can trigger an allergic or asthmatic reaction. The safest alternative is to completely remove drapes, curtains and stuffed animals - especially in the bedroom. Instead, use hard window treatments such as window blinds and shutters. If your child has trouble parting with their favorite stuffed animal, place it in a pillow case once a week and wash it in hot water and dry on a hot setting.

Considering hard flooring vs carpeting – Carpeting, like draperies, are dust magnets. Even the best vacuum can’t remove all the dust and dander from a carpet. Allergist recommend removing all the carpeting in a home and replacing it with hard wood flooring.  Hard floors are much easier to keep clean and the dust can be kept to a minimum. However, removing carpet throughout a home and replacing with hardwoods can get expensive. For a more economical solution, we recommend a professional carpet cleaning to reach the harmful dust mites hidden below the surface.

HEPA rated vacuum – Make sure you have a high-quality vacuum that has a HEPA rated filtering system. There are many different vacuums advertising they are good at removing allergens, but make sure you research the brand before making a purchase. There are only a few vacuums that are rated HEPA. Remember that you want to look for a vacuum that is rated HEPA not a vacuum that uses HEPA rated filters. A vacuum rated HEPA cleans the surfaces it touches as well as the surrounding air you breathe.

Dust mite sprays on furniture – Some people ask if dust mite removal sprays work and the answer is yes, but you need to be careful should someone in your home also have a chemical sensitivity. Spraying your fabric furniture with these sprays will kill the dust mites living in them, but they also add another type of pollutant to your air.

Keep humidity low – Dust mites like dark, moist environments so keeping the humidity low in your home is a great way to combat dust mites naturally. Use a dehumidifier all year round to keep the moisture in the air below 50%.

Keep pets out of the bedrooms – We all love our pets but their dander can be a trigger for someone dealing with allergies or asthma. Keep pets out of the sleeping area of someone dealing with allergies.

For more green cleaning and green living information, check out Leslie’s website.

For other allergy and asthma health tips, read these blogs:

https://maidbrigade.com/blog/support-your-immune-system
https://maidbrigade.com/blog/5-tips-to-get-you-through-an-earlier-allergy-season

How to deep clean the guest room

Preparing for holiday visitors forces us to address chores and projects we kept postponing when the weather was warmer and the days were longer. Even during this busy time of year, it's possible to get things checked off “the list” whether routine maintenance or improvement project. But it’s important to start early, so it can all happen before the big day your holiday guests arrive. Like the guest room. Deep cleaning the guest room ahead of time will relieve stress as you get closer to their arrival.

Deep cleaning the guest room may take a few hours but if you divide it into small 15 minute jobs, it that can be something that you can work on throughout the week. Find a timer or use a smart phone to keep track of how long you are cleaning.  My motto is:” I can do anything for fifteen minutes”.

Methodical deep cleaning will make the process go quickly and efficiently. This generally means to start at the ceiling and finishing with the floor, moving around the room clockwise, to make sure you cover every spot and cover it only once. Although there are some exceptions to this rule (see below).

Step 1: LIGHTS – Start with cleaning the lighting fixtures.  Remove the covers of ceiling and wall fixtures, taking ample safety precautions if using a step ladder. For light to medium dust, clean the fixture in the dishwasher. If the fixture has a thick coat of dust, fill up the sink with warm soapy water and give it a good scrub by hand. Ceiling fans can be easily cleaned with an old pillowcase. With the pillow case and a damp microfiber cloth, climb the step ladder, place the pillowcase over the dusty fan paddle and pull the dust off and into the pillowcase. Repeat this process on each of the paddles.

deep-clean-the-guest-room

Follow by dusting each blade with the microfiber cloth to make sure any remaining residue is gone. After you have safely descended the ladder, take the pillowcase outside, turn it inside out and shake out the dust. Launder the pillowcase with soiled cleaning cloths and store with clean cloths so it will always be handy.

Step 2: WALLS – Instead of washing the walls use a microfiber mop and dust them.  Use a microfiber mop cover and a spray bottle of water. My favorite microfiber mop is called a Duop Mop has a ball joint that easily clean large open areas with just a wipe. Place the dry microfiber mop cover on the mop and spritz it lightly with water (never spritz water or cleaner directly on your walls or you may permanently spot them). Start at the base of the wall and clean up to the ceiling (walls are the one area where you will clean bottom to top to prevent staining them). Then wipe the dry mop head over the ceiling to collect cobwebs and dust.

Step 3: WOODWORK – Use a damp microfiber cloth to wash woodwork and baseboards. Start with the tops of door jams and windows, follow with the trim around the windows, ledges and sills and finish with the baseboards and toe molding. Don’t worry about smearing the glass on the windows, you will clean windows in a latter step.

Step 4: WINDOW TREATMENTS – Remove drapes and place them in the dryer to remove dust. Don’t bother placing them in the washer.  If they have a thick layer of dust, put a damp towel in the dryer with the curtains. This will remove the dust and leave them wrinkle free.

ow-to-dust-window-blinds


Dust blinds by fulling closing them, wiping horizontally (with the blind slats) from top to bottom with a dampened microfiber cloth. Then, reverse the direction of the slats to the opposite fully closed position and completely dust this side in the same pattern.

dusting-blinds

Step 5: WINDOWS – Using a fine woven microfiber cloth and a bucket of hot water, clean the glass on the windows - inside and out. You want your windows to be crystal clear when your guests wake in the morning.

Step 6: BED LINENS – Strip the bed and place the bedspread, comforter and pillows in the dryer on a high heat. This will remove dust and also kill dust mites. This is a perfect solution for those guests that could have dust and dust mite allergies. Wash all the sheets using a fragrance free laundry soap. Your guests may be sensitive to fragrances, so using a simple soap to clean the sheets will let them have a peaceful night’s sleep.

Step 7: DUSTING – Dust all the furniture with a damp microfiber cloth. Move the furniture away from the walls and clean behind and underneath them. Using a crevice tool on the vacuum, remove built up dust in the tight spots where the carpet meets the wall.  Use the soft upholstery brush to clean the outside edges of hardwood floors.

Step 8: FLOORS – Vacuum carpets by starting in the farthest spot and gradually working your way out of the room. Use the vacuum’s pattern to make sure you have covered every inch of carpet. Hardwood floors can be cleaned with the Duop Mop. Start with a damp mop head and a spray bottle of a gentle hardwood floor cleaner. Use my “bucketless mopping” technique, spraying and mopping as you go, for fuss-free floors that look like glass.

Step 9: COMFORT BASICS – Help your guests feel at home by attending to basic needs. Like placing bottled water on their night stand.  Make sure the room has an alarm clock set to the current time. Add a luggage rack or ottoman so suitcase contents are most accessible. Leave a charging cube in a convenient outlet so guests can power devices overnight.

deep-clean-the-guest-room-for-holidays

Step 10: COMFORT EXTRAS – Purchase a few new magazines on subjects they find interesting and array them on the dresser. Place some fresh flowers and some hard candies on the dresser so guests will feel like they are staying in a 5-star hotel.

Deep Cleaning the Kitchen - Part 2

Deep cleaning the kitchen is a large undertaking with many smaller projects that need your attention.  Try to break down this deep cleaning project in to smaller bites so you don’t become overwhelmed.  That's why we used two blogs to cover how to deep clean the kitchen and everything in it. If you missed Part 1, click here.

How to clean the oven

Before starting to clean the oven, do a little research and find out if you have a self-cleaning oven and if it still works.  If you’ve ever used oven cleaner or abrasives inside your self-cleaning oven interior, you may have damaged the oven walls, making the self-cleaning feature less effective.  Manual cleaning can also damage the fiberglass gasket that seals the door. So the self-cleaning option is always the best if you can use it.

how-to-clean-the-oven

If manual cleaning is necessary, the safest and most effective method uses baking soda. When cleaning the walls and floors of your oven, make a paste of baking soda and water and “paint” all the oven surfaces. Fill a spray bottle with distilled white vinegar and spray the surfaces covered with the paste. When the surfaces are sprayed with the vinegar the baking soda will foam up. The vinegar is activating the lifting action of the baking soda which will remove baked on debris. Continue to spray the oven walls and floors every 10 to 15 minutes. Let the paste sit for at least an hour and then wipe the surfaces clean. Rinse the oven walls with warm water and a microfiber cloth.

Oven racks can be cleaned with Barkeeper’s Friend and a sponge. If you have some really difficult spots you can use a pumice stone to remove them.

How to clean the stove top

Gas burners – Use the same technique used inside the oven on gas top grates. Place the grates in warm water mixed with a de-greasing dish detergent and let them soak for 30 minutes. Rinse them off and “paint” them with the baking soda mixture.  Spray them with the distilled white vinegar and let them sit for an hour or so. Rinse them with warm water and a microfiber cloth. Scrub difficult spots with Barkeeper’s Friend or the pumice stone.

Electric burners – The drip pans on an electric stove can be very difficult and time consuming to clean.  If there’s a heavy build-up of baked on food and grease, you may want to just invest in some new ones. But if there’s only mild to moderate build-up there are a few options to tackle the job.  Remove the drip pans and place them in hot water and dish soap so they can soak for at least an hour. Then place them in a zip lock bag filled with distilled white vinegar and let them soak overnight.  The next day remove them and scrub the tough spots with some Barkeeper’s Friend and a green scrubby sponge. Don’t use a  pumice stone on the drip pans as it will scratch.

how-to-clean-the-stove-top

Glass stove top – The best trick to clean burn spots is a flat razor. Use a new razor and make sure to hold it at a 45-degree angle. Scrape underneath the build up until you feel the razor gliding over the glass. Use some baking soda and a scrubby sponge to loosen stubborn spots and then use the razor to remove them.

How to clean the dishwasher

It seems a little strange to clean something that cleans, but there are two parts of your dishwasher that need your attention so it will work better. The first spot is the food trap that’s found in the base of the dishwasher. This trap captures food, debris and even pet hair. The trap is either a mesh filter or a tray that can be completely removed and cleaned. The food trap can be the cause of a smelly dishwasher. Food that gets caught in the trap will continue to breakdown and rot with each wash cycle which is why it needs to be a part of your deep cleaning.

How-to-clean-the-dish-washer

The other spots that need to be deep cleaned are the seals around the door, the soap dispenser and the rinse-aid compartment.  Dish washing detergent can build up on each of these seals and create a film that prevent the dishwasher from being water tight. Wiping all these areas with distilled white vinegar will remove the “ick” and keep the seals working the way they should.

How to clean the garbage disposal

How-to-clean-the-garbage-disposal

There is nothing worse than a stinky disposal. Rotting food on the disposal blades is usually the culprit.  You can remove this buildup by placing ice cubes or frozen lemon peels into the disposal and then running it with cold water until clear. The other smelly spot in your disposal is the underneath of the rubber splash guard. This can be cleaned with baking soda and a toothbrush. Remove the rubber splash guard and sprinkle the guard with baking soda and scrub it with the stiff brush. Rinse with soapy water and replace the rubber guard.

How to clean the kitchen sink

How-to-clean-the-kitchen-sink

Using a stiff toothbrush, scrub around the faucet and also where the sink connects to the counter top. If you have a sink that is mounted under the counter top, there is a hidden rim that needs your attention.  Use a toothbrush and baking soda to get up underneath this rim. The area gets splashed with food and soap that can build up with mold and mildew.

Follow these tips every quarter and the job becomes easier over time using these tried-and-true techniques that are the most effective and efficient tips on deep cleaning the kitchen.

Follow the link to read Deep Cleaning the Kitchen - Part 1.

For more great green cleaning tips from our DIY Green Cleaning expert, visit greencleaningcoach.com.

Deep Cleaning the Kitchen

Once in a separate building altogether, kitchens have become the centerpieces of our homes today.  They are now meant for living, not just cooking.  Some modern kitchens have open floor plans that include a great room and a fireplace and some even flow outdoors. But regardless of whether your kitchen dated or updated, it is probably the place where people most often congregate. And with all this added activity it’s even more important this room is clean and organized.

Although each deep cleaning task should be completed start to finish, all tasks do not need to be performed on the same day (or weekend). To help make sure you don’t take on too much at once, this how-to guide is broken into two posts.

Part 1: The Pantry and the Refrigerator

Before you start

Before starting to deep clean your kitchen take the time for a little prep work. Start by clearing away the clutter and putting everything back where it belongs.  Remove things that don’t belong in the kitchen.  Clean the table and wipe down all the counter tops so you are not distracted.

deep-cleaning-the-kitchen-pantry

The pantry

  • The best place to start is in the pantry or cabinets where dry and can goods are stored. Remove everything from the top shelf and place it on the counter. Check each and every package and can for an expiration date. Throw out expired food as well as items you won’t really ever use.  If you have unwanted items that are not expired, donate them to a local food pantry.
  • Vacuum the shelf using the upholstery attachment to remove dust and debris.
  • Using warm soapy water and a large looped microfiber cloth, wipe the entire shelf as well as the sides and top of the cabinet or closet. These areas accumulate cob webs and need to be washed carefully.
  • When replacing the shelf contents, organize things based on how you use them. For example, store all your baking needs in one area, can goods in another and snacks in yet another area. Look at the next shelf and see if there are items that should be brought up to this top shelf.
  • Consider storing your dry goods in plastic containers. These will prevent damage from moisture and insects. Great, inexpensive containers can be found where kitchen and container items are sold. Make sure containers are easy to open and comfortable to grab with one hand. Use a labeling system to keep track of freshness dates.
  • Continue this process throughout the other shelves until all are done.
  • Wash the inside of the door or cabinet with warm soapy water and rinse.
deep-cleaning-the-kitchen-refrigerator

The Fridge

  • The easiest way to clean and reorganize the refrigerator is to empty it out completely. Throw out everything that has expired as well as things that you know you won’t be using.
  • Take out all the removable shelves and place them in warm, soapy water to soak.
  • Wipe down the interior fridge walls using a damp microfiber cloth and a spray bottle of distilled white vinegar. You don’t want to expose your food to the ingredients in a cleaning product. Vinegar is a natural acid and will work to break down food particles as well as kill 98% of the bacteria.
  • Wash, rinse and dry all the removable shelves and replace them.
  • Replace the food items. Remember that items that need to say cool should be placed on the back of the shelves. We tend to put things that we use on the doors or on the front of the shelves but in reality, your refrigerator should be organized based on the item’s temperature requirement. Milk should be stored toward the back of the frig instead of on the door. Items that can be stored on the door are items that don’t really require a consistent temperature such as condiments or salad dressings.  Keep this in mind as you reorganize your refrigerator.
  • Clean the outside of the refrigerator. Pull it away from the wall and vacuum the coils on the back and base of the unit. Remove items from the top of the refrigerator and clean it with a good de-greasing cleaner, dish soap or vinegar. Rinse and wipe it dry before putting things back on top.  It’s a good idea to clean these items while they are off the top of the fridge.
  • Finally, clean the sides and front of the refrigerator and make sure to give the handles a really good scrub. Use a tooth brush to get in and around the areas where the handles connect to the door. That connection is a sneaky place where spills and drips accumulate yet it rarely gets cleaned.

A deep cleaning by Maid Brigade will take care of these hard to reach, often overlooked areas. We want you to come home to a happy, healthy home every time. Whether you need us for weekly, biweekly, or monthly service, or you're just looking for an occasional deep cleaning, we want you to know you can count on Maid Brigade. Find your local Maid Brigade here and get your free estimate.

Leslie Reichert has tons of green cleaning tips, at Greencleaningcoach.com.

How to Clean Books and Bookcases

Deep-clean-books-and-bookcases

Warmer temperatures this winter have brought pollen out sooner than expected. May is Asthma and Allergy Awareness month, but if you or someone in your household is suffering asthma or allergy attacks, it’s probably time to do a deep cleaning targeted at removing the allergens than trigger these attacks. Pollen, dust, dust mites and pet dander are some of the main culprits and they are lodged in your carpets, upholstery, drapes, bedding and stuffed animals.

One often overlooked area to address is books and bookcases. Triggers that build up here can really be a problem for an asthma or allergy sufferer. But with the right deep cleaning tips you can alleviate suffering from asthma and allergy attacks. Here is the proper way to clean books and book shelves:

Quarterly cleaning your books and bookcases

This process should be followed every three months to keep asthma and allergy attacks at bay. For more information on cleaning for asthma and allergy sufferers, view this infographic.

Cover the floor. Start by placing a towel on the floor in front of the bookcase to catch any falling dust. Place another towel nearby – you will be placing the books on this one when you remove them from the shelf.

Work top to bottom. Start with the very top of the bookcase and completely remove the dust using a lightly dampened, large looped microfiber cloth folded into quarters (this makes 8 clean surfaces).  Then proceed in the following manner with each bookshelf, starting at the top and finishing with the bottom one.

Clear and clean. Remove all the books from the top shelf and place them on the book towel. Remove all the dust from this shelf, including all five shelf surfaces.

Dust all six sides. Using a fresh, clean surface on your cloth, dust the tops, sides and bottoms of the pages of each book while closed, as well as the front and back covers and the spine. It doesn’t really matter what order you do it in, just that you follow that order with each book, so that you won’t forget any surface on any book. Return each one to the shelf as you finish it.

how-to-dust-a-book

Repeat.  When the top shelf is completely dust-free, remove the books from the second shelf. Dust all the surfaces of the shelf.

Before you start dusting the books, change to a fresh, clean surface on your cloth.

Continue in this manner, changing the microfiber surface when you are dusting the books, not the shelf so that the cloth is as clean as possible when contacting the books.

Once you are done, place the book towel over the other towel and fold them together to prevent dust from falling off the towels. Place them in the washing machine to launder with other soiled items.

While you are cleaning the books, check for damage.

Caring for books

If you notice marks on the covers as you are dusting them, set them aside for extra care. We recommend Absorene Paper and Book Cleaner. It works like a pencil eraser to gently remove marks and stains.

If any books smell a little musty, place them and an open box of baking soda in a plastic container with a lid for at least two days and up to a week if necessary to let the baking soda absorb the odors.

Books last longer when they are stored in the “sleeping position” which is flat. They can be stored in an upright position like you see in a library as long as they are pressed together firmly. Never store your books leaning against another book.

If you don’t have enough books to keep them tucked together tightly, buy some inexpensive book ends to hold them.  If you don’t have bookends, place a stack of books in the sleeping position and use that as your bookends. This will give your books a pleasant looking arrangement.

Organizing and purging books

While you have your books off the shelves, it’s a good time to do some organizing and purging as well. As you work, set aside books that no longer interest you to give them to someone who will appreciate them. Donate your books to your local library or other charity.


Leslie Reichert is a cleaning expert that uses her sparkling personality, great sense of humor and contagious passion to encourage her fans and followers to think differently about what they are using in their homes. Leslie is known as a Green Cleaning Coach and she is changing the world - "one spray bottle at a time".  She is a national lecturer, a frequent homekeeping expert on The Dr. Oz Show, Martha Stewart Living Radio, Maid Brigade’s DIY Cleaning Expert and author of the book: The Joy Of Green Cleaning- a handbook for DIY cleaners. She works with Better Homes and Gardens, Real Simple, Today.com and other national publications.  You can see more of her work at www.greencleaningcoach.com


Homemade Remedies for a Sparkling Clean Home

A homemade cleaning solution

Who says you need to spend a fortune on cleaning supplies to achieve a sparkling home? With just a few everyday household items and a touch of creativity, you can whip up some effective, safe, and eco-friendly cleaning solutions. 

DIY cleaning can be fun, cost-effective, and a great way to reduce the number of chemicals entering your home with light maintenance cleans. And when it comes to deeper, professional-grade cleaning, Maid Brigade is here to ensure your home gets the non-toxic, thorough treatment it deserves. Maid Brigade’s PUREcleaning® system — powered by electrolyzed water — delivers a hospital-grade clean without the dangers of harsh chemicals. 

Natural (and Safe!) Cleaning Solutions You Can Try

Many conventional cleaning products contain chemicals that can leave behind harmful residues, contributing to indoor air pollution and potential health risks such as asthma or skin and eye irritation. By switching to natural alternatives, you’re making a safer choice for your home, your loved ones, and even your pets. DIY solutions offer an easy and effective way to keep surfaces fresh while avoiding unnecessary exposure to toxins. 

Sparkling Surfaces

For an all-purpose surface cleaner, a simple mixture of white vinegar and water does wonders. Combine equal parts of both in a spray bottle and add a few drops of essential oil, such as lemon or lavender, for a refreshing scent. This solution works on most surfaces, but be sure to avoid using it on natural stones like granite or marble, as the acidity can cause damage over time.

Glittering Glass

Windows and mirrors can sparkle without store-bought sprays. Mix two cups of water, 1/4 cup of white vinegar, and a tablespoon of cornstarch in a spray bottle. Shake well before each use, spray on glass, and wipe clean with a lint-free cloth or even newspaper for a streak-free finish.

Squeaky-Clean Carpets 

To freshen up your carpets, try making a homemade deodorizer. Mix one cup of baking soda with a few drops of essential oil. Sprinkle the mixture over your carpet, let it sit for 20 minutes, and vacuum thoroughly. This simple remedy not only neutralizes odors but also leaves your home smelling absolutely amazing.

Fully Functional Drains 

Slow drains can be frustrating, but a natural solution can save the day. Pour 1/2 cup of baking soda down the drain, followed by 1/2 cup of white vinegar. Cover the drain and let the fizzy reaction work its magic for about 10 minutes. Finish by flushing the drain with boiling water, and you’ll have clear, fresh-smelling pipes in no time.

Fresh Floors 

Even your floors can benefit from a DIY approach. Mix 1/4 cup of castile soap with two gallons of warm water for a gentle yet effective floor cleaner. Add a few drops of essential oil for a pleasant aroma and mop as usual.

Infographic titled “Make Your Own Household Cleaners.” It lists three DIY recipes: Surface Cleaner – equal parts water and white vinegar, plus a splash of essential oil. Window Cleaner – 2 cups of water, 1/4 cup of white vinegar, and 1 tablespoon of cornstarch. Floor Cleaner – 1/4 cup of castile soap and 2 gallons of warm water.

When DIY Isn’t Enough

While these homemade remedies are perfect for routine cleaning, some tasks require a more thorough, professional touch. This is where Maid Brigade excels. Using electrolyzed water as part of our PUREcleaning® system, we provide a deeper clean without relying on harsh chemicals. This innovative and eco-friendly method ensures your home is not only spotless but also safe for your family and the environment. But what exactly is electrolyzed water, and how does it clean so effectively?

It all comes down to a simple, scientifically backed process. We take salt, water, and electricity and transform them into a powerful yet completely non-toxic cleaning and disinfecting solution. The result is two key components:

  • A grease-cutting cleaner (sodium hydroxide) that breaks down dirt and grime on surfaces.
  • A deep disinfectant (hypochlorous acid) that eliminates bacteria, viruses, and other harmful germs without leaving behind harsh chemical residues.

Unlike conventional cleaners filled with synthetic chemicals, scents, and dyes, electrolyzed water is tough on dirt, grease, and germs without unfortunate side effects like unpleasant odors and risks to your health. It’s the same technology used in hospitals and healthcare facilities — now available to keep your home fresh, healthy, and sparkling clean.

Live in a Home That Truly Shines

Picture this: Your kids have their toy cars, crayons, and wooden blocks all over the living room carpet. They’re playing (and let’s be honest, probably putting their hands in their mouths) and you’re not worried about toxic carpet shampoo or other chemical cleaners harming them. Picture your pets, too. Your dog is lounging on the couch. Your cat is occupying their favorite spot on the windowsill. And look at you! You’re totally not stressed as you go about your day and move from room to room, preparing delicious meals on clean, safe surfaces and relaxing in an environment where it feels like every breath is full of fresh, clean air. 

What you’re picturing can easily become your reality. Stick to our DIY cleaning remedies for everyday cleaning, but don’t forget that Maid Brigade plays a central role in making your home cleaner, healthier, and ultimately happier with a regular cleaning service. So, are you ready to elevate your home’s cleanliness to the next level? Contact your local Maid Brigade today, and let us transform your space with safe, professional, and effective cleaning services.