Category: Green Cleaning Tips and Tricks

How to clean curtains and window treatments

a cat staring at the camera while laying by some sunlit curtains

Some of the places we never think of cleaning are those that we can’t see. Like window treatments – when was the last time you looked at your window treatments? I mean really took a close look at the fabric on those curtains and draperies. If I’m right, there’s probably a film of dust and dirt that hasn’t been removed in years.

If dust is left sitting on a curtain for a long time it can destroy the fabric.  Also, your curtains are acting like a huge sponge; holding on to the dust that aggravates allergies if anyone in your home is an allergy sufferer.  These are two good reasons to know how to clean curtains and window treatments and to start putting this important task on your cleaning radar.

Here is everything you need to know as far as how to clean curtains, so you can get them back to “clean” no matter how dirty they are.

Regular cleaning

To see how dirty your curtains are, try giving them a shake in the sunlight. All those little particles floating around should be removed weekly. Each time you clean your home you should also shake the curtains to remove dust that has settled on them during the week.

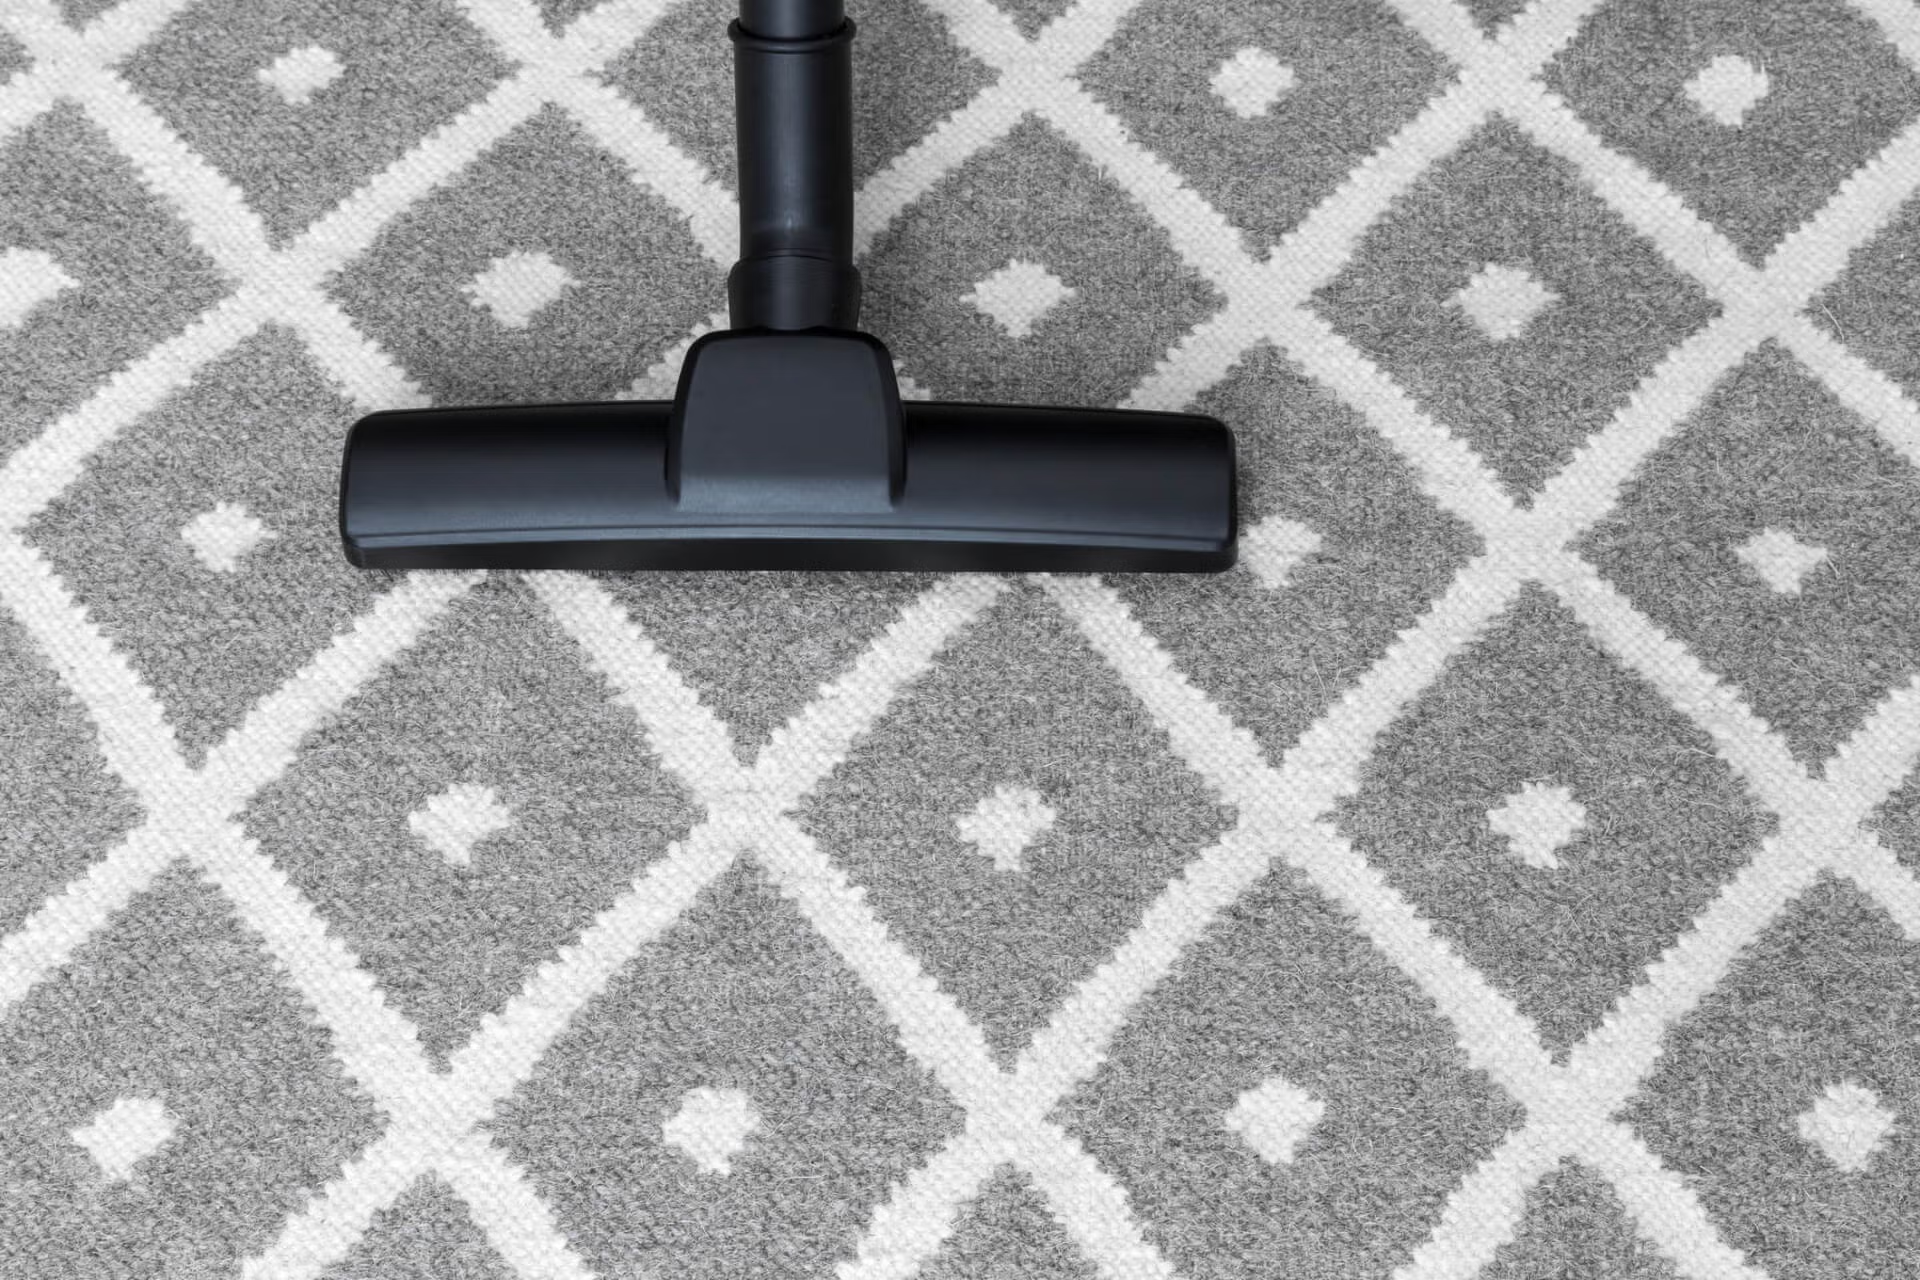
If you have a bit more time, use the dusting brush attachment for your vacuum to clean curtains and window treatments. The brush will work to get down inside the fabric and remove the buildup. To make it easier, open the air valve on the vacuum so you don’t pull the curtain off the curtain rod!

Along with shaking or vacuuming the curtains, remove the dust on the top pleats or on the top flat surface of the window treatment. You can do this with an extendable microfiber duster to catch the settled dust and pull it off the fabric.

Deeper cleaning

To remove a buildup of dust on your curtains, your dryer can help. Take down the window treatments and just pop them in the dryer instead of having to wash and iron them.  Use the warm air and gentle tumble settings of the dryer to toss the dust out of the curtain. Be sure to remove them before the dryer stops and hang them immediately – they will look as good as the day you installed them.

If you want to wash curtains first make sure they can be laundered. If so use a very gentle soap, a gentle wash cycle and a quality steam iron. Wash them on the permanent press setting then place them in the dryer for just a minute or two to warm up the fabric. Remove them and let them hang so the wrinkles will be pulled out of the fabric.  Touch them up with a hot steam iron.

how-to-clean-curtains-with-steam

Steaming is another option if you want to kill mites. There are great canister style steam cleaners that let you shoot the steam right onto the hanging window treatment. This is a great way to kill dust mites but you’ll still need to vacuum to remove the dust and dirt from the fabric.

Professional cleaning

To ensure that custom window treatments are cleaned without damage, take them to a local dryer cleaner that can clean them without using perc. Ask your dry cleaner to clean them with CO2 instead. It works just as well and it’s safer for everyone.

Mini blinds and fabric blinds also hold onto a lot of dust. Add them to your cleaning schedule. Be sure to check out our recent blog for tips on cleaning window blinds.

how-to-clean-curtains-correctly

Be sure to follow these tips for how to clean curtains and window treatments, to create a cleaner, healthier home and enjoy your beautiful window treatments for years to come.

For more DIY green cleaning tips, visit greencleaningcoach.com

How to clean window blinds and shutters

a women peering through blinds

Blinds and shutters are the perfect accents for your windows.  To keep them looking as nice as the day they were installed, clean them on a regular basis. The secret is all in the frequency.   A light dusting once a week will keep shutters looking brand new. But skip a few weeks, and the dust will build up and combine with the moisture in the air and make it difficult to remove.

Here's all the info on how to clean window blinds and shutters, whether they are brand new or not-so-new and kind-of-yucky. Follow these cleaning tips throughout the year, especially if there are asthma or allergy sufferers in your family.

Weekly Blind Cleaning

During your weekly regular cleaning, lightly dust all blinds and shutters.  Adjust blinds to the closed position and use a dry microfiber cloth to wipe them down completely. If the blinds are getting dusted every week, the microfiber cloth will do the trick to keeping them clean without using any cleaning products.

Deeper Cleaning

If your blinds have a buildup of dust and dirt, there are a few things you can do to make the task of cleaning them a bit easier. Start by putting the blinds in the downward position and use the upholstery attachment of your vacuum just to remove any large debris accumulated on the blind. While in the closed position rub a large looped microfiber cloth vigorously over the slats of the blind. Remove as much of the buildup as possible by putting pressure on the slats. Finally, using a spray bottle of rubbing alcohol, spray a light mist on a clean microfiber cloth and work it over the slats. The alcohol will work to cut through the buildup of dirt without turning it to a muddy mess. And the alcohol will dry quickly so it won’t drip down onto the next blind or onto the floor.

Deepest cleaning

Really grimy blinds or shutters will have to come down. If only there were some easy cleaning tips for yucky blinds, but there aren't. Fill a bath tub full of warm water and add a few drops of your favorite dish soap and two cups of distilled white vinegar to the water.  Let the blinds sit for five to ten minutes in the solution to loosen the buildup.  The natural acid in the vinegar will work to break down the dust and the soap will help to lift it off.  Gently rub a sponge over the slats to remove dirt. A small stiff brush will work to get into tight areas.  Rinse the blinds twice in clean, cool water. Let them drip dry for a few minutes then wipe them dry with a microfiber cloth.

Other types of blinds

how-to-clean-window-blinds-wood

Wood Blinds – Wood blinds should not be immersed in water as the moisture will warp them. Avoid using polish or oil on wood blinds as it will attract more dirt to the slats and make them more difficult to clean. Instead of a polish, use a spray bottle of witch hazel to spritz a light mist onto a microfiber cloth and wipe the slats clean.

Vertical blinds – Vertical blinds should be dusted or vacuumed but never submerged in water as the blind will separate from its backing. Use a dry microfiber cloth to remove dust on either side of vertical blinds on a weekly basis. Once a month use the upholstery brush and work over each of the slats to remove deeper dust and dirt. If your vertical blinds get a buildup that your vacuum can’t handle, call a professional blind cleaner to have them deep cleaned.

Exterior – Outside blinds or shutters can be dusted with a soft brush on an extendable pole. Or, wash with a hose and stiff extendable brush.

A word about the tools used to clean window blinds and shutters

Microfiber large-looped cloth – to wipe over the blinds so it will catch the dust and hold onto it until you put it into the washing machine.

Microfiber dusting wand – to reach the top corners of the blinds that are difficult to reach.

Microfiber dusting glove – to capture and remove dust on the slats and hold onto it until you place the glove in the wash. There are two types. One looks exactly like a driving glove and the other like a mitten. Both work well.

Paint brush – to clean off dust and dirt in hard to reach places on your blinds. They’re inexpensive at the hardware store so purchase different sizes to get into different areas.  Wash with warm water and a drop of dish soap. Air dry before re-using.

Blind cleaner brushes – supposed to be very convenient to dust the individual slats but these tong-like tools, hawked on late night TV, are cumbersome and time-consuming to use. It takes a lot of patience to get the tool lined up with the slats on the blinds.  A microfiber cloth or a microfiber glove to remove the dust is the way to go.

Vacuum attachments – to remove cobwebs and larger debris on blinds. Also cumbersome for dusting and other than the big stuff, microfiber cloths and wands are easier to manage and very effective.

clean-window-blinds

Now that you know how to clean window blinds and shutters, you'll be able to keep them looking great whether closed for privacy or open to let the sun shine in.


If you liked these cleaning tips, check out some others that are super useful this time of year:

How to Clean Summer Stains

How to clean the gas grill

How to clean a clogged drain, the GREEN way


For more information from our DIY green cleaning expert, Leslie Reichert, go to greencleaningcoach.com


How to Clean Summer Stains

young kid eating a melting ice cream that is creating a mess

Along with the sunshine, warm temperatures and (slightly) relaxed pace we also greet a set of summer stains along with the summer solstice. Not all stains can be treated the same way so don’t reach for the stain stick unless you know what’s in your stain.  Here’s a rundown on how to handle the TOP 10 summer stains PLUS a printable guide to put in your laundry room so you have the information at your fingertips. Our guide on how to clean summer stains should be required reading 🙂

download-free-stains-of-summer-guide


Ketchup – If the ketchup has dried, brush off as much as you can with a stiff brush.  Soak the stain in warm water for 30 minutes. Then, using a bar of Ivory soap, work the soap into the stain with a toothbrush. Continue to work the soap into the fabric until you can no longer see the stain.

Mustard -Dampen the stain with warm water and then apply a liquid laundry detergent on the area. Leave undisturbed overnight and rinse in the morning. If the stain does not come out, repeat the process or try a stain remover. You can also put the stain in the laundry with some oxygen bleach to see if that will remove the stain.

Dirt – Start by soaking the stain in cool water with a small amount of dish soap and some distilled white vinegar. The acid in the vinegar will break up the stain and the grease cutting properties in the dish soap will work to loosen the stain from the fabric. Use a toothbrush to separate the stain from the fabric with gentle brushing. Rinse and repeat this process if necessary.

hohow-to-clean-summer-stains-pizza

Pizza Sauce – First dampen the area by patting gently with a wet cloth. (Don’t pour water over the stain as it will bleed into the surrounding fibers.) Place a few drops of liquid automatic dish detergent (the type used in the dishwasher) directly on the stain and rub it in with an ice cube.  If there is a stain left after rinsing, blot with a rag soaked with distilled white vinegar. The acid in the vinegar will cut through the stain and loosen it from the fibers. Use a toothbrush to continue to try to remove the stain from the fibers. Rinse and repeat until the stain is gone.

Iced coffee – Run cool water through the back of the clothing to flush the stain out through the front. Flush fabric for 5 minutes. If the stain is still visible, spray the area with club soda and let it sit for 10-15 minutes. If the stain persists, dissolve some powdered oxygen bleach in warm water and spray it over the area. Use a stiff brush to work the oxygen bleach into the stain. Let it sit for a few minutes and then rinse. Let the entire piece of clothing air dry. Another cleaning tip: if the stain is still visible, apply real lemon juice to the stain and set the piece of clothing in the sun. The natural bleach in the lemon will work with the sunshine to bleach the stain away.

Grass – Grass stains are removed by pre-treating the stain with a stain remover.  Dampen the area with cool water to start and then apply the pre-treatment to the stain. Let it sit for 10 – 15 minutes before putting the clothing in the laundry. Do not put the item in the dryer. Instead let it air dry and check to see if the stain is gone. If not, repeat the process above.

Oil – Oily stains can be removed with rubbing alcohol and a basic bar of soap. Start by applying the rubbing alcohol directly to the dry fabric. Work the alcohol in with your fingers or a washcloth. Once it’s worked into the fabric, let it sit for 10 to 15 minutes.  The alcohol will work to break down the oil.  Next take a basic bar of WHITE soap and work the soap into the stain. Add a few drops of water to create a lather.  Rinse the area with warm, not hot water. Let the item air dry and check to see if the stain is gone. Repeat this process until the stain disappears.

Chocolate Ice cream – Scrape off as much of the ice cream as possible. Blot the area to remove any excess chocolate stain. Do not rub the area or you will push the stain further into the fabric. Flush the stain out of the clothing by running warm water through it from back to front.  Once most of the stain is removed add a few drops of laundry detergent to the spot and work it into the stain with your fingers.  Let the detergent sit for 10-15 minutes and then rinse the detergent from the spot. Let the item air dry to see if any of the stain remains. If so, repeat the process above.

clean-summer-stains-sunscreen

Sunscreen – Remove as much of the sunscreen as possible from the area with a knife or spoon.  Sprinkle the area with corn starch to absorb the oil in the sunscreen.  Let the corn starch sit for 30 minutes and then brush it off of the fabric.  Use a cotton ball or Q-tip and apply rubbing alcohol to the stain. Let it sit for 10 – 15 minutes. Then use a few drops of dish soap and work it into the stain. Flush the area with warm water from the back of the fabric and let it air dry.  Repeat the process if any of the stain is still visible.

Sangria – Immediately after a spill, spray the stain with club soda and cover the area with salt. The salt will start to absorb the wine. Once the guests are gone brush off the salt and dab the area until the cloth comes away clean. Then treat the area with hydrogen peroxide. Be patient – it takes the hydrogen peroxide awhile to work, but you will see the stain disappear before your eyes.  Alternatively, soak the fabric in warm (not hot) water and hydrogen peroxide until the stain is gone. Air dry the item to make sure the stain is completely gone. Repeat this stain removal procedure until the stain is entirely gone.

Hopefully having these cleaning tips will help you enjoy the season as much as possible. Because it's a time to collect memories, not summer stains!


If you enjoyed this article, you might want to check out How to Clean the Gas Grill.


For more info on Leslie Reichert, visit greencleaningcoach.com

How to Take Care of Your Mattress

young child jumping on a bed

When you look at the things in your house that need attention this spring, do you see your mattress anywhere on the list? Probably not, and you’re not alone. Few people realize how important mattress care is – not only to your spine and sound sleep. Respiratory health depends on it, especially if you have asthma or allergies.

Most people don’t know that mattresses actually need to be cleaned every season, not just in the spring. Read this blog to learn all the little-known tips for how to take care of your mattress.  And, some things you should definitely NOT do if you want to properly take care of your mattress.

Do you know what you’re sleeping on?

Before you start you need to know exactly what type of mattress you own.  There are many different types of mattresses on the market. And each type needs a different care routine.

FOAM – Foam mattresses are made from many different types of foam that are used in combination to create different densities for comfort and support. Foam mattresses are easy to care for: simply spot clean stains with an ecofriendly spot cleaner and vacuum it on a regular basis to keep allergens to a minimum.

GEL – If it is made of gel, care for your mattress just like you would a foam mattress. Keeping it aired out and vacuumed is very important.

INNERSPRING – These mattresses are usually covered in a fabric which absorbs moisture and dust. Vacuum innerspring mattresses on a regular basis to maintain a healthy sleeping place and easy breathing.  Using a mattress cover will keep your mattress free from stains, dust and moisture. It is a worthwhile investment to help you take care of your mattress.

how-to-care-for-your-mattress-vacuum-regularly

Mattress Do’s

  • Turning your mattress on a regular basis distributes wear evenly. You should turn the mattress from side to side and also from top to bottom. Turning should be done once every three months to prolong the life of the mattress. Do not flip your mattress.
  • Vacuum your mattress every time you change your sheets. Use an upholstery tool on your vacuum to vacuum the mattress top and sides as well as the mattress frame.
  • Let your mattress air out as often as you can. When changing the sheets, it makes sense to strip the bed in the morning and let the mattress air out during the day. We sweat a lot while we sleep and our mattresses absorb that moisture. Giving it time to air out and dry will keep it fresh. Martha Stewart suggests stripping the bed before going on vacation so that the mattress can air out all week.
  • As necessary, spot clean mattresses with a gentle spot cleaner. Use extremely diluted dish soap (a drop or two is all you need) in a 16-ounce spray bottle and a microfiber cloth to spot wash dirty areas.
  • Invest in a mattress cover to keep your mattress clean and free from moisture. A mattress cover can also seal in allergens so that you won’t be affected by dust mites and their “dirt”. Do your research and choose a mattress cover that will repel water and seal in allergens.
how-to-care-for-your-mattress-don't-jump-on-the-bed

Mattress Don’ts

  • Don’t let your mattress get wet. Moisture in a mattress takes a long time to evaporate and can actually cause a mold problem. If the mattress does get wet, you can sprinkle corn starch on the area to absorb the moisture and then let the mattress air dry.
  • Don’t sit on the edge of the bed. The pressure and weight of your body will work to break down the sides that support the mattress.
  • Never use harsh chemicals around your mattress. Your mattress is like a huge sponge and the fumes from the chemicals will stay inside it for a long time, exposing you to those chemicals while you sleep.
  • As much as we think it’s okay, don’t put a board between the mattress and box springs. This will work against the support system in your mattress.
  • No more jumping on the bed. This damages the mattress (plus it’s unsafe!) so no more jumping on the bed during pillow fights.


For more information on cleaning for Asthma and Allergies, visit:

https://maidbrigade.com/blog/choose-the-best-vacuum-cleaner
https://maidbrigade.com/blog/how-to-clean-books-and-bookcases

For more green cleaning tips from Leslie, visit her Green Cleaning Coach web site.


How to Clean Stove Drip Pans and Hood

Pot over lit gas stove

There are some cleaning tasks we just don’t want to even think about doing! One of these jobs is cleaning the drip pan liners on the stove.  These liners can become extremely dirty with built up food and can be extremely difficult to clean. Food that gets dropped or spilled down there then becomes “fused on” due to the heat from the burner. We think this job is too hard and will take too long. And, might require nasty chemicals. But most people don't know how to clean stove drip pans in a green way.

Some people wrap their drip pans in aluminum foil to avoid having to clean them, but that really doesn’t give the stove a clean look. Other people remove the drip pans before cooking only to have the spills go down inside the stove itself.  Still others spray oven cleaner on the drip pans and let them sit overnight in the sink.  This option disturbs me as the oven cleaner is very toxic and leaving it sit overnight in your sink fills your kitchen with very toxic fumes.

Fortunately, there is an easy way to green clean these liners with some very simple ingredients. Here’s how to clean stove drip pans with a few items in your pantry.

Stove drip pans

  • Start by removing the drip pans from the stove and placing them in the sink to soak in the hottest water possible.
  • Let them soak for 10 minutes, then drain the water and pour straight distilled white vinegar into the bottom of the sink. The natural acid in the vinegar will start to work to soften the burnt on crust that’s baked onto the liner. Let them sit for 10 to 30 minutes.
  • Next, sprinkle baking soda onto the liners and use your fingers to rub it into the stains. The baking soda is a natural lifter and will react with the vinegar by foaming. Let the baking soda work with the vinegar for 10 – 15 minutes. You will notice that there will be flakes of the burnt on substance starting to float in the vinegar.
  • Rinse the stove liners with hot water and add more baking soda. Use a very aggressive sponge or even steel wool to work the baking soda into the rest of the crusty residue. This may take some elbow grease depending on how long it’s been since the liners have been cleaned.
  • Rinse again with hot water and towel dry. Your will be able to see your reflection in your clean stove liners.
  • If you have burnt on areas of the liner that just won’t come clean, replacing the liners is not expensive. Just remember that if you wipe them out with a wet microfiber cloth after each use, you will never have to go through the cleaning process I outlined above ever again.
microfiber-deep-cleans-woodwork

Now that you know how to clean stove drip pans in a green way, you need never use harsh, toxic chemicals again for this task.

Another spot around the stove that never gets the attention it deserves is the stove hood. Commercial kitchens have to pay a certified cleaning company to come in and remove the grease from the stove fan and filter. Fortunately, you don’t need to pay a professional to clean your stove hood.  Here are some great quick and easy tips to get and keep it clean.

Stove Hood

  • Place the fan filter in your dishwasher on a monthly basis. Your stove’s fan collects excessive amounts of airborne grease. An easy way to clean that filter is to pop it into the dishwasher. Just place it on the bottom shelf of the dishwasher and use a grease cutting dishwashing soap. The hot water in the dishwasher will melt the grease and keep it clean so that the exhausted air can pass through it.
  • To cut through built up grease on your stove hood, use rubbing alcohol in a spray bottle. Spray the area and let it sit for 5 – 10 minutes. Then use a drop of dish soap on a wet microfiber cloth to wipe the alcohol off the hood. If you have a gas stove, do not spray the alcohol around the open flame.


To read more great green DIY cleaning tips, visit Leslie's site at www.greencleaningcoach.com

How to clean a clogged drain, the GREEN way

Clogged drains start off slowly with water taking just a touch longer than usual to go down the drain. Then one day the water stops moving. Hair and soap scum will slow down the water flow almost without notice. It’s best to address a slow moving drain before it becomes completely clogged so you aren’t dealing with a broken pipe or worse.  Most of us have been “taught” through advertising that all you need is a bottle of drain cleaner. But this option is extremely dangerous and the ingredients can hurt you and your pipes and it’s unnecessary to release these toxins into your city’s water system when there are safer solutions for you and the environment.  Green clean a clogged drain using one of these methods:

green-clean-a-clogged-drain-with-a-plunger

A plunger

It seems like a primitive way to clean out your drain but it’s one of the safest ways to remove a clog.  Make the first push of the plunger a gentle one. This will release the air inside of the tool. Now you can be more aggressive and push and pull the plunger to release the clog. After a few times, pull the plunger up and off of the drain.  You will see water from the clog come up and into the sink. If it doesn’t drain down, keep repeating the process until the clog is removed.

Drain weasel

There are some simple but very effective tools that will help remove solids that may be slowing down your drain.   The drain weasel works pretty simply. By using a patented micro-hook system on a flexible wand, it simply spins, pulls and toss.  It works faster than using a chemical drain cleaner.

A vacuum

Most wet/dry vacuums have a way to reverse the suction so that you can blow the clog out of the pipes.  Place the hose attachment in the exhaust area so that your vacuum is blowing air instead of sucking. Place the plastic pipe into the drain and let the pressure work to push the clog down the drain. Make sure you are very careful not to blow water and debris all over the room.

green-clean-a-clogged-drain-with-baking-soda

Simple Drain Cleaning Recipe

Your kitchen pantry holds ingredients that can green clean a clogged drain.  Mix up some table salt with an equal amount of baking soda and pour the mixture down the clogged drain. Then use one cup of distilled white vinegar that has been heated in the microwave. Pour the hot vinegar down the clogged drain and watch the mixture foam. Let the solution sit for 10-15 minutes while it continues to foam.  Flush the clog down with a pan of boiling water.

green-clean-a-clogged-drain-with-dish-soap

Dish Soap

Yes, dish soap can green clean a clogged drain! Place ¼ cup of dish soap down into the clogged drain.  The soap will work to break down the grease and loosen up the clog. Let the soap sit in the clog overnight.

green-clean-a-clogged-drain-with-a-drain-auger

Call a Professional

Instead of pouring an acidic solution down your drain that could make you sick and damage your pipes – call a professional. I have seen instances where you loosen a clog with the chemicals but it just moves the clog further down the drain pipes, creating an even bigger problem. A professional plumber will use a powered auger that can go for 200 or more feet to make totally sure your clog is removed from your drain pipes.

Green clean a clogged drain using any one of these methods instead of harsh chemicals that put your health, your pipes and the environment at risk.


Find more information from Leslie Reichert, our Green DIY Cleaning Expert, at www.greencleaningcoach.com

How to Really Clean a Fireplace

how-to-really-clean-your-fireplace

When was the last time you cleaned your fireplace? Not just emptied the logs and shoveled (you didn’t vacuum, did you?) the ash, but really cleaned it?  To clean a fireplace is not even a "to do" on our spring cleaning list. Surprisingly, your fireplace should be cleaned at the end of every burning season.  Chimneys also need to be cleaned and checked regularly by a professional chimney sweep every year to avoid a chimney fire.

If you follow these simple tips on how to clean a fireplace, yours can be cleaned in less than an hour.

Things you will need:

  • Stiff Brush
  • Abrasive tool
  • Protective clothing
  • A sheet or cloth to protect surrounding area
  • An old towel (one that is okay to stain)
  • Gloves
  • Coffee grounds – helps to keep ashes from becoming airborne
  • Kneeling pad
  • All-purpose cleaner
  • DIY stain remover
  • Fireplace shovel
  • Cream of Tartar
  • Distilled white vinegar
how-to-clean-a-fireplace

Start by laying down a tarp or towels around the fireplace to protect your flooring from soot. Make sure to wear protective clothing as soot is extremely difficult to remove from fabric.

Remove the grate from the fireplace while wearing protective gloves. Place the grate on the old towel to prevent soot getting on the flooring. Remove any large debris in the fireplace and throw away the large chunks of burnt logs.

Using a hand-held brush, start at the top of the of the fireplace and brush the loose dust from the walls of the flue.  A simple tip to keep ashes from becoming air borne is to sprinkle dried coffee grounds on top of the ashes. Remove the ashes and the grounds with a dust pan or a fireplace shovel and dispose in garbage bag.  Never use a household vacuum to clean up the ash. The ash in a fireplace will destroy a vacuum motor because vacuum bags are not designed to capture fireplace soot.  Alternatively, use a specialized vacuum designed specifically for ashes.

Next, spray an all-purpose cleaner on the walls and floor of the fireplace, and the exterior brick if there are soot stains on it. Let it sit for 30 minutes to let the cleaner absorb into the pours of the brick. The ingredients of the all-purpose cleaner will work to break down the carbon that is contained in the soot. After it sits, use a scrub brush to clean the brick.

If the brick is stained, clean it with a DIY stain remover made with Cream of Tartar and water. Mix the Cream of Tartar powder with water to create a thin paste. Use a tooth brush and scrub the mixture into the brick. Let the paste dry to a powder. Use a soft brush to remove the powder from the brick. The powder will pull the soot from the pours of the brick.  Another method is to spray the stained area with distilled white vinegar and brush the Cream of Tartar into the stain so that the acid in the vinegar will break up the soot.

Use a wire brush to remove burnt on creosote that has built up on the fireplace grate. Place the grate back into the chimney. Make sure to use dry wood in your fireplace to keep the buildup to a minimum.

Spring cleaning should always include the fireplace if you have one. And now you'll never have to wonder how to clean a fireplace the right way.


www.greencleaningcoach.com


How to choose the best vacuum cleaner for YOUR home

Someone I know has another friend who recently told my friend that she purchased the perfect vacuum and that my friend should buy one too.  Maybe it's happened to you too. Before we even think about the type of floors our friend might have, we look up that vacuum up on the internet.  But since none of us have the same home it doesn't make sense that we consider a vacuum for ourselves that is perfect for someone else.  Whether you realize it or not a vacuum is a very important appliance for your home. It deserves some thought and research before you buy it. Here are a few tips to help you chose the best vacuum cleaner for your home.

choose-the-right-vacuum-rugs

What type of vacuum cleaner do you want

Different personalities like different types of vacuums.  Upright people are pushy – meaning they like to push things around. They don’t like the idea of dragging something around behind them. Canister people don’t like the weight of an upright and prefer to just handle the pipe and hose. They don’t mind something following behind them. Decide which type of vacuum you prefer and shop for that style of vacuum.

choose-the-right-vacuum-canister

Is weight an issue

If you have a bad back or shoulder issues, don’t even consider a heavier vacuum.  But remember that the weight of the vacuum is directly related to the vacuum’s suction. Light weight vacuums are easy to use but don’t have very big motors. Heavier vacuums have large motors and great suction, but will be difficult for you to use. Decide whether you prefer a light weight vacuum or one that has great suction. Unfortunately, you can’t have both. At least not in the same unit.

choose-the-right-vacuum-for-hardwoods

The best way to clean hardwood floors

For hard wood floors, you might consider a canister vacuum. The soft floor brush that comes with a canister is the absolute best way to clean a hardwood floor. You won’t even need to use a dry mop after using this type of attachment. The bristles of the floor brush work incredibly well at picking up dirt and hair and will leave the floor looking perfect.

If you have allergies

Everyone loves the convenience and cost savings of a bagless vacuum cleaner, but think twice about purchasing one if you have dust allergies. Dumping the dirt container exposes you to concentrated amounts of allergens and dust mites.  You would need to use a mask and gloves to avoid being exposed to all those allergens. Another little known fact about bagless vacuums is that the filters need to be replaced every 6 to 12 months to keep them working efficiently.  This can cost up to $60 for each filter change, depending on the model of the vacuum. These costs are an important consider when you chose the right vacuum.

If you have pets

If you have pet hair, you need to have a very aggressive beater bar in your powerhead. Look for very stiff bristles on the beater bar along with incredible suction power to suck up the hair and dander in your carpet.

Stairs

The right vacuum for stairs should have a hose attachment that can reach at least ¾ of the way up a staircase. You don’t want to be fighting with a heavy, cumbersome vacuum while cleaning your stairs.

Reach

Manufacturers call this a “cleaning radius”. A canister vacuum can clean up to 35 feet from the plug in the wall. A vacuum’s cleaning radius should be something to consider before making your purchase. The information should be listed in the manufacturers details of the vacuum.  Nothing is more frustrating than finding your new vacuum won’t reach where you need it to clean.

HEPA filtration

If you deal with allergies, you want to choose a vacuum with a HEPA (High Efficiency Particulate Arrestance) filter.  You especially want a HEPA rated vacuum if you or a family member has severe dust allergies. The best HEPA vacuum has a sealed system meaning that there are no leaks in the entire system.  Watch out for the labels HEPA-type or HEPA-like.  These are vague ratings and don’t actually mean the vacuum is rated HEPA.  A real HEPA filter removes allergens down to .03 microns. The technical specifications on the vacuum will tell you the filter’s efficiency.

Research the repair records

Some manufacturers don’t even supply repair parts for their appliances. Do a little research on the different models you are considering. You don’t want to have to purchase a new vacuum just because of a minor (but un-doable) repair on your old one.

Your vacuum is an investment

Choose the right vacuum for your home. People spend more on a week’s groceries than they do on their vacuum cleaner. Yet they get frustrated when it doesn’t work correctly. There are quality vacuums on the market that will last decades for a small investment. These models are worth the extra money. You may save a few dollars with a disposable model, but over the years you will save hundreds of dollars by purchasing a good quality vacuum. And, your home will also be cleaner and your health better protected.


Leslie Reichert is a cleaning expert that uses her sparkling personality, great sense of humor and contagious passion to encourage her fans and followers to think differently about what they are using in their homes. Leslie is known as a Green Cleaning Coach and she is changing the world - "one spray bottle at a time".  She is a national lecturer, a frequent homekeeping expert on The Dr. Oz Show, Martha Stewart Living Radio, Maid Brigade’s DIY Cleaning Expert and author of the book: The Joy Of Green Cleaning- a handbook for DIY cleaners. She works with Better Homes and Gardens, Real Simple, Today.com and other national publications.  You can see more of her work at www.greencleaningcoach.com

How to Clean Books and Bookcases

Deep-clean-books-and-bookcases

Warmer temperatures this winter have brought pollen out sooner than expected. May is Asthma and Allergy Awareness month, but if you or someone in your household is suffering asthma or allergy attacks, it’s probably time to do a deep cleaning targeted at removing the allergens than trigger these attacks. Pollen, dust, dust mites and pet dander are some of the main culprits and they are lodged in your carpets, upholstery, drapes, bedding and stuffed animals.

One often overlooked area to address is books and bookcases. Triggers that build up here can really be a problem for an asthma or allergy sufferer. But with the right deep cleaning tips you can alleviate suffering from asthma and allergy attacks. Here is the proper way to clean books and book shelves:

Quarterly cleaning your books and bookcases

This process should be followed every three months to keep asthma and allergy attacks at bay. For more information on cleaning for asthma and allergy sufferers, view this infographic.

Cover the floor. Start by placing a towel on the floor in front of the bookcase to catch any falling dust. Place another towel nearby – you will be placing the books on this one when you remove them from the shelf.

Work top to bottom. Start with the very top of the bookcase and completely remove the dust using a lightly dampened, large looped microfiber cloth folded into quarters (this makes 8 clean surfaces).  Then proceed in the following manner with each bookshelf, starting at the top and finishing with the bottom one.

Clear and clean. Remove all the books from the top shelf and place them on the book towel. Remove all the dust from this shelf, including all five shelf surfaces.

Dust all six sides. Using a fresh, clean surface on your cloth, dust the tops, sides and bottoms of the pages of each book while closed, as well as the front and back covers and the spine. It doesn’t really matter what order you do it in, just that you follow that order with each book, so that you won’t forget any surface on any book. Return each one to the shelf as you finish it.

how-to-dust-a-book

Repeat.  When the top shelf is completely dust-free, remove the books from the second shelf. Dust all the surfaces of the shelf.

Before you start dusting the books, change to a fresh, clean surface on your cloth.

Continue in this manner, changing the microfiber surface when you are dusting the books, not the shelf so that the cloth is as clean as possible when contacting the books.

Once you are done, place the book towel over the other towel and fold them together to prevent dust from falling off the towels. Place them in the washing machine to launder with other soiled items.

While you are cleaning the books, check for damage.

Caring for books

If you notice marks on the covers as you are dusting them, set them aside for extra care. We recommend Absorene Paper and Book Cleaner. It works like a pencil eraser to gently remove marks and stains.

If any books smell a little musty, place them and an open box of baking soda in a plastic container with a lid for at least two days and up to a week if necessary to let the baking soda absorb the odors.

Books last longer when they are stored in the “sleeping position” which is flat. They can be stored in an upright position like you see in a library as long as they are pressed together firmly. Never store your books leaning against another book.

If you don’t have enough books to keep them tucked together tightly, buy some inexpensive book ends to hold them.  If you don’t have bookends, place a stack of books in the sleeping position and use that as your bookends. This will give your books a pleasant looking arrangement.

Organizing and purging books

While you have your books off the shelves, it’s a good time to do some organizing and purging as well. As you work, set aside books that no longer interest you to give them to someone who will appreciate them. Donate your books to your local library or other charity.


Leslie Reichert is a cleaning expert that uses her sparkling personality, great sense of humor and contagious passion to encourage her fans and followers to think differently about what they are using in their homes. Leslie is known as a Green Cleaning Coach and she is changing the world - "one spray bottle at a time".  She is a national lecturer, a frequent homekeeping expert on The Dr. Oz Show, Martha Stewart Living Radio, Maid Brigade’s DIY Cleaning Expert and author of the book: The Joy Of Green Cleaning- a handbook for DIY cleaners. She works with Better Homes and Gardens, Real Simple, Today.com and other national publications.  You can see more of her work at www.greencleaningcoach.com


How to clean pots and pans

how-to-clean-pots-and-pans

Unless you’re an over achiever in the cleaning department, it’s a safe bet your pots and pans need some attention. It’s really not your fault if they have black burnt spots on their bottoms – the heat on your cook top gets so hot that even water can leave a burn mark.  According to the 2017 Cleaning Calendar & Checklists Maid Brigade recommends special attention for pots and pans every three months.  But finding the time to clean your pots and pans is not always easy. That’s why it’s important to make sure you’re using the best methods so you don’t waste time.

Cast Iron

The beautiful thing about cast iron is that you can never really tell how dirty or stained it is. Cast iron has been around since the 5th century BC but cast iron cookware was developed by two American companies in the late 1800’s. The Lodge Company is still manufacturing their cast iron line today. Caring for cast iron is more about keeping the pan oiled than it is about removing stains. Cast iron will oxidize if left open to the air.

how-to-clean-cast-iron-skillet

Never use soap on cast iron as the soap will be absorbed by the pores of the pan leaving a soapy residue in the metal that will leech into your food. Use a steel or stainless scrubby to remove any burnt on food particles, then wipe the cook surface with a paper towel treated with olive oil to seal the pan and prevent oxidation. Clean cast iron every time it's used for cooking.

Store the cast iron in your cupboard and keep a paper towel on the cooking surface to keep the oil from getting on the bottom of your other pots and pans when you stack them.

Stainless Steel

Stainless steel is the choice of professional chefs because of its durability.  Stainless can really stand up to abuse but it does need some special care to keep it looking good. Use this amazing trick from celebrity chefs to help make clean up easier: always heat the pan before putting anything in it. When cold food is put on a room temperature pan, the cold causes the metal to contract and “hold on” to the food, making it stick. However, heating the pan first will cause the steel to expand instead, preventing food from sticking when it is added to the pan, working just as well as a non-stick pan.  After cooking, let the pan air cool and wash it in warm water with a gentle soap.

how-to-clean-stainless-steel-pots-and-pans

Don’t use anything harsh on the outside of the pan as it will scratch. Use a non-abrasive cleaner on the bottom to remove burnt on stains.

Water spots on stainless's shiny exterior are caused by minerals in the water. Remove them easily by using a cloth dipped in white vinegar. The acid in the vinegar will cut right though the mineral deposits that come from the dried water droplets.

Stainless steel can get rainbow-colored stains caused by over-heating. When this happens you will see a rainbow colored stain on the bottom or sides of the pan.  Remove those stains by rubbing some ketchup over the area and letting it sit for a few minutes before wiping the surface clean with a soft cloth. Clean stainless steel pots and pans this way every three months.

Ceramic

Ceramic bakeware should be treated with care. Ceramic must be left to cool completely before placing in water for washing.  Once the ceramic dish is cool, use hot water and baking soda to remove food that may be stuck to the cooking surface. Then, just wash ceramic bakeware in in warm soapy water. Clean ceramic dishes every time they're used, because baked on food will be harder to remove with each subsequent heating.

how-to-clean-ceramic-bakeware

Forged Steel

Forged steel cookware can be treated like cast iron even though it’s not as heavy or as porous as cast iron. The oils on the forged steel keep food from sticking. Scrubbing too hard will remove those oils, so don’t be too aggressive with the cooking surface. Simply keep it clean by washing it in warm water and a touch of gentle soap. Just make sure not to soak forged steel pots or pans in water.

Copper

Most people think copper cookware is extremely hard to care for but this couldn’t be further from the truth. The copper on the outside of the pot creates an excellent conductor for heat while the hard metal inside keeps the food from coming in contact with the copper. Copper pots are usually lined with a hard metal such as nickel, tin or stainless steel.  If using copper pans be sure to check the lining inside frequently, to make sure it’s in perfect condition and not wearing away.

how-to-clean-copper-pots-and-papns

When copper is exposed to air, it turns a lovely patina that can add to the charm of the pot. If you prefer it shiny and clean, use a natural acid like ketchup or vinegar to remove the patina. Do this every three months.

Aluminum

Aluminum pots and pans can be washed in warm soapy water. To remove stains, you can use a cut lemon or sprinkle cream of tartar on the stain and rub it in with a soft cloth. Then just rinse with warm water and dry with a soft cloth.

No matter what type of cookware you have, the real secret to keeping it looking good is to address burn marks and stains as they happen. A simple burn mark may come off easily when it first happens but if it’s not addressed, the pot will get put back on the heat and the burn is seared onto the pot. These stains are almost impossible to remove, so it's important to clean up burn marks and stains every time you use an aluminum pot.


Leslie Reichert is a cleaning expert that encourages people to think differently about their cleaning products. Leslie is known as the Green Cleaning Coach is changing the world - "one spray bottle at a time".  She is a national speaker, a frequent homekeeping expert on Martha Stewart Living Radio, Maid Brigade’s DIY Cleaning Expert and the author of the book: The Joy Of Green Cleaning. For tips and simple, but effective strategies visit her at www.greencleaningcoach.com


How to Clean Glass Light Fixtures, Shelves and More

There are a few things that hardly ever get cleaned in your home, yet when they get forgotten, they make your home look neglected.  To make sure your home looks and feels cared for, take a few extra minutes to clean glass light fixtures and overlooked items at least every three months, or more often if you’ll be entertaining.

Light fixtures

When light fixtures are clean you really don’t notice them, but when they are foggy and filled with cobwebs and dust they definitely let your guests know you’re not paying attention to the little things. The best part about cleaning your light fixtures is that you have an appliance in your home that’s willing to do this job for you – just pop the fixtures in your dishwasher.

how-to-clean-glass-sconce

Wipe any dried on water spots with a damp microfiber cloth. If you can’t take the fixture down from the ceiling, use a microfiber cloth on an extension rod to remove the dust.  Also clean glass globes from chandeliers and sconces in the dishwasher after removing them from the fixture.

Glass shelves

Glass shelving is beautiful inside cabinets and showcases. Even though they’re inside a cabinet they still get dirty. Dust and dirt work their way inside the cabinet and turn those beautiful shelves into a dusty foggy mess. Clean glass shelving by removing the items on the shelf and using a fine woven microfiber cloth designed specifically for glass.

how-to-clean-glass-shelves

Make sure the cloth is damp, not wet. After wiping the cloth over the glass shelf, finish with a dry microfiber cloth which will make the glass look perfect. If It’s been awhile since you’ve cleaned the shelves, you may want to take a minute and wipe the underside of the shelf as well.

Hardware

Door handles and drawer pulls are another often-overlooked item when cleaning the kitchen cabinets, but they’re some of the grimiest places in your home. Hand oils mix with dirt and dust to create a thick residue that can remove the finish on your hardware, so this hardware should get cleaned every three months to prevent damaging buildup.

how-to-clean-cabinet-pulls

Clean the handles and pulls with some soapy water and a gentle cloth to wash away oils and leave the pulls looking like new. For severe buildup, spray some rubbing alcohol onto a microfiber cloth and wipe them down to break up the grease and grime.  Then finish by washing with warm soapy water, a cleansing rinse and towel dry.

Fan blades

Have you ever leaned back to relax in your recliner only to notice a huge amount of dust on the blades of your ceiling fan? Ceiling fans collect dust whether they are moving or not.  People think that turning on a fan will remove the dust. Not so. Even a moving fan paddle collects dust on the front edge of the paddle. A quick trick to removing the dust from a ceiling fan is to use a pillow case. Put the open end of the case over the fan paddle. Hold the pillow case against the paddle and pull it off. The dust on the top and sides of the fan paddle will come off inside the pillow case to avoid getting dust all over the room. Then simply take the dusty pillowcase to the wash.


About Leslie

Leslie Reichert is a cleaning expert that uses her sparkling personality, great sense of humor and contagious passion to encourage her fans and followers to think differently about what they are using in their homes. Leslie is known as a Green Cleaning Coach and she is changing the world - "one spray bottle at a time".  She is a national lecturer, a frequent homekeeping expert on The Dr. Oz Show, Martha Stewart Living Radio, Maid Brigade’s DIY Cleaning Expert and author of the book: The Joy Of Green Cleaning. She works with Better Homes and Gardens, Real Simple, Today.com and other national publications.  You can find her at www.greencleaningcoach.com

Microfiber for cleaning - what's the big deal?

microfiber-cleaning-cloth

For the past twenty years I've been sharing the incredible value of microfiber for cleaning. But there are still people who don’t know about this “miracle” for their household cleaning, and if you're one, keep reading.  Microfiber can clean any surface with just water and leave it free from dirt, grease, smears, streaks or lint. It’s a great option when you are trying to take the toxins out of your cleaning.

What is microfiber

By definition microfiber is any thread that is smaller than 10 microns (about 1/5 the thickness of a human hair).  Microfiber that is designed for cleaning is a thread that has been split or cut with a machine so that it has numerous cleaning surfaces. That makes it very absorbent, with the capability to hold from five to seven times its own weight in liquid.

There are various grades and price points for microfiber products. Some are overpriced but overall you do get what you pay for. Seek out mid to high quality cloths – you won’t regret it. Because it’s made from polyester or a polyester blend, it offers longer lasting, higher durability, and greater efficacy than traditional cleaning cloths.

History 

Microfiber is not just for cleaning. Originally, microfiber was manufactured by the Japanese for swimsuit material. Microfiber clings well to the body so the swimsuits looked great. But it was found to be very absorbent and not a good choice for swimwear.

microfiber-not-just-for-cleaning

Scientists in Sweden took the absorbent fabric and started manufacturing microfiber cloths for commercial use. Starting in the early 1990’s, Europeans started marketing microfiber as a new way to clean.

Uses

There are now many other uses for microfiber other than cleaning. Car detailers have been using microfiber cloths for years because of their lint-free properties. Furniture manufacturers use the fabric because it can be cleaned with just a damp cloth. Even the NBA uses microfiber basketballs designed by Spalding, because it doesn’t need the break in period that a leather basketball needs.

Disinfecting properties

Independent studies have found that microfiber does an excellent job of disinfection without the need for chemicals. This is very important if you have children, pets, elderly family members or those with asthma/allergy problems or compromised immune systems living at home because these groups are particularly vulnerable to the many ingredients in traditional cleaning products containing toxins.

Microfiber disinfects by going underneath the bacteria and lifting it off the surface. All those teeny tiny cleaning surfaces hold onto the bacteria until you place it into the wash. The combination of hot water and laundry soap releases the bacteria into the water so it can be washed away with the waste water.

With microfiber you don’t need to use harsh chemicals to make a surface free from bacteria.  So it’s a totally opposite technique to our current ways of disinfecting, which includes lots of chemicals and a two-step (clean first, then disinfect) process.

There’s really no reason not to look at microfiber for cleaning – it cleans better, faster and with fewer chemicals plus it last longer than other options.

microfiber-for-cleaning

How to use

Microfiber is so easy to use. Just wet the cloth with water, wring it out really well and start wiping dirty or germy surfaces. Then, for perfection on a particular surface, dry the area with a dry microfiber cloth. This combination will leave the surface immaculate.  To get the most out of each cloth during cleaning, fold each cloth in half and then fold it in half again. This gives you eight cleaning surfaces to use. After wiping an area, switch to another clean area of the cloth so you are using a clean side each time.

To prevent cross contamination on germy surfaces, use a color-coded system. For example, the pros at Maid Brigade use only red cloths in the bathroom (think, “code red”), only yellow in the kitchen (think, “yellow”), blue for mirrors and glass (most have a blue hue) and green for dusting and general cleaning (G = general). This method eliminates the chance that germs will be spread from room to room.

Microfiber-for-cleaning

How to care for microfiber

High quality microfiber can be washed with hot water and laundry SOAP (detergent builds up on fabric and will leave a film in the cloth).  High quality microfiber cloths can be dried in the dryer on warm heat. Dryers tend to melt the threads of the lower-grade fabrics, fusing all those microscopic cleaning surfaces together, making the cloth no more effective than a regular rag. If you’re not sure of the quality of your microfiber, just let the cloth air dry. Never use dryer sheets as the oil in the sheets will accumulate in the threads of the fabric and compromise its cleaning ability. You also want to wash your microfiber cloths separately, because lint and other fibers will get trapped in those cleaning surfaces, clogging them and ruining their performance.

For more about microfiber, click here.