Category: Green Cleaning Tips and Tricks

Control clutter and control your health.

clutter-control-on-the-desk

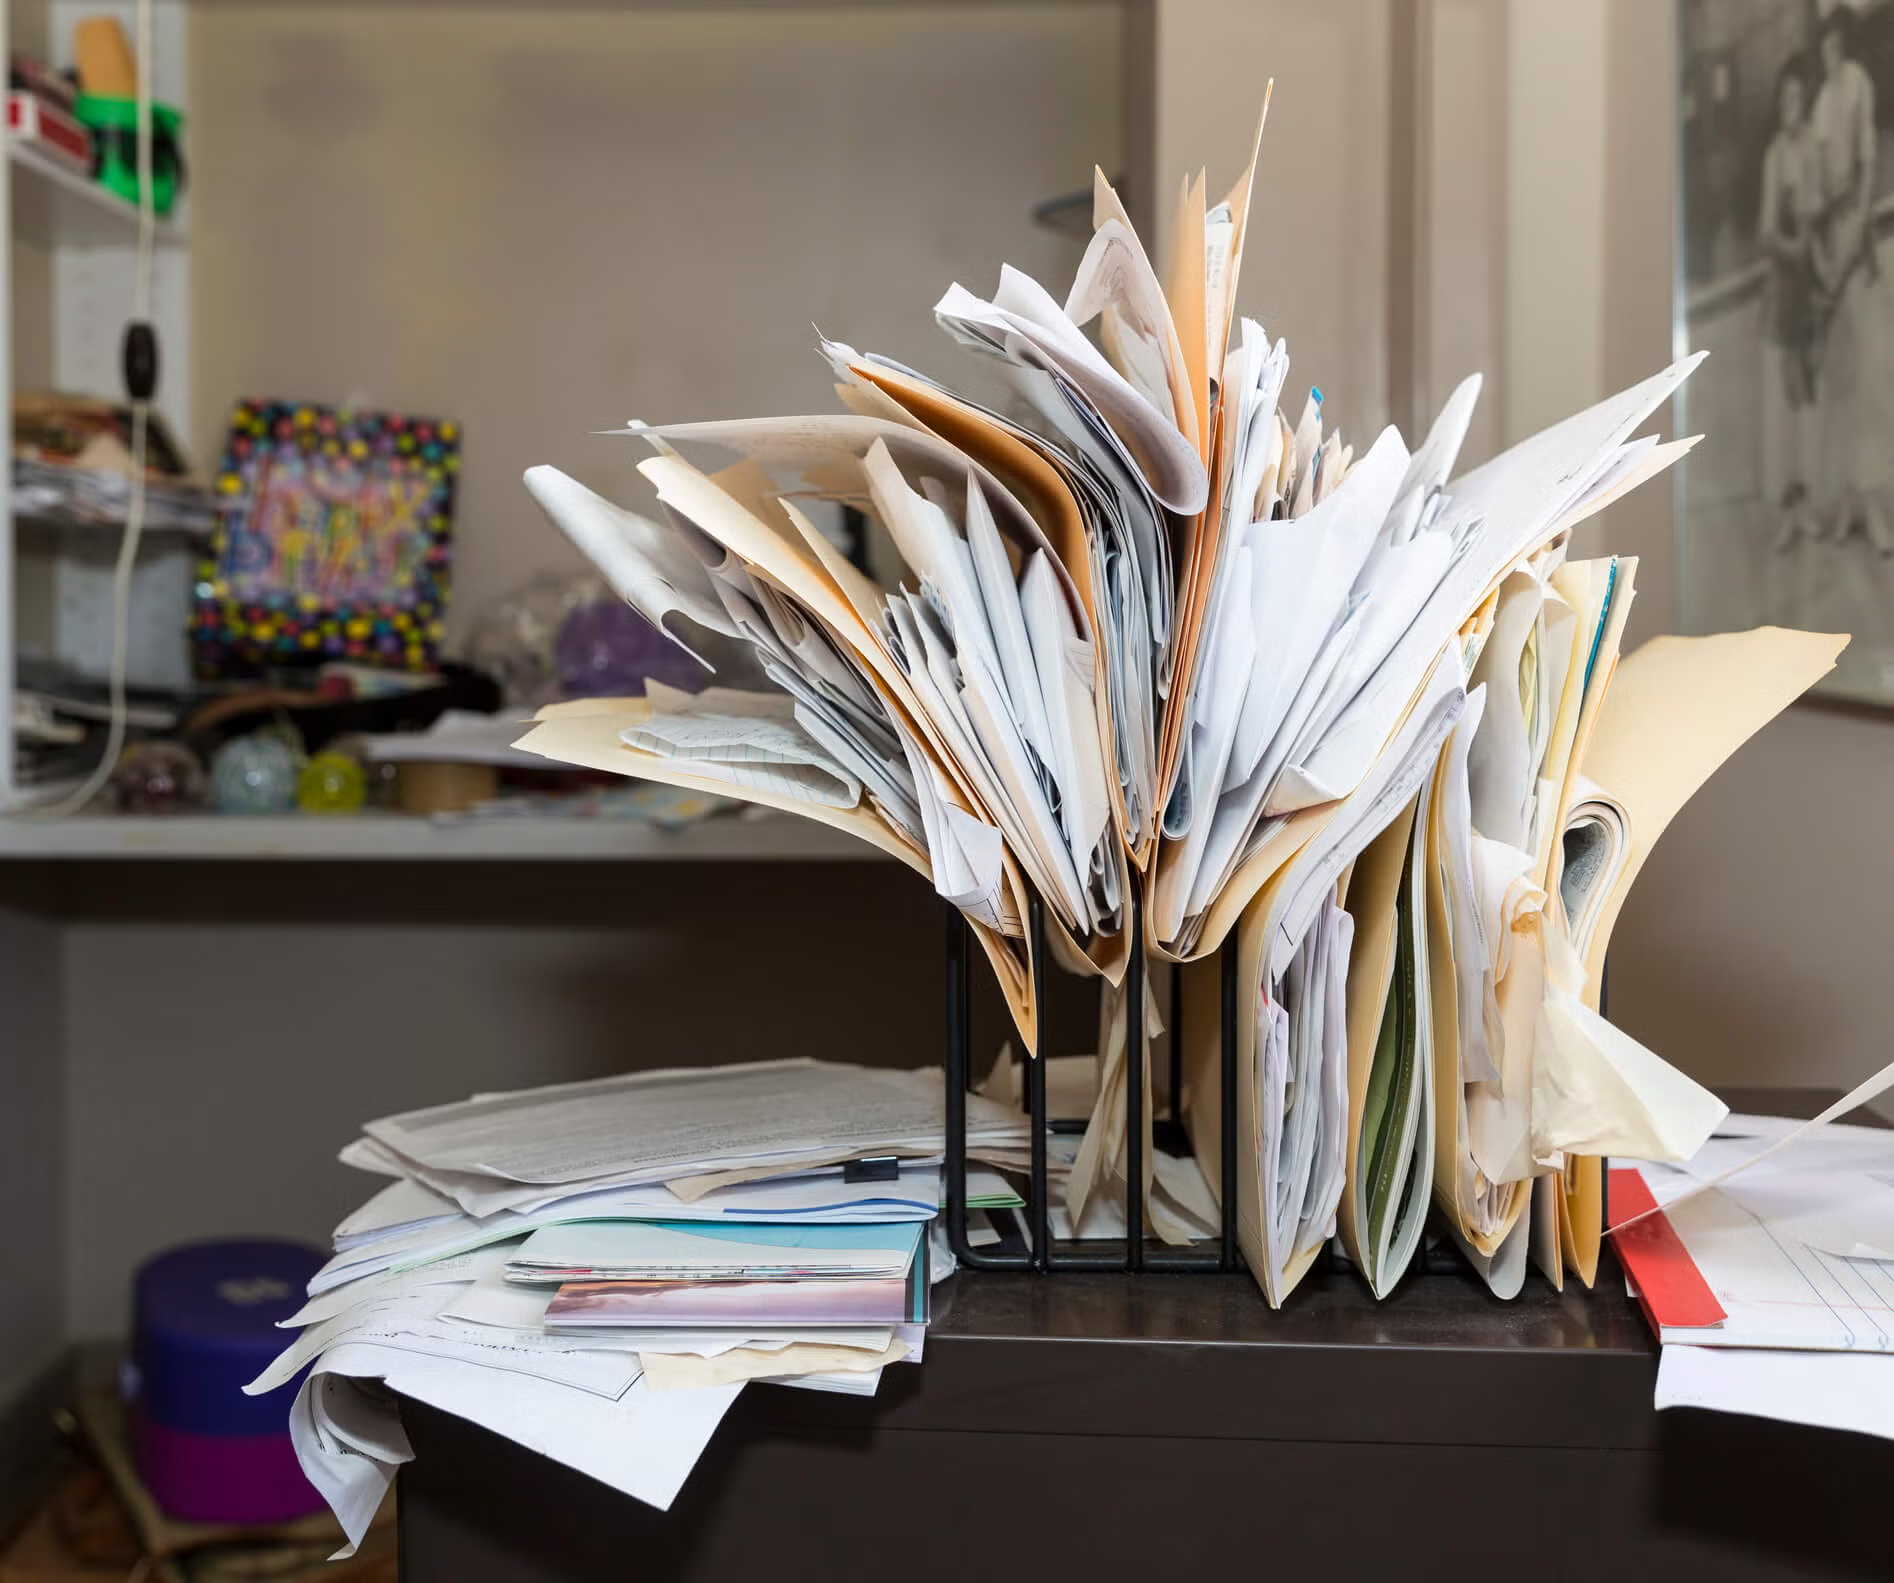
If your overstuffed closet, packed garage, littered desk or messy basement brings on feelings of stress – even suffocation – don’t worry, you’re not alone.  Clutter, to varying degrees, brings distress to many of us.  For some, clutter can feel “crushing,” almost to the point of no return, like it has taken over our lives. Even if our clutter is stacked up in neat piles, when it’s all over our homes and our lives it can be damaging to our physical and mental health.

Physical effects of clutter.

Concerning our physical health, clutter by itself has an overwhelming presence, enough to cause unwanted and unneeded stress.  But clutter also creates a haven for germs, giving them a home to live, breathe, and grow.  For those who suffer from allergies, clutter can aggravate allergens by causing a buildup of mold, dust mites, cockroaches, dander, and at times, pesticides and toxic chemicals and fragrances.  Clutter adds to the stress of not being able to find things when you need them.  It also increases the risk of trip-and-fall injury and can cause fire hazards.

Psychological effects of clutter.

Clutter affects our mental health by increasing our stress and anxiety levels.  It can put added pressure on us and make us feel overwhelmed, and sometimes even depressed.  Mentally, clutter can weaken our decision-making skills, while strengthening our procrastination.  Clutter can teach us to avoid large tasks instead of organizing and tackling them.  This avoidance can prevent us from living now and moving forward with positive energy and a positive outlook.  Sadly, clutter can make mental issues worse.  Sometimes feeling so mentally cluttered can hold you back from doing the things in life you want to do.

control-clutter-in-your-home

Controlling clutter can have a positive effect on our lives.  The more we can control clutter, the better we are able to take care of ourselves mentally and physically.

How do we gain control over clutter?  By fixing the core of the problem first, which usually starts with our behavior.

Why do we clutter?  Is it due to lack of time or lack of organizational skills?  Do we suffer from an underlying health issue, or what doctor’s call chronic disorganization?  Does the disorganization of clutter stem from chronic pain, depression, grief, or ADHD?  We can better understand what’s causing us to clutter if we look at the nature of our clutter – is it things we won’t need long term, or things we might need long term? Examining this will help determine the best course to fix the problem.

Maybe our clutter is more than just a pile of stuff, but serves as a security blanket, filling multiple needs.  After all, clutter can falsely be viewed as providing a sense of security, an indication of self-worth, comfort, a path to the past, a feeling of being loved, or a variety of items we promised to do, but never got around to.

No matter why we do it, we can stop it, and move towards enhancing our physical health, mental well-being and overall quality of life.  Reducing the accumulation of clutter is a two-part process, beginning with elimination of clutter, and continuing with an ongoing, life-altering organizational system that halts clutter before it builds up.

control-clutter-forever

Here are five quick cleaning tips to keep your clutter-free life intact:

Think “bite size”. Organizing clutter can get a tad overwhelming so plan to organize only fifteen minutes a day.  It’s too easy to procrastinate when the other choice is a full day of organizing! To make it productive, make a plan. Designate a day for each room or each task (file papers on Mondays, for example) and have sorting baskets or boxes close at hand. You can sort items by level or room to which they be returned, by trash/recycle/give-away, or any other categories that work for you. When the fifteen minutes is up, return the contents of each basket to its proper spot in your house.

Use available tools. If your clutter seems to be taking over your work space, you may not be as productive as you would like.  Keep your main work area functional.  It’s easy to find affordable, functional desk and drawer organizers or dividers online and in stores to help control clutter. Figure out a storage system that works for the kinds of things you need to store in your work space – think through your needs. Make a plan – have a set time that you block off a few times a week to re-boot your work area. When you find a plan that works, you’ll stick with it. (Check out Organizing U’s blog on drawer organizers here.)

Limit daily distractions. Artificial interruptions derail us from following through with putting things away when we’re through using them to control clutter. Like email. Instead of checking email throughout the day, dedicate time twice a day for it. In truth, the times we HAVE to be glued to our email Inboxes are fewer than we perceive.  But when you are checking emails, follow through here too. Respond to emails right after reading them so you won’t have to worry about it later.

Touch it once. Avoid stacking (and re-stacking) papers at home or at work.  File them away in the proper areas as soon as they are completed. As old-fashioned as it sounds, In/Out boxes keep pending documents tidy yet close at hand.

Purge often. Throw our expired foods, medications, vitamins, etc.  Go through junk mail, tidy up counter tops, empty trash bins, etc.  Organize and tidy for a few minutes each day. Every square foot of clutter eliminated is an improvement in your mental and physical well-being. With minimal effort daily, you can thoroughly organize every square foot of your home about once a quarter. Control clutter and keep life simple and stress-free!

To read more on clutter control and home organizing, check out these blogs:

17 Tips to keep your resolution to get organized in 2017!

3 simple steps to organize the junk drawer

Is your home a tad stinky? Use these odor control tips.

Is your home smelling a little stinky?  This usually happens during the winter. We close up our homes in October and don’t open them up again until April. That means we’re living with the same air for six months. If you’re smelling some unusual odors in your home, read on for a plan to help you control odors in your home and freshen up:

Garbage Cans

Clean the inside of the trash can by washing it with hot soapy water. Then deodorize it with distilled white vinegar mixed with an essential oil.

clean-trash-can

You can make a "garbage sachet" to place at the bottom of the pail beneath your trash bag: place some fresh coffee grounds and whole cloves in a clean coffee filter, and tie it closed using string, a twist-tie or a rubber band. Simple!

Refrigerator

Don't just remove rotten food, but also clean the shelves and drawers to remove any rotten liquid. When things rot in a refrigerator, they tend to leak and leave a terrible smelling fluid. Clean and disinfect that area using distilled white vinegar or hydrogen peroxide and a microfiber cloth. Or remove the shelves and wash them in the kitchen sink with hot soapy water.

Pet Smells

Smells from your pets can be removed with consistent cleaning. You should vacuum two to three times a week to remove pet hair, fur and dander.

control-pet-odor

Pet beds should be washable or have removable covers - launder every week. Keeping your pet groomed will also help control pet odors in the home.

Cooking Odors

Control cooking odors with a DIY air purifier. Combine 2 cups of water, some baking soda and a few lemon peels in a pot and heat the mixture on your stove. The aroma will work to remove those stinky smells.

Bathroom

Areas around the toilet can have what I call "little boy syndrome" where the urine sprays out of the toilet and embeds into the walls, woodwork and flooring. Regular cleaning with a good cleaner AND a disinfectant will work to control those odors.

Clean-odors-around-the-toilet

The inside of the toilet also needs to be cleaned well. You can use a simple mixture of salt, baking soda and borax to make a toilet bowl cleaner that will clean and remove smells. If you have a toilet bowl that has stains - use a pumice stone to remove those stains.

Carpeting

Carpets hold smells like a sponge. Fill a spray bottle with bottom-shelf vodka and spray that over smelly areas. When the alcohol evaporates it carries the smells away with it! This tip will also control odors on smelly fabric furniture.  If the carpet and furniture are really bad you should spend the extra money and hire a professional to steam clean them.

Garbage Disposal

Your garbage disposal can be the cause of a stinky sink.

clean-the-garbage-disposal

To correct that, clean the garbage disposal by grinding a mixture of ice cube, salt and frozen lemon peels. Let it run for a few minutes, then flush with boiling water. Fresh!

Bed Linens

Launder bedding weekly. In nice weather hang everything outside to dry, where the sun and fresh air create ozone that helps remove stale odors from pillows and quilts.

Closets

Stinky shoes can really make your closets smell terrible. Control odor in your shoes by spraying some newspaper with distilled white vinegar then crinkling it up and placing it inside your shoes.

control-odors-in-the-closet

If you don't want to use newspapers, you can spray the inside of your shoes with rubbing alcohol or vodka. Add a few drops of an essential oil into the alcohol or vodka to help cancel out the alcohol odor.

Stale Odors in Rooms

General bad smells can be removed by spraying door jambs with vinegar and your favorite essential oil. By spraying the jams of all the doorways you will get a clean fresh smell when entering into the room!

Workout Clothing

Exercise clothes retain sweat smells and are extremely difficult to remove.  There are some new laundry soaps that work great to remove these smells. Borax or baking soda are great additives to the laundry to get rid of smells too. Just add a tablespoon to your regular laundry soap.

Repeat these tricks to control odors in your home year-round, but especially in the winter. Happy cleaning!

Post-holiday cleanup: LATER is NOW

holiday-clean-up

Oosouji is the Japanese tradition of cleaning up and getting ready for the new year.  When translated it means the “big clean”.  The Japanese actually spend their New Year’s Eve cleaning their home to get it ready for the incoming new year. (These are people after my own heart.)

Let’s do an American version of oosouji for our homes.  Nothing feels better than getting a fresh start into the new year.

Deal with your presents

The holidays are over so it’s time to put your presents where they belong. If you got something you really didn’t need or want, take it back and return it for something you really do need. There’s no point in keeping something you don’t want.

Holiday cards

Go through your holiday cards and create a spreadsheet so you can keep a record about who sent you a card and their addresses. Don’t bother with an address book as it will just create clutter. Instead keep a digital copy you can access it from your computer or phone.

Back to the guest room

In our 20-day countdown to clean we started with the guest bedroom, getting it clean and ready for our guests.  Now time to start there again and clean it really well. Remove and launder the sheets so they are lovely and fresh. Putting the pillows in the dryer on a high heat will disinfect them. Also disinfect areas that could contain germs like light switches and door knobs.  Your next guests will appreciate your thoughtfulness.

Christmas ornament storage box

Organize your Christmas ornaments

Taking down the tree needs to be done with care because throwing all the ornaments into a box will just create a terrible mess. Instead, remove any wire ornament hangers and store them in a zip lock bag. Separate the breakable ornaments, pack them with tissue paper and store them in specialty ornament boxes.  Wrap the lights around a piece of cardboard or the cardboard tube from an empty paper towel or wrapping paper roll.  Then seal everything in an airtight container with a clear label.

Clean out the refrigerator

It’s time to deal with all those party leftovers in the frig, so grab the garbage can and start tossing.  Take time to check expiration dates on bottles and condiments too.  Wipe the shelves with warm soapy water and a microfiber cloth. Rinse them with hot water and start restocking.

Spot clean your spots

In the busyness of the holidays, things get spilled and left to be dealt with later. Later is NOW.  You can spot clean carpets and fabric furniture with some club soda and a microfiber cloth.  Sprinkle a few drops onto the microfiber and work the club soda into the spot. Let the area air dry and repeat the process if any of the stain remains.

holiday-clean-up-dishes

Check your china and crystal for chips and cracks

Before you put your china and crystal away, make sure you check the rims and edges for chips and cracks.  You don’t want to discover at your next event that some of your beautiful crystal was chipped during the holidays. You can try filing a small chip down by yourself with a specialized tool or even a nail file. There are a number of professional companies that will grind the entire rim so that the chip is unnoticeable.  If it’s a quality piece, sending it away is definitely worth the cost.

Launder the linens

All your linens need to be check for spots, laundered and ironed so they are ready for your next event.  The usual spots you will find on linen napkins are red wine and lipstick.  Lipstick can be treated with rubbing alcohol and red wine will disappear with hydrogen peroxide. Treat the napkins before placing them in the laundry. Check them before you place them in the dryer – if any stains remain, re-treat and re-launder.  Do NOT dry them until you know the stain is totally gone.

Holiday Stain Removal Primer

holiday-stain-primer

Along with the season's cheer come some nasty holiday stains.  Whether it’s a tiny spill on a guest’s new dress or an oily mess on your heirloom table cloth, having the basics at hand will help you get through the holiday stain season. Read this now and add any stain removal items on your last grocery list before the holidays.

gravy-stain

Gravy

When gravy spills on a tablecloth, use a touch of corn starch to absorb the moisture.  The corn starch will get thick and will lift off with a spatula.  Since gravy is oil based, pre-treat the stain with rubbing alcohol or vodka. Don’t dump the alcohol on the stained area as that will just make it bleed into the surrounding fabric. Instead, put some alcohol in a spray bottle and lightly mist the area. Then dab it with a clean white cloth. Continue that process until the cloth comes away clean.  Keep the area moist until you are ready to put it in the washer. Use a simple bar soap, like Ivory, and rub the soap into the stain. Then place the table cloth in the washer. Once it’s completed the cycle, check the area to see if the stain is visible. If so, repeat the entire treatment with the alcohol and soap. Don't place the tablecloth into the dryer until you know the stain has been completely removed.

menorah-candle-wax

Candle wax

Even dripless candles can drip onto your favorite table cloth. But don’t worry, here’s an easy stain removal solution. After your guests have left, place the table cloth in the freezer to harden the wax.  Once the wax is frozen, remove the tablecloth and scrape off the wax with a dull knife. There will be a waxy residue left down inside the fabric. Using a clean face cloth and a hot iron, you are going to pull the excess wax out of the fabric. Place the cloth over the waxy area and heat it with the iron. Don’t remove the facecloth until it’s completely cool. Once the cloth is cool lift it up and the wax will be attached to the facecloth. Repeat this process a few more times until you feel the wax has been removed. Then treat the area with rubbing alcohol to remove the oily buildup. Rub the area with a simple bar soap and scrub with a stiff brush. Place the tablecloth in the washer with a grease cutting detergent. Check the stained area when it’s done and repeat the process if there are signs of the stain.  You can let the tablecloth air dry to see if the stain is totally removed.

chocolate-stain

Chocolate

Treat hard chocolate stains as if they were candle wax. Freeze to harden, then use a stiff brush or knife to remove as much as possible. Finally, treat it with rubbing alcohol and bar soap.  For chocolate syrup, dab off as much as you can with a clean dry cloth. Once the cloth comes off without any chocolate on it, pretreat the area with hydrogen peroxide.  Place the hydrogen peroxide on the cloth and continue to dab until the stain looks like it’s starting to break up. Let the hydrogen peroxide sit on the stain for a few minutes. Then use a bar soap and work it into the chocolate stain with a toothbrush.  Continue to hand wash and rinse until the stain is gone.

red-wine-stain

Red Wine

There are a few quick treatments to have on hand when entertaining, because you know someone is definitely going to spill some red wine.  Immediately after a spill, spray the stain with club soda and cover the area with salt. The salt will start to absorb the wine. Once the guests are gone brush off the salt and dab the area until the cloth comes away clean. Then treat the area with hydrogen peroxide. Be patient – it takes the hydrogen peroxide awhile to work, but you will see the stain disappear before your eyes.  Alternatively, soak the fabric in warm (not hot) water and hydrogen peroxide until the stain is gone. Air dry the item to make sure the stain is completely gone. Repeat this stain removal procedure until the stain is entirely gone.

Mystery stain

Suppose your friend has a spot on her new dress and isn’t sure what it could be.  In this case use a neutral treatment to prevent setting the stain. Put a spray nozzle in a bottle of club soda and lightly spray the area. Magically, the stain will be completely gone once the area is dry. This trick also works with mystery stains on your carpet. Just lightly mist the area and dab it with a clean cloth. Once it’s dry the stain will be gone.


Knowing these foolproof cleaning tips for removing stains, you’ll be able to truly mean it when you reassure the friend who spills her wine during the celebratory toast, “No problem.”

Week 2 of the Holiday Cleaning Countdown

20-Day Challenge: Week 2

The Dining Room

holiday-cleaning-countdown-20-day-challenge

(Scroll to the bottom for links to other blogs in this Countdown Series, including a printable checklist.)

The focus for our Holiday Cleaning Countdown is the three rooms you’ll use most when entertaining during the holidays. And this week the focus is the dining room. With one task per day, you’ll spend 7 days on this room, but once completed it will stay fairly clean until the holidays. A quick touch-up is all you’ll need before guests arrive – do this when you place your floral centerpiece to whisk away any petals, berries or needles that stray from the holiday arrangement.

This week our holiday cleaning checklist calls primarily on one tool to get this room ready: microfiber. So gather all your microfiber cloths and mop heads along with your microfiber mop.  Microfiber lets you deep clean quickly, without harsh chemicals or any mess.

Below are all the tasks for Week 2 of the Holiday Cleaning Countdown:

DAY 7: Walls - Start by removing the dust and cobwebs from your walls. But instead of washing them like our mothers used to, use the microfiber mop and a spray bottle of water to do the same job.  Start with a clean, large looped microfiber mop head and a spray bottle of plain clean water. Spritz the mop head so that it just has a light film of water on it. Start at the baseboard of the wall and by using a Z pattern, work your way up to the ceiling. Work one vertical section at a time, always starting at the baseboard and working up. The damp microfiber mop head will catch and remove dust and dirt that was on the wall.  This process will also catch cobwebs that may be hard to see with the naked eye.  If your walls are extremely dirty, change the mop head often!  Also change the mop head when it gets too damp.

holiday-cleaning-tip-chandeliers

DAY 8; Light Fixtures - When cleaning your light fixtures, let your dishwasher to help! Place then glass globes on the top shelf of your dishwasher and wash them with a normal cycle. Then, give them a touchup with a blue fine woven microfiber cloth when they come out, just to remove any spots or drips. Hand wash smaller glass pieces with dishwashing liquid. Dry with a microfiber cloth.

DAY 9: Dusting - When dusting the furniture use a fresh, lightly dampened microfiber cloth. Normally, water is all you’ll need on the cloth. But, if your furniture is looking a little drab or cloudy, you may want to use a polishing mixture of 1 tbs. mayonnaise and 1 tbs. olive oil.  Mix these two ingredients together and apply a light coating on the flat surfaces of your furniture. Let it sit for a minute then buff off with a dry microfiber cloth. Check out our video:

DAY 10: Serving Pieces - Use your dishwasher to clean all the dishes and serving pieces you expect to use during the holidays. This ensures everything will be clean and dust free before serving your guests.  Be sure to include your crystal and silver. If you silver is tarnished, set it aside for DAY 12.

DAY 11: Linens - Make sure to launder and iron the tablecloths and napkins you plan to use for your holiday event.  Check for spots and stains on each piece. Use some hydrogen peroxide to remove dark spots and rubbing alcohol for greasy stains.  Air dry the treated cloth in the washing machine. If the stain has not disappeared repeat the treatment, then launder. If the stain persists, invest in a new tablecloth or set of napkins.

holiday-cleaning-tip-silverware

DAY 12: Silver – Safely polish tarnished silver with some old-fashioned paste toothpaste and a soft cloth.  If you’re pressed for time try placing your silverware in a deep dish lined with aluminum foil.  Fill the dish with distilled white vinegar then place the silver on the foil. The tarnish will “jump” off the silver and onto the foil. The, wash the silver as you normally would. It’s not as effective as polishing but you’ll notice a difference.

DAY 13: Floors – Your final task on this week’s holiday cleaning checklist is to vacuum rugs and vacuum or wash hard wood floors so they look ready for your company. Make sure your baseboards are wiped clean and are dust free.  Spot clean the woodwork as needed. Once the floors are clean, you can keep touching them up during your weekly cleaning.

holiday-cleaning-tips-linens

And now there’s just seven days left in the Holiday Cleaning Countdown, and seven days before you can celebrate the wonder of the holidays and rejoice with your guests.

Check back next week for a detailed description of the Week 3 tasks!

If you missed our other posts in the Holiday Cleaning Countdown series, please click on these links:

https://maidbrigade.com/blog/holiday-clean-up-20-day-challenge
https://maidbrigade.com/blog/20-day-challenge-holiday-clean-up-day-1

20-Day Challenge: Holiday Clean Up - DAY 1

holiday-clean-up-guest bedroom

To help prepare you for the holidays, we've collected some expert advice from our guest bloggers to share throughout December. Be sure to check out our 20 Day Challenge on holiday cleaning and getting your home ready for the holidays. If you plan to host overnight guests, we recommend you download the Holiday Clean-Up 20-Day Challenge PDF guide below, because the first 6 days focus on the Guest Room. READ ON, for cleaning tips and details on preparing the most critical part of this room, the guest bed.

holiday-clean-up-20-day-challenge

Day 1: Strip and wash the sheets. Remake the bed. Use furniture movers to make changing the linens easier.

Our 20 day count down to a clean holiday will start in the guest room. Why start here when so many other areas need attention?  Because the room your guests will pay the most attention to is the room where they sleep. There, they can look around without any inhibitions so it’s really important to get this room extremely clean when making your home ready for guests. The first thing to focus on is the bed.

How to wash your bedding:

Make sure the sheets are clean and stain free. If they look at all worn or off color – spend the extra money and buy a new set.  Nothing looks more inviting than freshly laundered sheets! This includes the pillows and the pillow cases. No one wants to sleep on a pillow that looks or smells like it’s been on the bed for decades. Wash the pillows and remove the stains with my miracle pillow stain remover.  Watch the video below:

How to make your bed:

Make the bed starting with a fitted bottom sheet. Using a flat top sheet, place the pattern facing down so your guests pull down the sheets they’ll see the pattern on both sheets. Use hospital corners to keep everything nice and tight. Place a blanket over the top sheet. Fold down the top sheet about 4” so that the pattern will show and go over top of the blanket.  Top off the bed with a clean, fresh bedspread. Add a down comforter at the end of the bed to give your guests comfort options at night. An easy holiday cleaning tip is to use decorative pillows to make the room look inviting and up to date.  Add a big empty basket near the bed to give decorative pillows a special place during the night. Spray the bedding with witch hazel infused with your favorite essential oils to add safe and inviting fragrance to the room to put the finishing touch on your holiday clean up in the guest room.

Keep watching our blog for more holiday cleaning tips throughout the month!

Holiday Clean Up: 20-Day Challenge

Getting ready for a Holiday event doesn’t need to be stressful, it just takes a little extra planning. The Holiday Clean Up 20-Day Challenge is a step-by-step cleaning guide for the three most visible rooms during a party or dinner.  It’s simple to follow: each day there is one assigned task.  Follow this cleaning guide and, in just 20 days, your home will be perfect for all your holiday entertaining.

Click on the image above to download the Holiday Clean Up 20-Day Challenge cleaning guide.

And, you can access this PDF for a more detailed, text version.

There's also a companion blog, about super-quick short cuts to use when company's coming over last-minute, called Holiday Cleaning Hacks.


Holiday Cleaning Hacks

During the holiday season nothing stresses people out more than cleaning up for guests. Short on time? Use these holiday cleaning “hacks” to get your home ready in a jiffy.

Only clean what’s dirty – As pros we are programmed for thoroughness but with a jiffy clean we are intentionally finding ways to cut corners. When you're in a  hurry, why clean things that aren’t dirty? Instead, spot clean the areas that you can see are dirty like the handles on refrigerators and microwaves. Look around and then clean the areas that look like they need attention.

Use a “tool belt” – You would never see a carpenter going up and down a ladder every time he needed a nail.  Instead he carries everything he needs in a tool belt so he can work more efficiently.  You can use the same system to make your cleaning easier. Gather all your cleaning products, cloths, brushes and other tools you’ll need and place them in a bucket so you can take them from room to room. Or you can find a comfortable apron with pockets and loops so your bottles and rags will be right where you need them.

cleaning-supplies-bucket


Use your vacuum instead of a dry mop – Dry mops do a great job of lifting dirt, but you still have to use a dusting broom and a dustpan to get the dirt off the floor. Remove this step by just using a canister style vacuum with a dusting brush attachment. You’ll be cleaning the same area but removing the step of filling and emptying the dust pan.

Use a feather duster – Instead of polishing your furniture with a polishing spray and cloth, switch to a high quality ostrich feather duster. You can dust every flat surface without moving a thing. A genuine ostrich feather duster will hold onto the dust until you shake it out. Can’t find one? Try a microfiber “feather” duster instead.

feather-duster

Use your appliances – Don’t waste time cleaning something when you can let the dishwasher do the work for you. You can use it to clean items on your bathroom vanity or even the filter over your stove. Your dishwasher can be a very valuable cleaning tool.

Only clean what your guests will see – If you only have a small amount of time to clean, focus only on the areas a guest might see. Leave the upstairs bedrooms for another time. Spend your time on the entry way, hallway, kitchen and the room where you might ask your guests to sit. As far as the other rooms and the upstairs - keep the doors closed. Guests usually won’t open a closed door.

Clean your bathroom in minutes – Start by NOT cleaning the shower.  Use a damp, fine woven microfiber cloth and wipe all the surfaces.  Start with the mirrors, then move down to the vanity area and save the toilet for last.  You don’t even have to dry the areas once you’ve wiped them with a microfiber cloth. They will look perfect when you’re done.

microfiber-cloth

Just swish the toilet bowl– Don’t bother with toilet bowl cleaner when you are quick cleaning. Use the toilet brush and give the inside of the toilet a quick swish.  Then flush and move on.

Use your dishwasher to hide dirty dishes – If you don’t have a dishwasher then you can place a large tub under the sink and place the dirty dishes there until you have time to wash them.

Steam clean your microwave – Place a microwavable bowl filled with water into the microwave. Run it on high for 3-4 minutes. Once it’s done, carefully remove the bowl and wipe the sides of the microwave with a microfiber cloth. Any stuck on food should wipe right off.

Lint rollers and paint brushes – Need to get into tight areas quickly? Keep a lint roller and paintbrush in your tool apron. Lint rollers are great for pet hair on furniture as well as dusting lamp shades. Paint brushes are wonderful for removing dust and dirt tucked into hard to reach areas.

dust-lamp-shade-with-paint-brush

Use natural fragrances to cover up your cleaning problems – Sometimes you just don’t have the time to clean but you can “hide” your dirt behind a nice aroma. But don't use store-bought air fresheners - synthetic fragrances usually contain toxins you don't want in your home.  Instead, make natural fragrances in a jiffy using a few drops of your favorite essential oils mixed into a bottle of witch hazel and spray entryways and door jambs so your guests will smell the lovely fragrance and overlook your cleaning shortcomings.

But let's face it. Some days there is no gas in the tank for anything extra. If you’ve run out of time or motivation to even do the smallest cleanup, just turn down the lights and turn on a few battery operated candles. You’ll be surprised how nice and clean a room looks with minimal lighting and a few candles.

If you have more time for truly sparkling results, check out the new Holiday Clean Up: 20-Day Challenge I created with Maid Brigade. It's a step-by-step plan to deep clean the three most visible rooms during entertaining, with only one or two tasks per day. Keep it on your phone or tablet for a handy reference during the holidays.

Battling Mold in Your Bathroom

shower-tile

This time of year is when we start battling mold in our bathrooms. Mold loves dark, moist areas and a bathroom is its perfect home. Mold is a living fungus that reproduces when it has enough water and food. Mold is not related to cleanliness but to moisture, therefore even the cleanest bathroom can have an ongoing mold issue.

Some mold is more dangerous than others, but most molds are just growing organisms that damage walls and tile grout. Mold growing on porous drywall is actually using the drywall for food and destroying it in the process.

Bleach will not kill mold. It will change its appearance but the mold will grow back. And, bleach is unhealthy and damaging to the environment. To kill mold you must use an anti-microbial.

tea-tree-oil-anti-microbial

This year, wage a different battle against mold. Use these few simple tricks and a green DIY recipe to keep mold from growing in your bathroom.

  • Run the fan as much as possible – mold can’t grow without moisture. Run your ceiling fan for at least 10 minutes AFTER the steam has disappeared from the bathroom mirror. Moisture stays in the air long after you can see it, so let the fan run the entire time you are getting ready in the morning.
  • Open the window even slightly so you have continual fresh air - Fresh air helps damp surfaces dry faster.
squeegee-shower

  • Use a squeegee to remove water on the shower walls and glass doors - This will not only stop the mold but keep your shower clean. If you squeegee your shower, you’ll almost never have to clean it.
  • Wipe down surfaces with a microfiber cloth – if you wipe down damp surfaces in your shower and sink with a microfiber cloth, everything will dry faster and you will stop mold in its tracks. Make sure to take the damp microfiber cloth out of the bathroom when you are done.
battle-mold-with-microfiber

  • Hang wet towels outside of the bathroom -Wet towels can take up to 24 hours to dry and create unwanted extra moisture.
  • Hang wet bath mats outside of the shower area – Shower mats collect a ton of water. These carpets can take days to completely dry. Hang mats and throw rugs outside so that they can dry completely.
shower-curtain

  • Shake out your shower curtain- Shower curtains are a breeding ground for mold. Moisture gets into the pleats which are perfect a perfect breeding ground for mold. By shaking out the curtain you remove the excess water and help it to dry faster. Remember to keep the curtain completely drawn.
  • Spray this DIY mix daily on dry tile grout and drywall –
    • Vodka or witch hazel
    • 20 drops of tea tree essential oil

Combine ingredients in a spray bottle and spray the mixture on dry tile grout and drywall daily (it's important the grout is dry, so that the mixture will penetrate the grout pores to kill mold beneath the surface). The alcohol in the vodka will evaporate very quickly and the anti-microbial properties of the tea tree oil will work to kill the mold and mold spores in your shower area. This mix is great to use on ceilings too, especially textured ceilings that are difficult to wipe down.

  • Clean your bathroom regularly or hire a cleaning service. Mold needs a food source to survive. It eats dead skin cells trapped in soap scum residue. Eliminating mold requires removing its food source. So a frequent, thorough shower cleaning will go a long way toward reducing your problem long term.

A bathroom is a very hospitable environment for mold, so the battle against it will be ongoing, but with these tips you can be more effective, safely.

Keep Your Closet Beautifully Organized

closet-organization

You never know what you have until you clean your closet.

I love a clean closet but I have to admit, I hate cleaning it! Closets are like bedroom dresser drawers in the sense that if you don’t properly put your items away neatly, it quickly turns into an unorganized mess.

Not only do I use my beautiful walk-in bedroom closet for my clothes, but I also use it for storing papers, books, kids school calendars and everything I need in life at the moment. Sometimes I use it for storage, for hiding things like the vacuum, holiday presents, and even my laptop. My closet has always been my number one personal storage space that I can count on to call home for any of my personal items.

I have tried all different ways and techniques to keep my closets neat and I can honestly say that if I don’t go through my clothes, shoes, books, papers, handbags and jackets AT LEAST twice a year, everything quickly builds up.

Here are some clever ways to keep your closet clean that actually work:

When tackling your closet, put each item into one of three piles, the “yes” pile, the “no” pile, or the “not sure” pile. Try and keep the “not sure” pile to a minimum. Ask yourself, “does this item look good on me, do I love this item, is this the image I want to show.” If the answer is “no” to any of those questions, place the item in the “no” pile. Learn to let go of the past and feel good about donating your clothing to those in need.

After the “not sure” pile is completed, pull out all the clothes you are keeping because of sentimental reasons. If you don’t currently wear them but really cannot let go of these items yet, you may want to store them in another area of your home. Try not to keep them in your closet.

Organize all of your items in the closet into sections by color.

For shoes, face one shoe forward and one backwards. Storing your shoes like this gives you more room. You can also see the differences in the height of your heels too!

wooden-hangers

Use the same type of hangers throughout your closet. Everything looks so much neater. I do this in every closet in my home. It makes your clothes look so elegant, and the closet more aligned. Don't want to make the investment in new hangers all at once? Replace them in smaller groups, either by clothing type (pants first, then shirts, skirts, dresses, etc) or buy a new package of hangers each month until you have enough. The dry cleaners will be happy to have the wire hangers back, and a donation center will appreciate the hodgepodge of plastic and clip hangers you've collected over time.

When stacking piles of pants, hoodies, or even sweaters on the top shelf, try using a plastic clothing organizer called Slide N Stax®. It keeps your clothing stacked nicely, even when you are grabbing from the pile! If putting your clothing together by colors doesn’t suit you, try grouping your items a different way. For example, put all blouses together, then all dresses together, and so on. Or, you can group your items according to sleeve or pant length, or season to season. Choose whatever you think will work best for your personality and your lifestyle.

Buying and hanging belt racks around the closet is a huge help! I use belt racks to hang belts, bags, scarves, and ties.

To avoid wearing the same things each day, after the item is cleaned, hang it on the rod in front of all the other items. My husband does this with his suit shirts so he doesn’t wear the same shirts twice in the same work week.

When hanging up your new clothes of the season, place the hangers backwards in the closet. Every time you wear a piece of clothing, hang the item up with the hanger facing front. This way, when the season comes to an end, you will have a better idea of which items you haven’t worn that you may want to donate.

Space Bags are a great way to store items because they take up very little space and they can be easily stored under beds, in closets, or on shelves. For storing winter jackets and snow suits or even bulky bedding, these bags may come in handy! Some people even use these in their suitcases when traveling!

When storing clothes in an area of the basement, add some chalk pieces in cloth bags and pack them with your clothes in the storage bin. Chalk absorbs moisture and will help protect your clothing by keeping it dry.

Before putting all your clothing and other items back in the closet, be sure to clean your closet well. Vacuum with a HEPA filtered vacuum, paying close attention to corners and tops of shelves. Wipe everything down with your favorite homemade green cleaner and a microfiber cloth.

Finally, stand back and admire your beautifully organized closet!


Green cleaning works on appliances, too!

glass-top-stove-cleanerToday's high-end appliances take expensive specialty cleaners to keep looking brilliant - or DO they? Leslie Reichert has some green cleaning techniques that work just as well, and you probably have them on hand right now.

Cleaning appliances can be a struggle. Since there is a growing number of cleaning products manufactured specifically for each of the different finishes available today, like stainless steel polish, porcelain scrub and even glass-top stove cleaner, you could buy a dozen different products just to clean your appliances! Instead let me show you some DIY ideas for cleaning appliances. With a few simple ingredients and some microfiber cloths, your appliances can be perfectly maintained for just pennies.

glass-top-stove

Cleaning the stove

The stove is one of the hardest appliances to clean. Burnt-on food coupled with spattered grease make cleaning this surface a chore.  If you have a glass-top stove, try using my “green” scrub.  First, use a flat utility blade to scrape off burnt food, taking care not to cut your fingers.  Next, sprinkle the scrub powder onto the glass surface. Using a damp sponge, work in circles until all grease and stains are loosened. Finish by wiping the glass-top clean with a damp microfiber cloth.

Green Scrub Recipe

  • 1 cup baking soda
  • 1 cup table salt
  • 1 cup borax
  • 8 drops pure essential oil for fragrance

Mix well and place in a shaker container

clean-oven-interiorCleaning the oven*

Typical oven cleaners contain toxic chemicals and fumes that are very dangerous – potentially damaging your lungs, your skin and even the food you cook in your freshly cleaned oven.  Even if you rinse the oven really well, there will still be some off-gassing that happens the next few times you use your oven.  Instead, let’s use the power of science to clean your oven. Start by sprinkling some baking soda over the base of the oven. Then fill a spray bottle with distilled white vinegar and lightly spray it over the baking soda. The mixture will start to foam, just like the chemical oven cleaners.  This foam will lift off anything stuck on the oven, without using toxic chemicals. Continue to spray the vinegar onto the baking soda frequently, until the foam has done its work. Soon the mess will wipe right off.

*Do not use this method if you have a self-cleaning oven.

stainless-steel-appliance-cleaner

Stainless steel appliances

There is a daily fight with fingerprints left on stainless steel appliances, in large part because the people putting the fingerprints ON the appliances are not the ones wiping them off! But stainless steel can actually be cleaned very easily. For daily wiping of fingerprints, use a finely woven microfiber cloth – the same type of cloth your eye doctor gives you for cleaning your eye glasses – to keep your stainless steel looking great. To protect stainless steel from fingerprints in the first place, use a light coat of organic olive oil over the entire appliance. The oil will actually work to repel the oils on your fingers. It will keep your stainless steel looking great for a week or more.  After a week, wipe the surface with a microfiber cloth and reapply.

Black appliances

Black appliances look stunning, but just like a black car they show every water spot and piece of dirt. Clean them daily by wiping with a damp, fine woven microfiber cloth. Wipe the entire appliance then let it air dry. The microfiber cloth will remove all dust, dirt and water spots and leave it looking perfect.

granite-counter-cleanerGranite countertops

Nothing is more beautiful in a kitchen than a granite countertop. Light colored granite with lots of veins, always look clean. Dark brown or black granite, however, seems to highlight streaks and smears.  No matter the color avoid typical granite cleaners, which contain oils that make the counters look foggy. Instead, clean the counters and remove bacteria using a spray bottle of hydrogen peroxide. If the counters just need a wipe, use plain water with a dry microfiber cloth to restore the surface to a perfect clean look.

The Three R’s to Garage Organization

The garage – a building or shed for housing a motor vehicle or vehicles. If that’s the textbook definition, how is it that the garage nearly always ends up becoming a home for stuff we are tired of looking at, we don’t have room for, and we’re not even sure we need? It is a “safe spot” for things we know we have to go through but just don’t want to face. The garage is like a time capsule, accumulating evidence of its owner’s interests, professions, and hobbies. It is a place where items go in but never seem to come out. And since mine is a two car garage, finding a seldom used item trapped deep in a corner is an expedition on the magnitude of an archaeological dig!

“Just put it in the garage, I’ll go through it when I have time.”

I cannot begin to tell you how many times I have said that statement throughout my years as a homeowner.

Well, not anymore! Now that summer is over and we’re back to a routine, the time has come to finally tackle this, the biggest area of my home. Because I use my garage for my cars AND for storage, I really need to be on top of my game when it comes to organizing.

But, cleaning the garage sounds worse than it actually is. If you just follow the three “R’s” listed below you will be able to enjoy a clutter-free, organized room that can actually serve its intended purpose. Don’t be afraid to ask family, friends, or even neighbors for help.

Remove

The first step is to remove everything (yes, everything) from the garage. All those mysterious wires, plugs, batteries, sports related items, garden tools, shoes, and boxes should be taken out, assessed, and (mostly) eliminated.

After everything is out, begin separating unused/unwanted items into two piles, the “dumpster pile” and the “donate pile.” Try to get rid of anything that has not been used in the past twelve months. The garage should be a place that reflects the current life of the family that uses it, not a place to store items that you think you may possibly need in the future.

So go ahead, remove those motorized scooters that require chargers and batteries which are not made anymore, manual scooters that are way too small, unicycles, skateboards, plastic toys, helmets, and 7 coolers (how many is too many)? Don’t forget to remove all the “just in case” items that, deep down, you know will never be used!

Rent a dumpster if you plan to get rid of large volumes of stuff.

Rethink

After the sorting is completed, ask yourself what you really want to use your garage for. Parking? Paints? Bicycles? Gardening equipment? Holiday decorations? All of the above?

colored-storage bins

When you decide want this large square footage area is for, divide the garage into different sections, or zones. When each item has a designated area to call home, not only is everything easier to find, but each space has set limits on the amount of items that can fit. That is the key to keeping the volume of “stuff” stored and organized.

To separate zones, use different colored bins, tags, boxes, or even different colored walls. This way each member of the family knows which items go in which zones. For example, for the “blue tool” zone, spray paint the pegboard blue.  Use orange tags on clear bins for the kids sports equipment.

Restore

Time to move the remaining items into their newly designated areas.

Store things according to each items’ frequency of use, placing the least used items at the highest point. Yearbooks, photos and childhood memorabilia can be placed at the top.

peg-board-garage

Frequently used items like tools can be affixed to a piece of pegboard or hung from hooks within easy reach. Hang all saws, gardening tools, brooms, mops, and even outdoor fold up chairs on nails, hooks or more peg board. Use heavy-duty plastic shelving for bins holding frequently used items, like gloves, umbrellas, lightbulbs, and extension cords.

Nothing should be kept on the garage floor. This way the floor is easy to sweep and keep clear of the accumulation of leaves, cobwebs and unwanted bugs. Anything that was once stored in cardboard boxes should now be placed in color coded bins. This keeps things organized and rodents from nesting in your belongings.

tool-hanging-storage-garage

If extra space is needed in certain zones, create a loft, using vertical storage. A sheet of particle board or medium-density fiberboard secured to the rafters is a great way to add much needed storage space.

Never put paint and chemicals down the drain or in the trash. Instead, recycle these items using the app, “iRecycle.” Based on your location, it lists all the collection facilities near you.

Finally, pull those cars into your garage and sit back and enjoy using your beautifully organized, clean, space in the way it was originally intended.